JagdPanther, late version
Around the time I moved to my present home I was just beginning the heady times of redicovering the length and breadth of this hobby. After about 4 years away from the hobby a chance encounter with a chap whose name I've long since forgotten on a pre-internet( as we now know it) hobby BBS netted me a copy of Modell Fan magazine when he returned from Europe. Unexpectedly but happily I discovered that the magazine was running a program where you could place non commercial hobbyist adds for free. In my best German( which is never very good) I put out a general request for information on 1:10 armor models. Well! In the veritable torrent of mail( note NOT email!)from Europeans that came of that it was the beginning of my rebirth in the hobby! This was about 1988-89. Over the following years I made connections with numerous people in Europe, one of these was Franz Pracht..
Franz Pracht was a "modeler's modeler" as someone termed him. At times his work was spectacular and others( like original aspects of this JP ) were "ok". I believe he started out making copies of Maier's Panther hull parts; it is rather obvious from the floor plate from this JagdPanther model as you can see the cast in maker's plate that was unique to Maier's products. I beleive this was an early stage of Mr Pracht's work and as he developed his own work more fully; the latter examples of his work I've seen and own are his own creation. The upper hull of this JagdPanther is fully original to Hr Pracht. On the whole I enjoyed getting models from Mr Pracht and I miss his work. Mr Pracht quit making models quite a few years ago as far as I know, I believe he was more elderly than many and I've not heard of him for quite a few years; I hope he is well. I'd been told when he quit he moved to part of the former east Germany. I had had the opportunity to purchase all his equipment, molds, patterns and inventory when he quit but couldn't find a way of raising the funds at the time. I do regret not doing so... alas water under the bridge! I did however over the years manage to purchase 4 models from him; A Coellian, Panther II/F, Panther G and JagdPanther. The G was eventually sold to a local chap who, to my knowledge never built it. I retained the other 3 models. I more or less finished the bulk of work on the other two but this JagdPanther has the distinction of being bought first and not yet been finished. So what follows is a detailed account of what I will do to finally finish this old kit from Mr Franz Pracht.
As it was purchased there are a number of things I HAD to change:
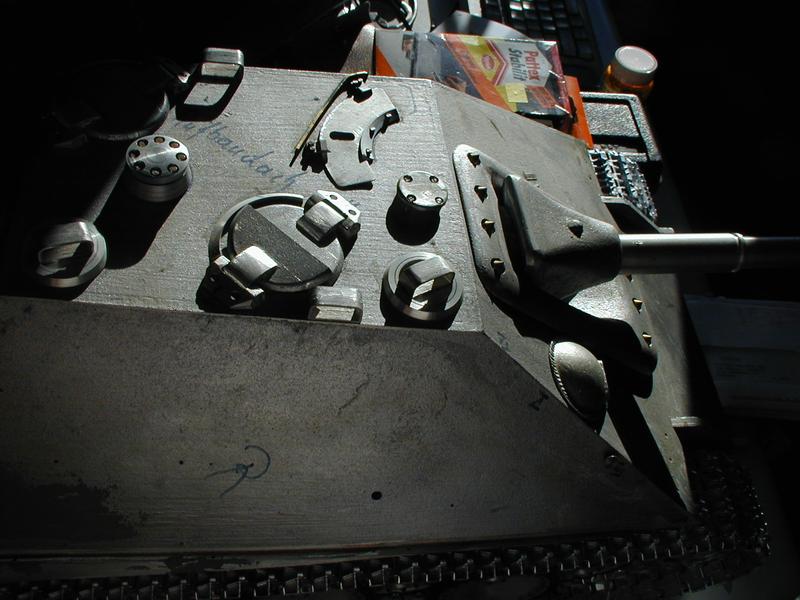
As you see it as of this writing there has been already done much work which I will itemize later, both on the model proper and the Maier 3 speed gearbox/ engine I am installing. Some of these aspects of the model can be seen in the following series of photos

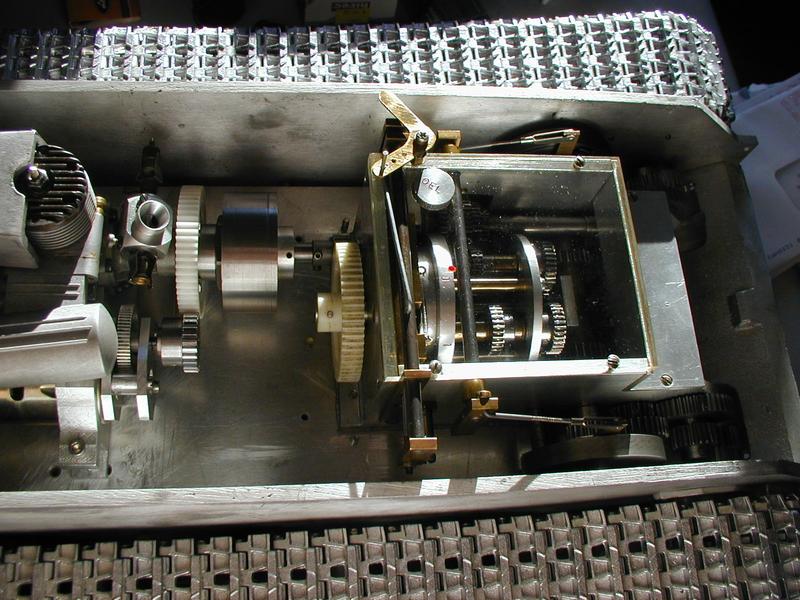
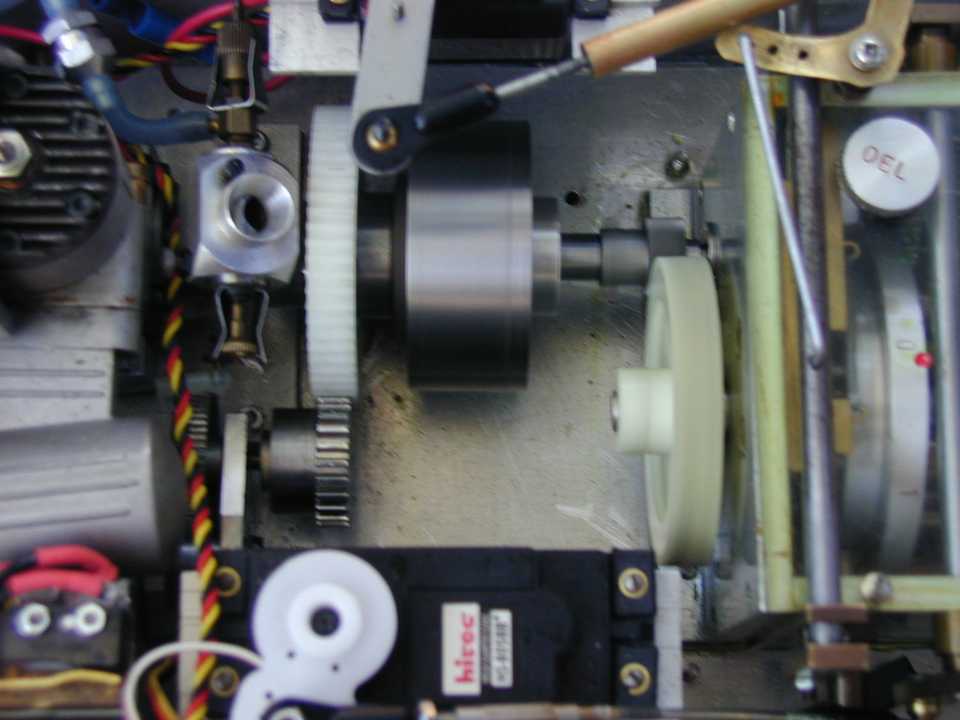
In this next photo you can see that I have had to fabricate a new top cover for this Maier 3 speed gearbox. I did this as I didn't wish to damage an original cover when I relocated both the oil filler cap and the shift mechanism control arm post. I had to do this as the main gun mantlet sits practically right on the gearbox cover; scant few fractions of an inch remain clear. I made a new smaller the oil cap, stamped "OEL" and filled with red paint as the original; also a shift locator dimple on the top cover again filled with red paint as it was on the original. I only could find clear acyrlic nothing like the blue colored stuff of the original. I also had to make a new left hand drum brake for this gearbox. I could see no apparent signs of damage but it was horribly out of true when it turned on its shaft; the shaft ran true with no wobble even when I oput a dial indicator on it. It didn't make sense. When I pulled the drum and put it on a ground and true 10mm shaft rod the wobble was plain to see so either it was made wrong so long ago( in which case this gearbox could never have worked right) or perhaps someone swapped it from another gearbox? Still beacause of the wobble I can't imagine where it could have worked. This caused so much drag on the left side of the gearbox I don't see how it could ever have worked. I can only imagine some poor fellow's frustration with this gearbox, as I would have been when I started out with this hobby, not being familiar with the gearbox's function and not being able to get it to work properly only because of this bad part! In all truth the internals of this gearbox appear little used, considering it was made probably 30+ years ago, perhaps it never was used much because of this defect?? With the new drum the gearbox functions are as they should be. Oddly making the drum was my first opportunity to turn a part in grey cast iron, an interesting experience. Brake action seems appropriate now. Shifting gears is good. I used good grade air tool oil up to the appropriate level. As I bought the gearbox it was pretty clear that someone had remounted it on a longer base plate. Original versions of this type gearbox had just a bottom plate with mounting bolts; this plate is similar to the later electrically shifted versions Maier made. Shortly after I received the gearbox I resealed and reseated it on the plate. The starter which had been installed with this gearbox was not original and used a reduction motor driving a tooth(timing) belt which engaged an appropriate pulley. The pulley was riding on a gigantic INA HF1616 roller clutch bearing whereas Maier used a INA HF1012 on his original starter. The bearing engages an ingenious drive housing coupled to the hollow flywheel inside of which is the clutch plate. The bell housing fits over this clutch yet is fully inclosed in the flywheel which it doesn't come in contact with. It makes for a very compact assembly as you can see. I replaced the pulleys with gears as was used originally and transferred the clutch bearing to a gear carrier as may be seen in the photo. The flywheel and cooler housing were painted red when I received the gearbox but I removed that. As far as I can determine the engine/gearbox assemply is good to go.
Another problem with this model's lower hull, well almost a problem is that being based on a copy of Maier's it is slightly undersized, apparent on the interior. The brake shafts of the gearbox that protrude from both sides: on a Maier original hull they have about 1 maybe 2mm clearance on each side. Not so on this one, maybe just maybe a fraction of a millimeter on each side, no more that a thickness of paper. Made very precise location of the gerabox a must. Remember aluminum castings shrink about 1.25 to 1.5% from the pattern size so since the Maier original hull floor plate was used as a pattern with no additional material added to make up for this shrinkage a ~1.5% narrower hull is the result. I tell you my heart skipped a beat when I first trial fit the gearbox to lower hull as I wasn't sure it would fit!! I tell you a flea could not fit between shaft and hull wall.

The rear engine deck "all akimbo". My replacement grates sit on top of the partially dissassembled original deck. Also visible are my replacement "Flammvernichter" type exhausts which were not altogether easy to make. These tiny vane things were somewhat neve wracking to cut on the mill... Keep in mind these parts are stationary, they don't spin, they were put in the stack to swirl up the exhaust gas stream. I can't make the cuts far enough to accurately simulate the original unit. Original units were made up of many plates welded together. Using the thinest(.015") slitting saw I dare the cuts would be extremely close together towards the center or the part which would be too weak. My simulations of the exhaust system needs to be functional as opposed to 99% of models out there... I cheated by making only 27 vanes not 28; I hope no one will count!

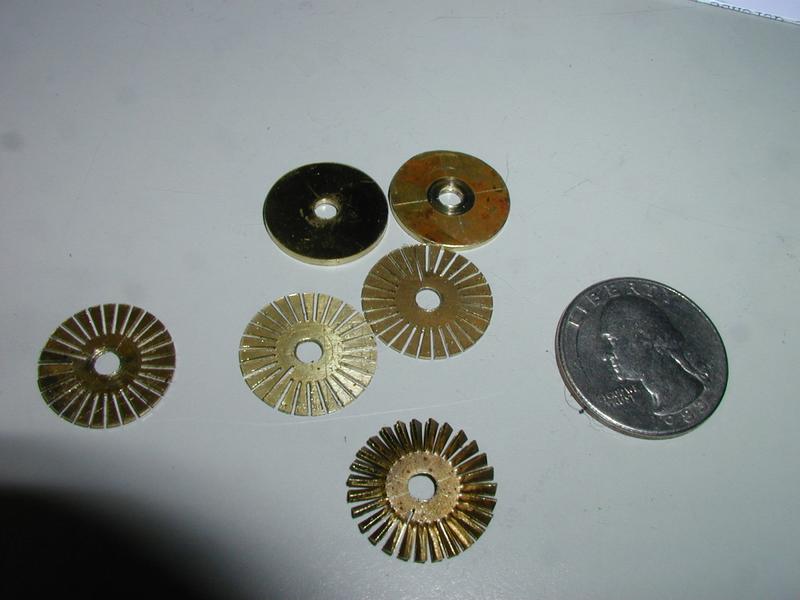
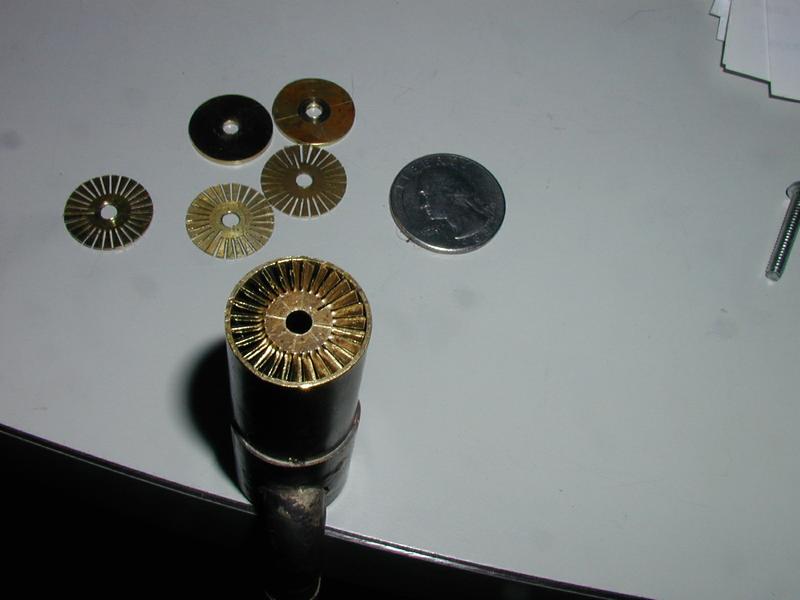

03/18/2008 The present tasks are to prepare the rear plate. I decided to recut the rear access hatch way as it was irregular as cast. This required making it somewhet larger but I will be able to make the access cover plate itself the correct overall diameter. I plan to finish and seal( exhaust pots) up the rear plate components prior to setting up the intermediate exhaust components and control servos. I hope to fire it up with a few weeks. The engine was used little as is apparent from the internal appearance of little discoloration of the piston crown so there may be a break in period required.
04/06/2008 - Some progress has been made in tha last days. On Wednesday of this week I had corrective surgery to set right a deviated septum in my nose; the result of injury I received playing softball many years ago. Long story short I didn't allow adjust time when I switched from glasses to contacts playing centerfield and well you fill in the blanks! Owwie! Anyway I'm retired now from softball... During the early stages of recovery I had plenty of time while reclining to think of what I wanted to do next on this model. What follows are photos of the latest work
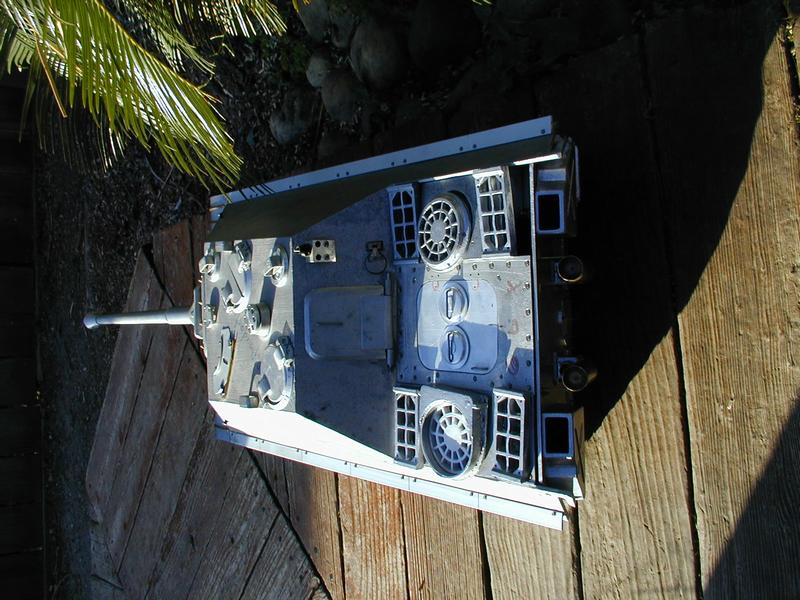
Rear plate almost complete. Rear deck will be the next target.

Engine and gearbox mounted; exhaust system complete. I've begun mounting the radio system's servos. The giant servo on the bottom plate is for the brakes; on these early manual 3 speed Maier gearboxes the brake and gearshift cotrols are reversed from the later versions. I plan on using servo savers on both the gearshift and brakes on this model; unlike the later version the servos is directly interacting with changing gears and should the unit refuse to make the shift( there are no synchros here) the servo may damage itself. And the brakes are just that: the harder you pull the better they work up to a limit... I should really have servo savers on all my brake servos in all my tanks. Oddly I knew enough to put them on my very fist Maier Panther but have not installed them since; since is because I can set the travel limit via the programming on my whiz bang Futaba 8UAP radio. Still if I used the trim tab it may cause the servo to come to grief.

Jerry here. I've not been entirely sitting by on these models. I just about finished the radio installation; this and my Panther F will be my first on 2,4GHZ systems. Also I've been working on some of the small detail parts. Below you can see the extra C-hook holders I've decided that me JagdPanther and Panther F will carry. Also see the Wecohe jack and the upper clamp for it. The clamp was a Wecohe part but I wanted it to be functional so it is. Jerry 03/01/2009

I will be posting on this and the other models I'm working on more frequently now as I push to finish them.
07/27/2009 - Hello, Jerry here. Yesterday I decided it was high time I test run the JagdPanther's engine, which I'd not yet done. Long story short I fond several problems. 1) the Webra's carburettor fuel inlet was blocked solid so I spent some time with disassembly and cleaning and re installation of that unit. Next I found that I was getting not nearly as much power ti the glow plug as needed; possible poorly charged driver batteries, weak connections or a combination of both. Starter assembly output drive gear slipped after some cranking as the shaft did not have a flat on which to engage the set screw. I took care of these faults and set the carb to the approximate settings I've become familiar with and after only a few cranks she sputtered to life. I ran about 1/2 the fuel tank's ( it is a big one) capacity through the engine. After I was satisfied I shut down cleanup the back plate and ran oil through the engine. I had ran the engine dry by disconnecting the fuel line. Below you can see the engine test photos.


Here is a brief video of a trial run. I really don't like doing this before the model is painted because I end up with extra work degreasing the model; as you may plainly see this model is running very rich and sputtering oil all over the back. Second, when I rush to run, as I did here something always bites me; this case bring no exception. Right at the end of the video you see below a track pin worked its way out and jammed on the rear plate. Long story short I'm making a replacement gear. The left out gear of the transmission, a very hefty Module 1 steel gear shredded itself. Moral of the story? Never run a tank before it's time... Jerry 10/05/2009
10/25/2009 I've begun a side ( to a side?) project to quiet down this model in particular and my cadre of Webra 40 powered models in general. I stripped off the sound portion of the video above and I've begin disecting the frequencies of the exhaust note and I find that the area for the sudio bad that seems to have the greatest impact is the range between 1 to 6 Khz. I've begun a search on muffler theory to see if there is any way I can attenuate this band. I found that the "Flammvernichter" type exhaust stacks I implemented offer the least resistence to the sounds of the high revving Webra 40 ;it seems much less than the Type A exhausts. The comments I received on the Kettfahrzeug forum while biting were true. The exhaust note of this model is especially loud even to me. So if just a video of it is loud how much worse in person. It behooves us to pay attention to such things. I'll never be successful in having it sound like a deep throated Maybach V12 but I should be able to inprove on the high pitched sharpness; I believe even a little will help a lot. As it is pertinent to all my models I will post the results here and possible make a new page out of it, if enough good comes of it. Jerry
02/03/2012 Getting back to this model. Installed the details I'd prepared some while back for the rear plate; jack mounts, column light and a c-hook bracket. I believe the latter is a modern day museum addition but I liked it some I'm installing one. The bracket isn't installed in this photo but the mount point is there. This year I really want to nake an attempt to finish some of the models which have been hanging on for years.Jerry

Column light on
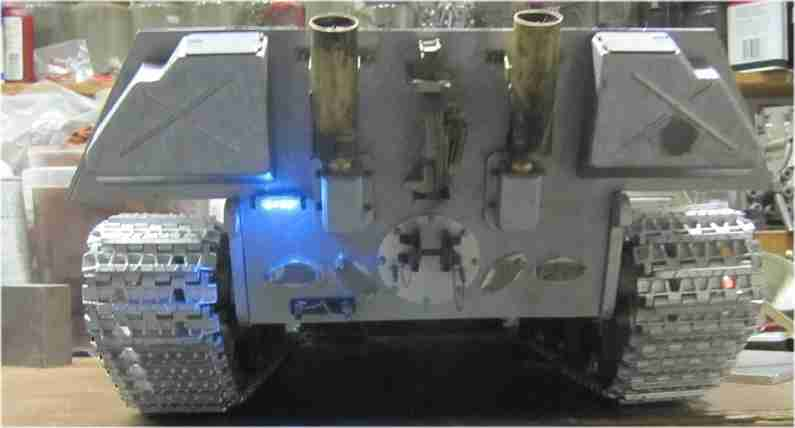
Column light on - this is difficult to capture via camera I turned the voltage to the light down a bit so that the 4 individual LEDs may be better seen

I'm trying to make progress on this model. I started working on the rear engine deck. It is slow going as some of the inner surfaces of the model are not true or straight making the alignment of the deck components trying. I only care to go to a certain level of detail on most of my models; for something like this I strive for "representative scale" meaing in general terms the level of detail is about 80-90%. I am going to make the engine deck look as good and representative of the original as I am able. With my very first Panther -type model, my original Maier Panther I bought in 1976 I began a process that I carry forward on every tank that has a similar deck layout: I use miniature hex bolts to bolt everything together similar to what I can see in photos and have seen in person. Quite time consuming and more expensive; the tiny hex bolts in steel are quite costly and only available from one supplier that I've been able to find. I try each time to make the result better than the last. I go through this exercise because like many things you can't simulate ( well anyway ) the effect of separate parts with one giant casting nor actual bolts with molded in ones. Looking back on my heater duct housing I reognize I did not build any casting detail, part numbers, foundry marks, etc into the pattern. Perhaps hext time although such detail in theis scale doesn't usually replicate well in sand casting. As I mentioned earlier these efforts are slow going for me as I'm just slow ayway. Jerry 02/12/2012
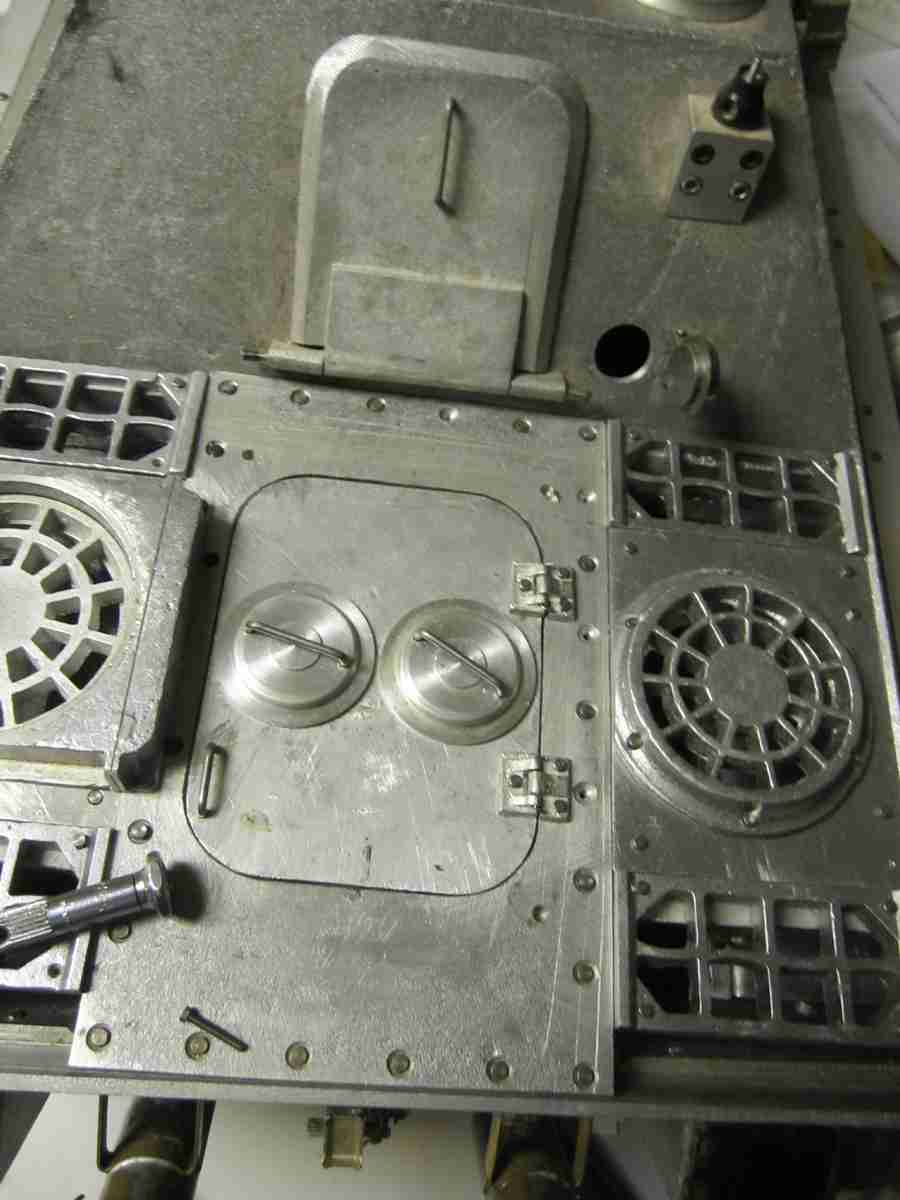
One of the problems I have is staring at something too long. One of two things may happen 1) everything will begin to appear just as it should even if it isn't or 2) slowly all the things that are wrong will begin to bother me more and more until I can't stand it, especially as I seek resource photos for details. These last two weeks have been an example of #2. The engine hatch clearly was not located far enough forward to obtain even a smidge of accuracy. I thought of ways around it, that I could live with it. Nope. Long story shot I had to move the hatch opening 18.2mm forward ( about .71" ). Things like this just take that much longer. Instead of casting a new piece I decided it would be a more effective use of time to modify the existing one; not to mention it isn't a part I want to set up for casting. First was to bond a suitably thick ( ~.250" ) piece of aluminum plate I was going to put small steel dowels as well but as the bonded part withstood substantial direct milling forces I probably won't. There's work to be done yet on the details obviously; as may be seen I've begun making from brazed steel the angled vent you see in the photo. But I won't worry about the hatch as much. Jerry 03/05/2012

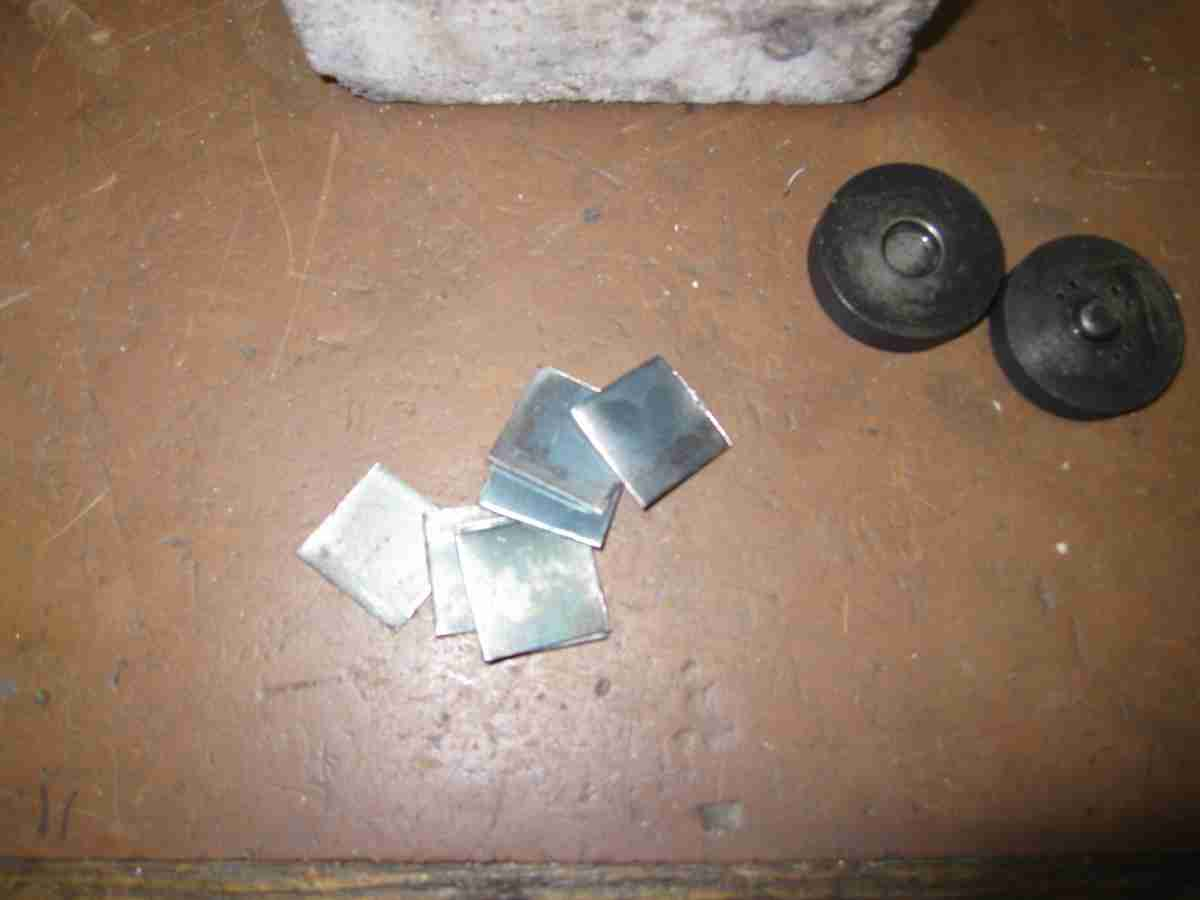
Hello! As it is late in the day as I write this 6/16/2012 I realize I haven't written anything in several months! I haven't been entirely idle but I have been moving at a slow pace. Days like today where it reached 100F - nearly 38C slow me down even further. Can't work in my shop, even now at 11:35PM when it is still 83F outside; very unpleasant. I've been working or trying to on little things. I made a die and a fixture to help me make the 'hubcaps' for the wheels of this model. I will say it right out while the die came out great and allowed me to make uniformly great basic parts I didn't check on the the bolt pattern. I made a die to press the hubcaps to replace the nasty cast lead ones ( copies of Maier's no doubt). They came out very well except for one initial oversight on my part which I decided to keep as a form of homage to Maier who started it all for me. When I made the die I decided as I did with that for the King Tiger I would use the die as a guide to drill the screw holes for the bolt pattern to hold the hubcap to the wheel. I used Maier's original as an example for the spacing of the bolts. I never bothered to look at an original. An original of course has the bolts on a evenly spaced pattern around the circumference of the flange with sets of two bolts on a safety clip giving the optical effect that there are 4 sets of 2 bolts around the flange. Well Maier's original cast cap actually had 4 sets of two bolts grouped closer together which is the way I made my die. By the time I actually realized this I had already modified several wheels to receive the caps. Not having the desire to remake, redo or anything else I said to myself just finish it. I'd already hardened the die and didn't want to make another nor anneal the one I had. You might ask yourself how I could have overlooked this, well I just had in my mind how these are supposed to look and I did it; never occurred to me to actually look.Embarrassing but I do stuff like this. I may just modify the die to have the proper spacing but I will not go back and rework these wheels. I can prepare the die for the next time I use it. So there it is, an homage to Maier in steel. I know it isn't true to life but there it is. It was nerve wracking and very tedious to drill and tap the tiny holes ( SAE 0-80 ) for these screws. Remarkably even though there were 128 holes to drill and tap I broke only 1 drill and part of one tap... I know my models are not true to scale anyway but even though I try to make them as well as I am able I just didn't have the energy. I can always revisit these some other time, rework the die, drill and tap the wheels again ( I would hopefully only need 4 new holes / wheel!) seal the extra holes/ drill proper ones on the hubcaps and all would be well! Work for another day perhaps.
You may see the photos of this work below
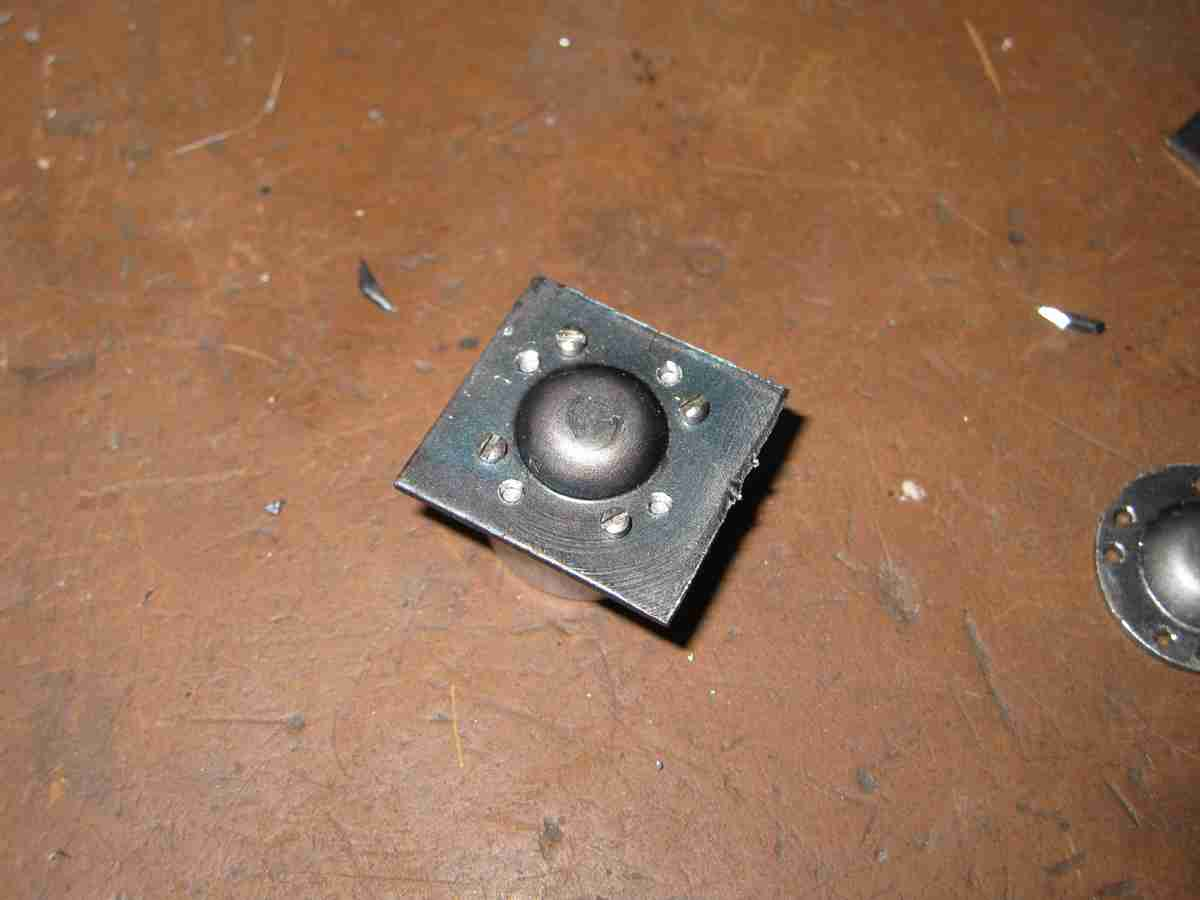


Actually making the spacing of the bolts was more difficult than evenly spacing them when it came to putting the screws/hex bolts in. Also,I used 0-80 steel hex heads as sold by Cole's Power Models; I insist on using steel for these sorts of applications and Cole's to my knowledge is the only company to sell steel hex head screws and with proportional heads to boot. 00-90 size would have been better but they aren't available in steel. 00-90 hex heads are the smallest I've found in any material. I know there is a company in Germany that makes smaller metric sizes in brass.
At the moment I'm actually at an impasse, actually at one I've dreaded for some while. With each passing year the level of detail on armor models in the 1/16, 1/8 and 1/6; the latter in particular, has reached astonishing levels of fidelity to scale. 1/10 scale is largely being left in the dust in this regard with only a precious 1 or 2 manufacturers supplying a few low level detail parts; photo-etched. One of these items which really stands out are the clamps that festooned most German armored vehicles and some light vehicles used for holding all manner of tools and other essentials on the vehicle. In the past I've just glossed over these details but I find I can no longer do this! I am hoping that somehow these details will come to hand somehow in 1/10 scale. I remember a conversation I had with my late friend Jacques Littlefield quite a few years ago now about these clamps. He told me they had had reproductions made, possibly by an original maker ( but not positive if I remembered that last bit correctly). He had said " You can have one, now where's that box of them??...."; unfortunately either he or I became distracted and I never did get that example clamp. Very unfortunate. So I have just photos to go from today. Long story short I'll be working out this stubborn detail item so I may yet finish this as well as several other projects! So long for now... Jerry
Siiiiiiiiiiiiiiiigh.
07/26/2012 - Ok I admit it the wheels bugged me; had to fix them. ( so much for the homage part...sorry JM). I had to do three distinct operations not incliuding making a repair fixture I could use both for drilling the correct hole pattern on the hubcaps AND the wheel hubs; 1) fill ( uniformly ) the second and unwanted hole of each 'pair' on the each cap. 2) drill the new correct holes on the caps 3) drill and tap the corresponding correct holes on the wheel hubs. I did this assembly line style, filling the holes first. Ever since I worked at Eimac /Varian I've adopted, whenever I am able, a variation of the brazing technique I learned there. I prepared the hubcaps with the shortest amount of filler steel, flux paste and the absolutely smallest piece if silver braze wire I could manage. This last part was to minimize cleanup as well as conserving expensive braze wire. I perfected my approach on the part at hand after the first cap and all 16 went quickly and turned out great. Drilling the caps was easy using the tool I'd made with the drilling and tapping if the hubs really the only trying part. I should add and this is not a function of the error I made but rather the geometry of the hubs themselves: they weren't designed to have removable caps put on them so drilling a tapping was a very hit and miss prospect with a number of holes less than optimal. The overall end result is good although would have been much better had I been able to use 00-90 screws. I'll paraphrase my friend Per, "they look good but aren't correct". No safety clips for one thing on any of the wheel bolts, a level of detail I'm not prepared to cross at this time. And there are other missing details; I won't mention them most folks won't notice! Anyway the results are shown below. I will return to my attempts to make a passible tool clamp so that I may really have a shot at finishing this model this year! Oh and by the way I made and tried a new two stage muffler on this model; too early to determine if it is quieter. That's all for this time.... Jerry

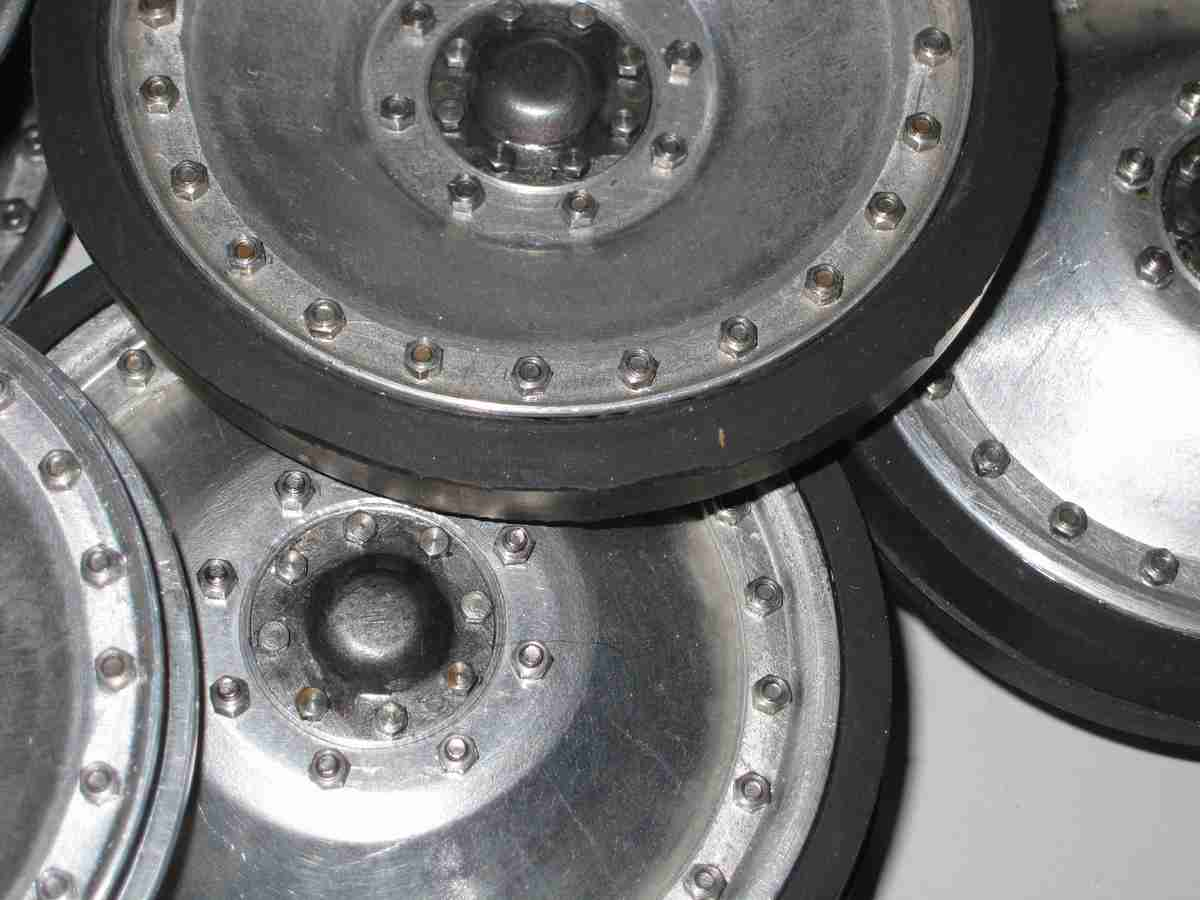
I've been moving slowly on all my projects. Between getting my home ready for winter, painting, sealing and all that I had the heating system changed out which disrupted my home for the better part of a week, several days anyway. Other demands; helping my lady's daughter off to university. All of these things have their own rewards of course but above and beyond all this I find I feel like a man running a race; I'm getting close to the end of the race but I'm tired, somewhat nervous. What makes me feel this way? My day job, my work, my profession. I'm within a few years of retirement one way or the other; I don't want to be completely burnt out when I get there. Software development, being a programmer isn't always the enjoyable, fulfilling profesion it was 20 years ago. At least it isn't in a large company like the one I work at. Politics, dirty dealings, horrid, offhand treatment of longtime loyal employees as well as mass firings of same, minimalist working conditions not to mention the unparalleled bull slung in the name of wanting to make this the "most admired company to work for" while saddling everyone with nearly back breaking controls and rules at every aspect of one's work life is making life there terrible. I know, if it that terrible why not just leave? easier said than done. I've been there a long, long time and can say it wasn't like this before, not even close.
I always manage to find something to divert me from a project, this time it was directly related- a early generation Maier Panther upper/lower hull. I'm think of adding a repair/ fix it page since I spend a considerable amount of time in that pursuit. First the ( second) Pracht JagdPanther that was severely damged enroute to me. Now this early Maier hull- excpet that this one was known to me to be damaged before I purchased it. I repaired it as well amd have been spending time on the hull to get it on tracks. It was missing a lot. Anyway to this project! I've not been entirely sitting still. Worked through making all the safety clops for the wheels and the center lube point on the wheel caps. Put first coat of base coat on wheels and lower hull even though I'm not done yet. More photos to follow but below is a teaser.... jc- 11/14/2012
It's high time I return to this and my other projects. I make slow progress in the best of times and these are not. Sadness underscores my efforts these days. I'll leave it at that. I hope to have the presence of mind to do right by these projects.
A positive note among the negatives is the recent arrival of long awaited ( > 1 year) arrival of tool clamps.David of Armortek in the UK was the champion agreed to make these for me. See images of these clamps below.
these will allow me to execute the tool stowage of the late JagdPanther that I want. The tools on this version were spread out on the rear of the machine and I plan to duplicate that as closely as possible.
06/06/2013 Along with my Panther F, which I'm attempting to work in parallel with the JagPanther I am in the process of remaking the vision ports. What follows are some photos of the beginning of this task.All of the parts shown are still loosely fitted together
The loader's movable periscope mount.
The commander's movable scope plate. I wanted to show this part away from the mounting area as it does not photograph well it seems. The openings appear uneven, especially the cartouche /oval shaped opening for the commander';s range finder. It was machined in my milling vise and it is uniform. I will make the cover for it over the next few days.
The Commander's movable periscope mount without the armored cover..
The Commander's movable periscope mount with the armored cover..
I'm hoping to make decent progress on both the JagdPanther and Panther F over the newxt few weeks. There are other projects including my King Tiger that I really want to get to..... ..........That's all for now. - Jerry
I'm presently working on the mounting brackets for the Tetra 2 fire extinguisher, for both this model and the Panther F, This may seens below
Ah yes and I did change the antenna mount, the original piece supplied too bulky. I do a small thing every day, or try to. The details are tedious, my hands not well suited for delicate work but I muddle through. Jerry 06/20/2013
Some work on my JagdPanther. Slow going, but reasonably enjoyable at the moment.
The two rear hatch bolts were surprising, or rather the steel I made them from was surprising. I picked out some random steel , a 4 cm square bar that I cut a thin slice from to make the bases and just some ~7mm ( or so) steel rod I picked out of my metal box. I cut the base plates and drilled them, oddly it was difficult to drill. The bar I cut two pieces from and bored out to the diameter I wanted, these worked very easily. I milled channels in the plates with a regular end mill( seeing how the full size ones were made) and then I brazed the parts together.
This is where it started to go downhill. both types of steel appear to be air hardening tool steel. The assembled parts became extremely hard. I had not realized this when I attemped to stamp identifying letters for left and right on the underside of the base plates. I nearly broke my steel stamp and the base plate metal fractured badly( can't be seen from the top). Next I wanted to drill and tap the holes for the small ( really small in my case) retaining screws again as the originals. I couldn't even mark the holes or scribe lines. I had to play around heating the metal to try to soften it enough to drill and tap "0-80" threads. ( ~1,3mm ??) . The tubes actually fractured as well, again barely visible.
It was awful and did not allow me to make a clean job of it but there they are. I will clean up the screws to make them look better. The latching bolts work perfectly, they actually lock the rear hatch in the closed position. Jerry 07/03/2013
It's December 2013! My goodness a lot has happened this year hasn't it? I continue to work on this and my Panther F ( II ? ). Progress is slow. I realized when I began preparing to update this page I've not been taking a lot of photos along the way. For the moment I'll show the work I did over the last 2 nights for the close defense weapon carried by the JagdPanther
Cutting the pilot hole to enable using counterbores.
Using the second of two counterbores.
Bore complete.
Fitting the close defense weapon; trial fit not complete..
That's all for this evening. I'll take more photos 12/6/2013..
I'm including a photo of the rear engie deck as I've been spending a lot of time on this. Actaully if I were to spend a solid 2 weeks on the model I'd probably be able to finish all that remains to be done; the challenge is getting myself to spend those 2 weeks. I've built and installed oll the engine deck hooks. One thig that can't be seen is under the left ( coolant ) filler cap: I'll be using it as a place to refuel the model. I attached a Du Bro quick connect fuel filler valve under that cap. I plan to run plumbing to it that I can easily connect as I ready the model to run; This will enable me to re-fuel the model without removing the upper hull. I'll take a photo of it for next time.
I'm plugging away at the details on this model. It is slow going as I only work for a short while each evening. The back plate is about as complete as I'm going to make it. I can definately see the light at the end of the tunnel. I have to finish a few things on the upper hull and I'm going to call it done. I'm looking at mere weeks to get this one done. only about 20 years after I got it. But in fairness it's nothing like what it was when I got the basic kit back then as this page will attest. Two of the things yet remaining to be done is to make a main gun elevation drive and new, more peoperly shaped muzzle brake.
One growing concern I have with this and my models from this point forward is the detail. Not that the bar has been raised and the level required to have a reasonably passible model has increased but that that level of detail will be fragile requiring far more care or at least more caution in handling, transporting and running the models than I'm used to. Just the act of picking the models up is made more tricky due to fragile parts. Ah well, progress.
I expect that the next time I write here I'll be marking as complete the construction phase of this project!. Jerry 01/18/2014
03/28/2014 I'm still here! I'll be right to the point- there's a new lady in my life. I've been preoccupoed so to speak.I'm hopeful but we'll see; I hope it will be all we hope. I've made mistakes in my past relationships; I hope I've learned. My modelling progress has reduced to an even slower crawl than normal. However I've begun to make new hinges for the split hatches of the JagdPanther. I realized the old ones were made of lead when I tried to reshape them! I don't like lead parts, as they aren't strong enough. I'm making 4 patterns so that I might cast enough for one model with each molding; the patterns will be mostly silver brazed steel. The other change in my life has been a professional direction change. Our application development team has adopted the Agile philosophy and I'm the appointed Scrum Master! It's a change after more than 30 years as a 370 assembber, then C/C++ then Java developer! Anyway the progress of the hinge patterns is shown below.

Well here it is getting close to the end of May, May 26, 2014 to be exact and I'm still moving slowly. I had been sidelined from most rigorous walking and it took a toll emotionally due to tendonitus in my left foot. I'm hoping it's gone but we'll see. I went omn a 7.2 mile moderate difficulty hike this past Sunday and all seemed to work ok. Back tio the JagdPanther. Long story short I finished the patterns I set out above, I cast the parts in bronze as I intended but I just didn't like them. My failure was trying to make replacements the size of Pracht's originals but shaped a bit more like the original machine's version. Bad idea. They are way oversized. While they went together ok I just couldn't abide them. I reviewed my available books for photos and I believe I came up with at least a better interpretation. See the photos below:
The first is the first attempt hinges... ,
The second is the second attempt hinges... ,
The third is the comparison... ,
As a final redoubt I also purchased the hinges from Geisswerk; made specially for the JagdPanther but I think these should be ok. I will be interested how my interpretation stands up to Martin's. As his are investment cast I have no doubt his will be more attractive and professional but mine are a tough bronze! Jerry
06/22/2014 - Work proceeds slowly on the model. Other things occupy my time, I'm actually planning my retirment or at least trying to work out the options that are before me. As is often the case I have my share of shoulda/ couldas but on the whole I believe when retirement rolls around I'll be in decent shape; as decent as a regular guy can me in this society of ours. My greatest concern is how much the government will suck away in its never ending hunger for our money. Anyway.........The second attemp hinges /hatches proceed well; these I believe I will keep. I took the time to cut the opening for the ball MG mount I purchased from Geisswerk. It's a nice unit. I expect to nickel plate it ro mask the bronze like color being as it is a substantial piece in a prominent location. Below you may see a few phhotos of the progress and trial fitting. Jerry
Withe ball mount in trial fit
06/25/2014 - Below is a comparison of a untouched mg mount on the right and on the left a nickel plated version ( disassembled for ease of work ) that I plated just tonight. I might try putting on another layer at a higher current level to try to get a rougher surface although what's there should be ok. This little project harkened back to my days at Eimac ( Varian ) in the late 1970s- a huge plating line there was. I learned alot from that place... Anyway I plated the mount and the mg/ ball itself as well and reassembled it back together. I also put a thin plate on my new hinges. More to come. Jerry
08/01/2014 I've not been idle on my JagdPanther! I will post photos tomorrow. I've mounted the commander's and loader's hatch hinges and actually modified the hatches themselves. I made the small parts that the hatch latches are mated with. I need to make the actual latches. The next part took me quite a while just to decide how I wanted to execute it: the elevation for the main gun. I decided to make a guide that follows the arc of the breech and made a guide follower attahed to a lever that I will act upon with a Savox SC-1258TG servo - rated a 12kg torque. More to follow... Jerry
09/23/2014 Sometimes I wonder why I do the things I do; not my model engineering, it's the escape I need from the other aspects of life! I've made reasonable progress. I've not kept this build blog current but I've made some significant progress: finished the side stowage tube; the elevation mechanism and I decided to remake the crew compartment warm air collector housing as the original was too narrow. I will expand these subjectss and post photos.
10/03/2014 I'm close to the end of this project... I can feel it! There isn't much that remains to be done. I know the muzzle brake is not what I want to end up with but instead of holding up this project until I can decide how I want to make it I modified what there was with an eye towards including that upgrade as part of my King Tiger project which I'm hoping to return to..
10/25/2014 I am considering this project concludsed. some days ago I applied the base coat to the entire model. I will let the model sit and the paibnt cure before I apply the camoflage, unit and divisional markings.What I ended up doing to finish the model was the following:
You may see the work in the following photos:

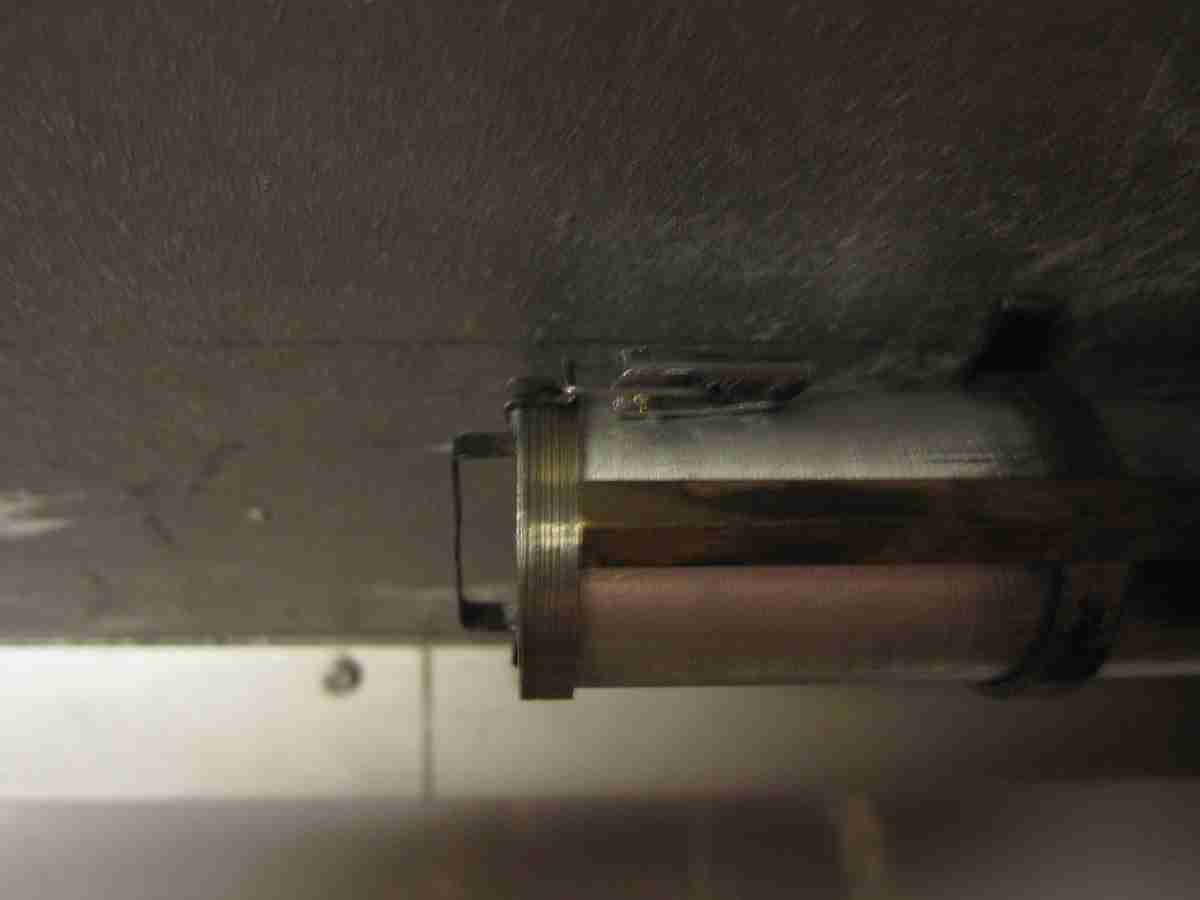


And finally the painted model where it will remain for some while.


I'm going to return to the Panther F for some time to bring it up to this level of completion.. There are a few things to make( internal hatch latches for one) but I'm glad I may consider this project complete .Huzzah!.. Jerry 10/25/2014