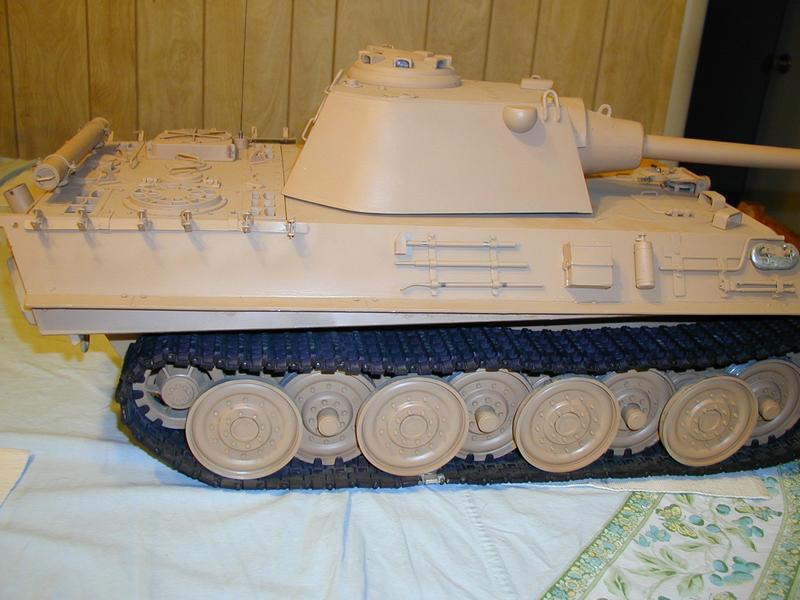
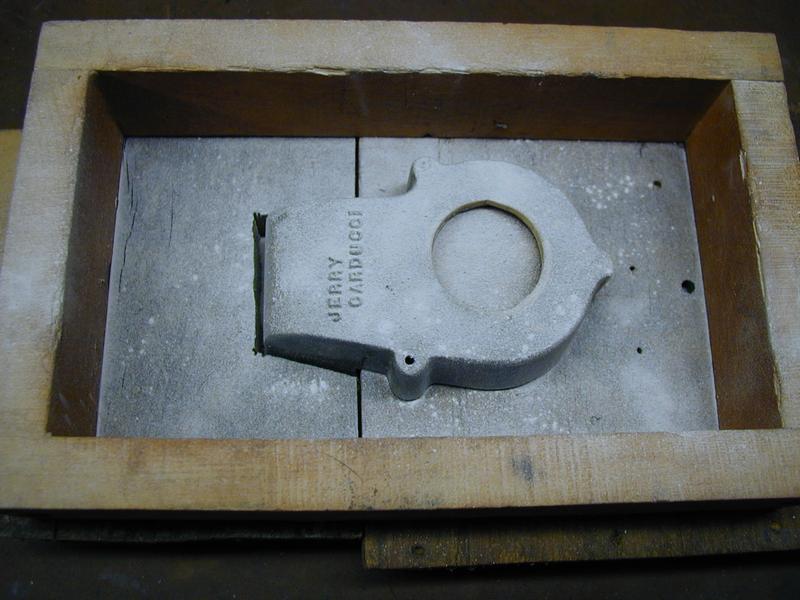
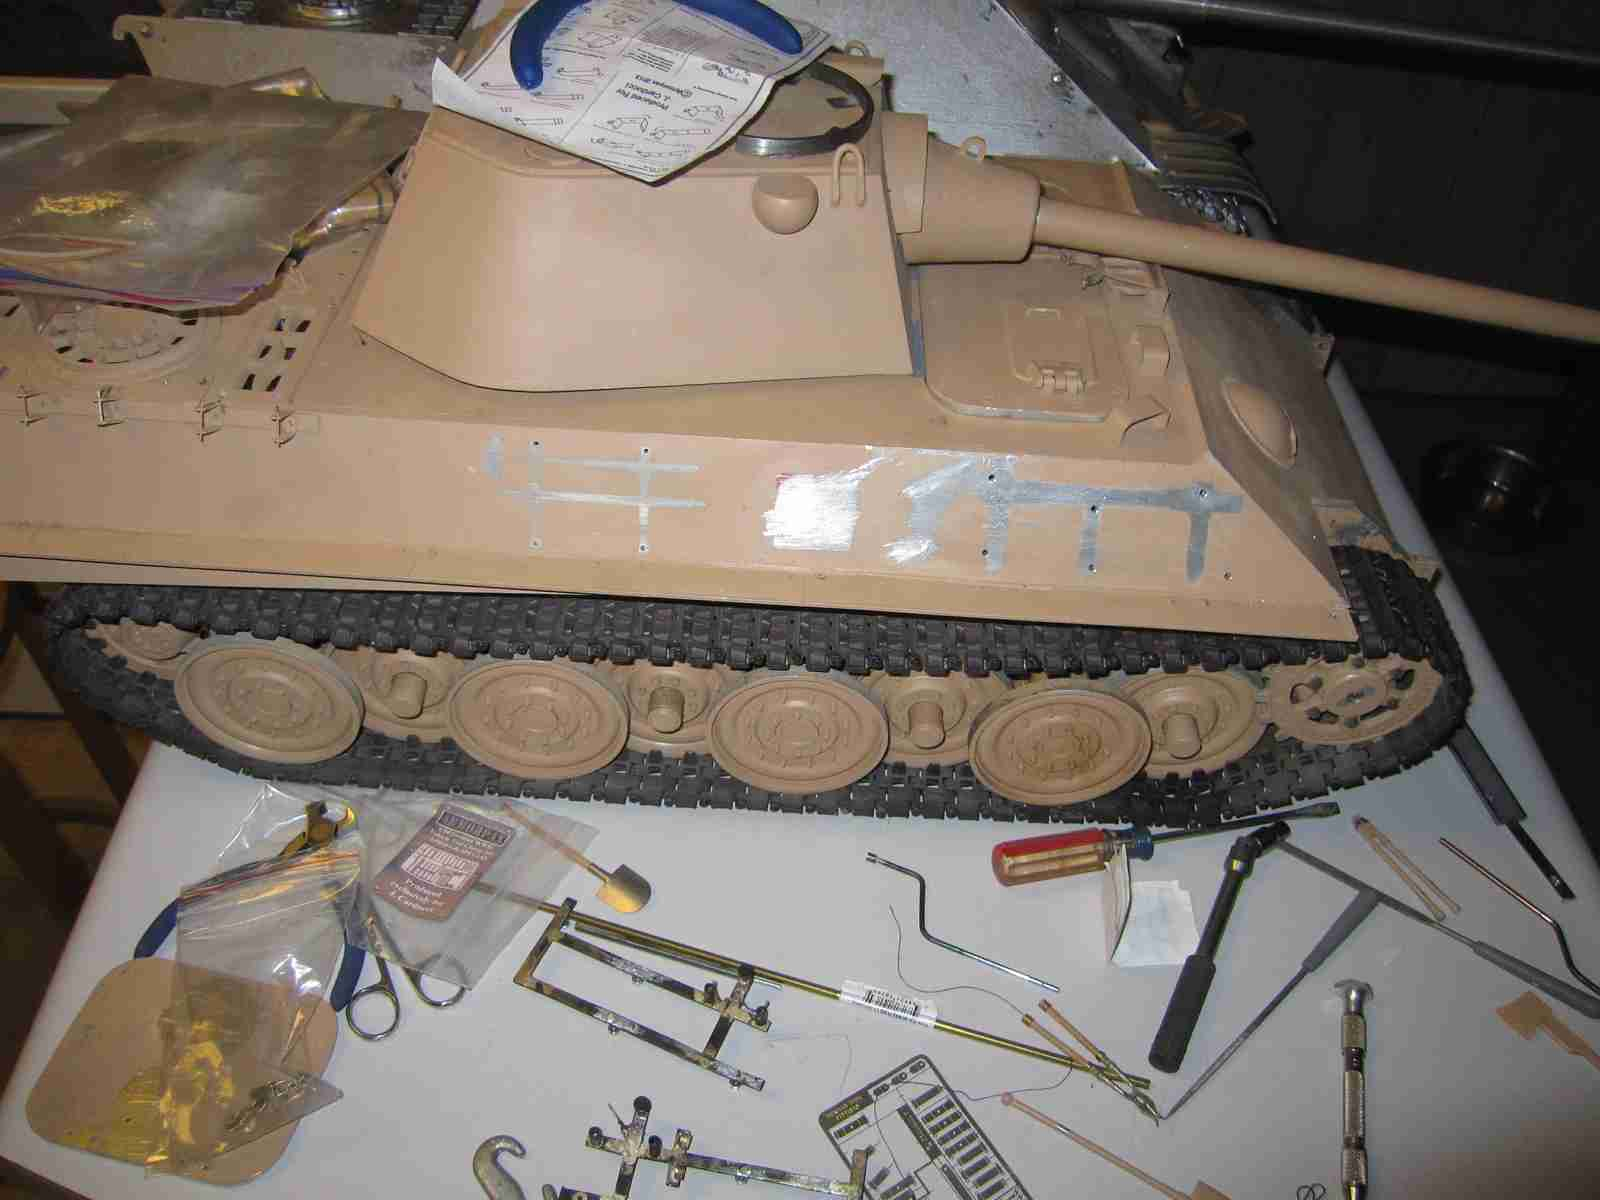
Panther F, an assumed development version of the Panther.
As I described in my page/blog on the JagdPanther I'd also bought a Panther F from Franz Pracht. This model, while executed well, certainly cleverly; was not very well representative of how it is commonly believed the Panther F would appear had it been fielded by the Germans. The model as seen here was reworked by me and a base coat applied. I don't plan to debate what the Panther F was to look like, I don' believe anyone knows for certain, this is just an idea of what it may have looked had the Germans finished their plan.
Some of you may wonder what's happened to my other two project, the King Tiger and JagdPanther? As well you should! They are fine...I needed a break from those and I also want to bring the three of these models to the same point whan I can paint and finish all three. After that I will take a break from the larger German mainstream tanks and focus on smaller projects. My mill and lathe have been in a constant state of messiness for the better part of a year and a half. I also want to take a break from this intense( for me)machine work I've been doing so after I make the required parts for this Panther F I'm hoping to give my machines a rest as well.
As it was purchased (again ) there are a number of things I HAD to change:
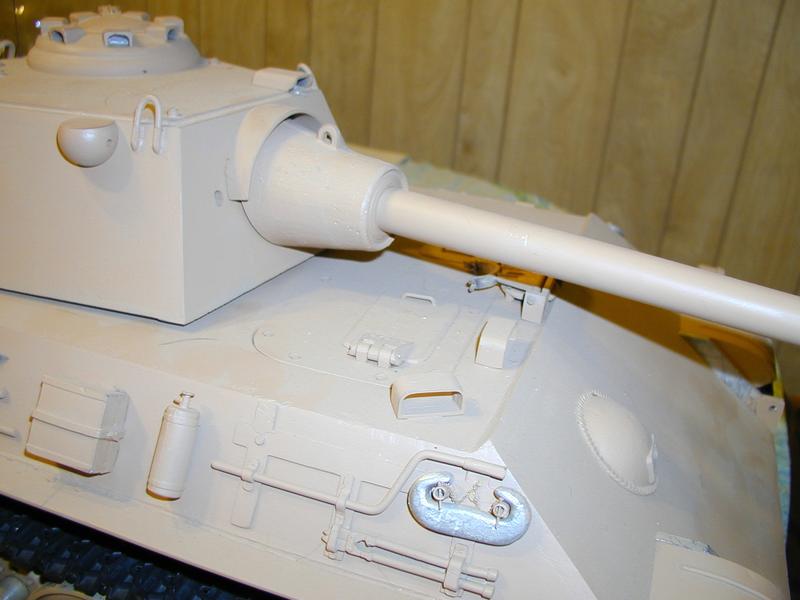
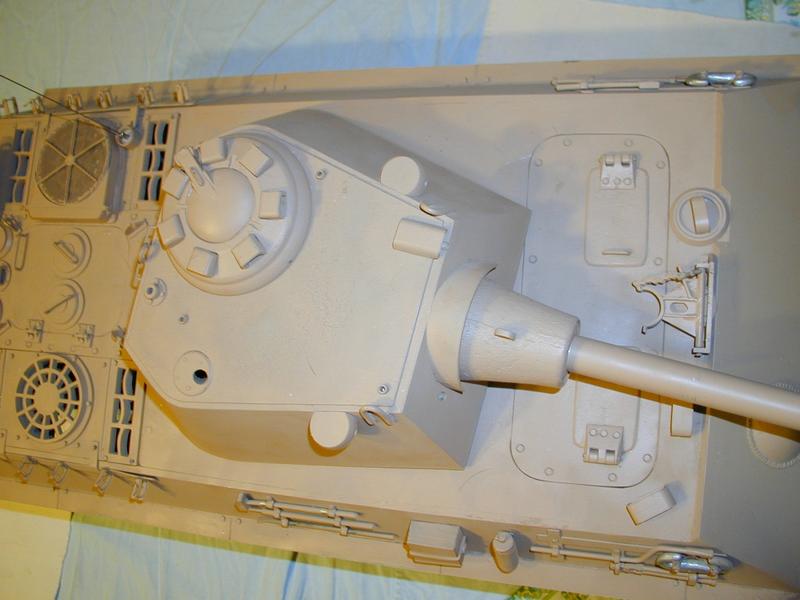
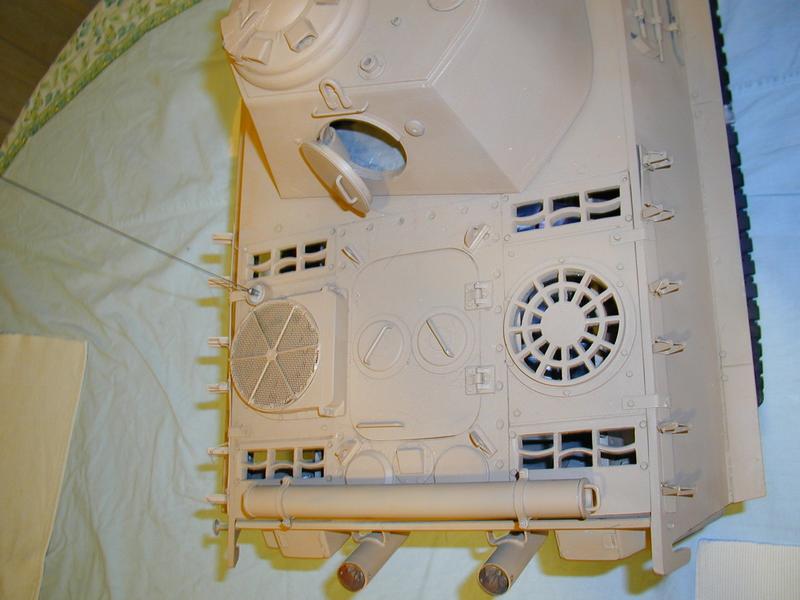
Those were the major things I did to the model besides making up the stowage in the manner I used 10 years ago when I did this model. I think I pressed my self to do this one at the time as it was so umpleasant to see prior. Looking over some aspects of the model I'll probably rework such elements as the rear deck( possibly ), certainly the exhaust stacks, the cleaning rod tube on the rear deck and possibly some of the stowage. Looking over the model for the first time in a number of years I realize there are a number of details that I could have made better. I will probably rework these as I go. Some of these are fairly obvious to me now. The level of detail that I've tried to put into th models I've made or reworked over the last 10 years has been evolving. There's more than a little pressure to add this as the general level of detail or rather the acceptable minimum level of detail on larger armor models has been increasing. I hate to say it but when the first generation of Maier, folowed by Pracht models first hit the scene it was just about good enough to have the general form of the original vehicle captured in model form. Lower level details were done or were "stylized". The Holy Grail of detail can be a never ending quest so I have established in my mind anyway to what level I'm willing to go.
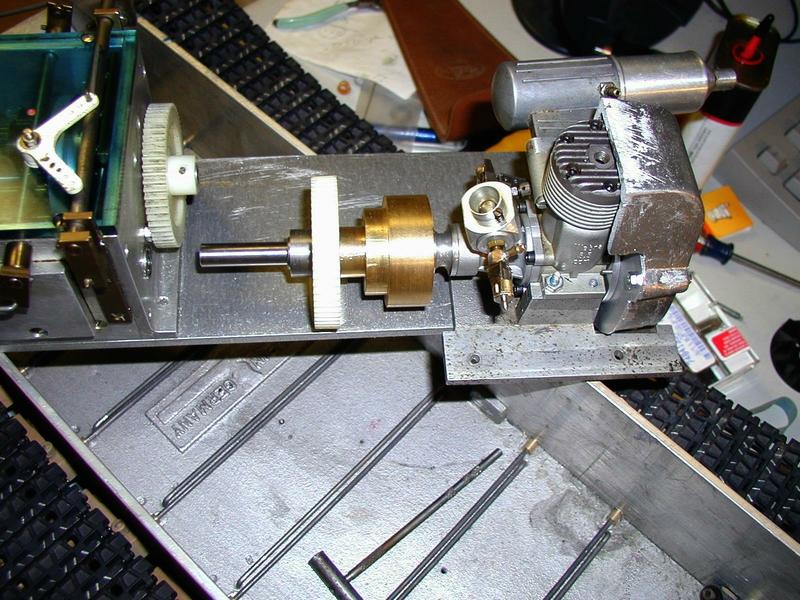
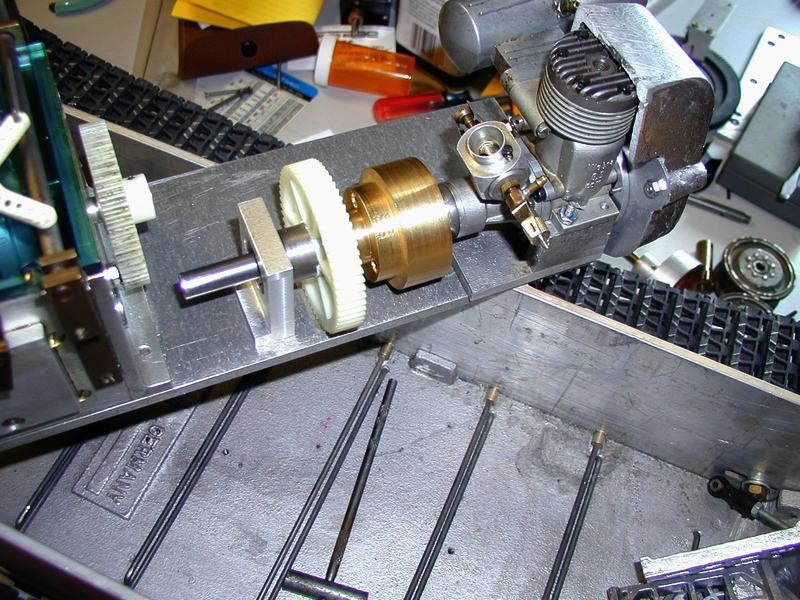
The model as all of Pracht's models was intended to for electric power and when I completed the modifications I did I didn't have an idea what transmission I'd use so didn't set it up for gas, that needs to be done. Also the basis of this model was clearly a Maier Panther ( or possbly a copy of a copy), at least the floorplate, and therefor the resultant width of the model is about .050" of an inch too narrow to fit a Maier transmission I have for this model. I have two options" 1) mill the side plates slightly to allow the geabox to fit or 2) dissassemble the gearbox and trim the brake drums and output shafts enough to allow the gearbox to fit. I have chosen the latter, while more work it will not matterialy affect the gearbox or its function and the first method would reduce the strength, even slightly, of a key element of the lower hull. As I plan to remount the gearbox on a longer plate to accomodate the engine and starter as well it won't add that much more work.
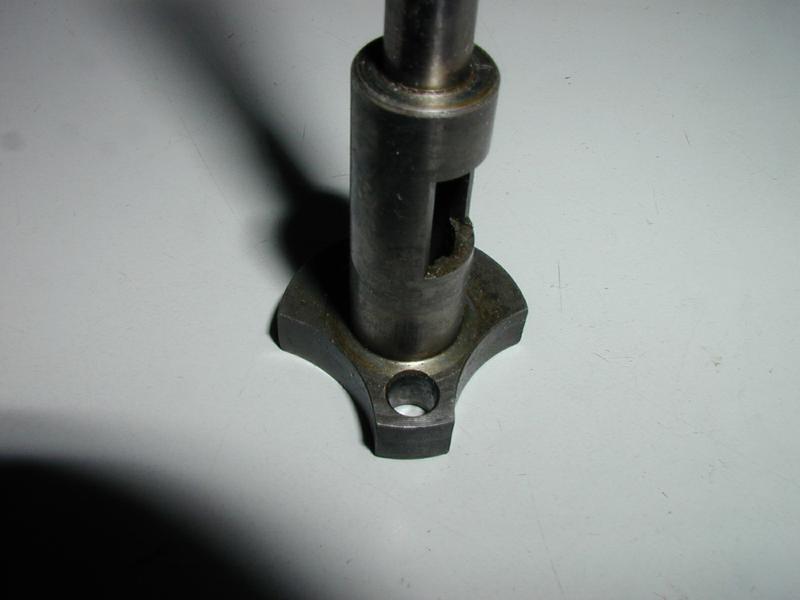
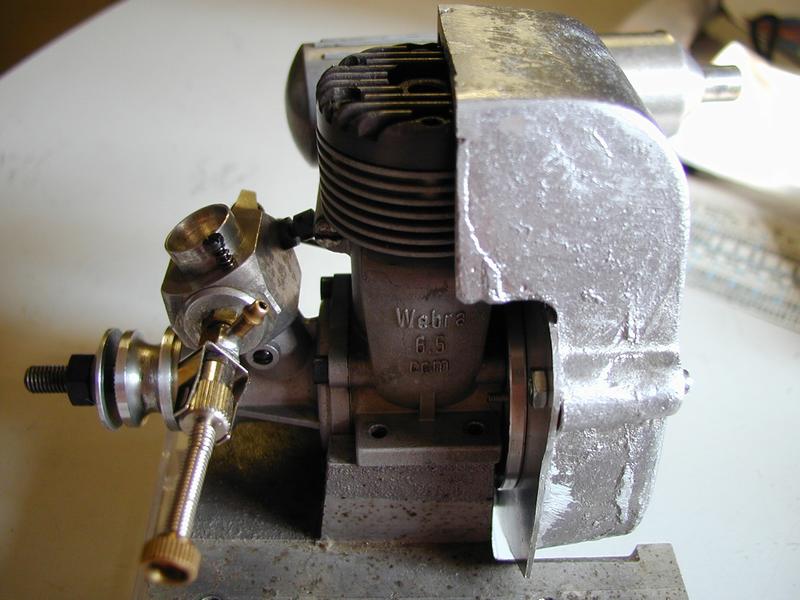
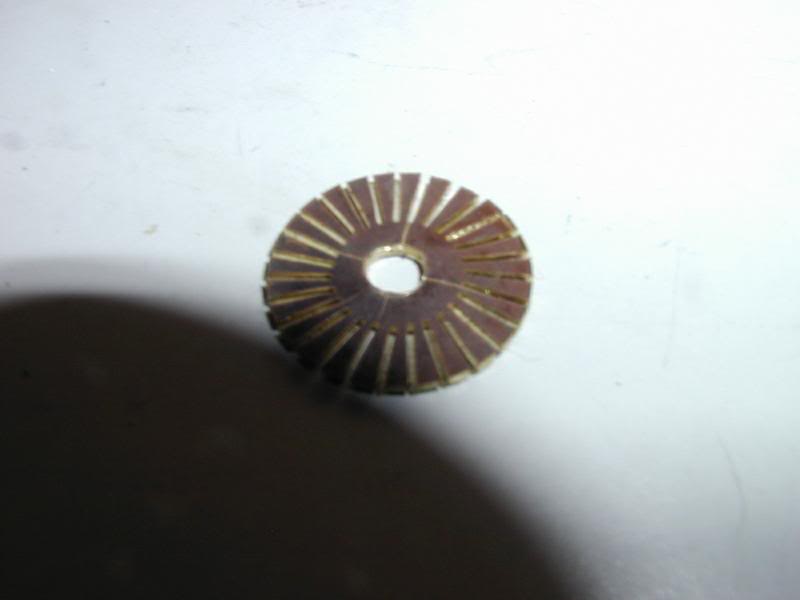
First things first. As I mentioned I plan to install an older, maually operated version of Jochen Maier's 3-speed gearbox in this model. When I bought this one there was no engine for it so I've had to make one up from a standard Webra 6,5 ( .40 cid) "Blackhead" engine. I do have one original Webra Blackhead with rear drive which is unused but my plan is to keep that one as my standard reference engine. I will detail in photos what was needed however the key elements are the carnkshaft with longer crank pin, back plate with bearings and lastly the rotor which engages the pin and is supported by the bearings in the back plate. This rotor is the mounting for the fan. The crank pin is a press fit which may be removed and replaced with a longer one. Seen below is the cranshaft sans pin.
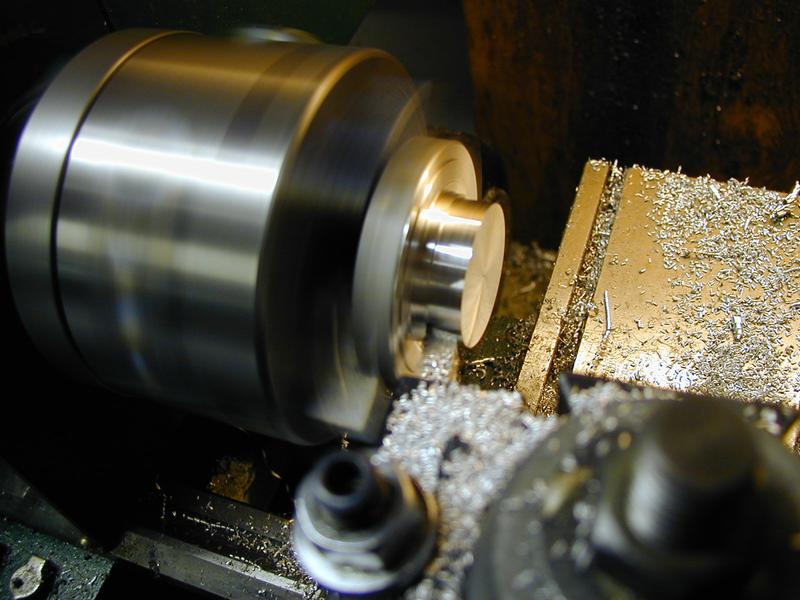
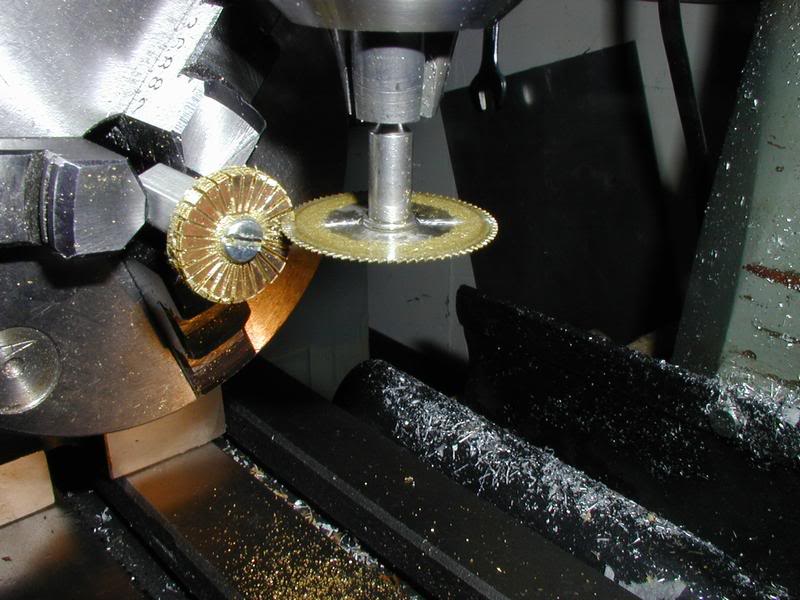
Having replaved the pin I moved on to making the rotor. After an attempt at making the rotor from brazed pieces I decided that only by machining the thing from a solid bar could I get the reliability I wanted, as the original. Below you will see the rotor in photos showing the progression of the backplate. Creating the rotor from a solid bar of air hardening tool steel was very tedious.

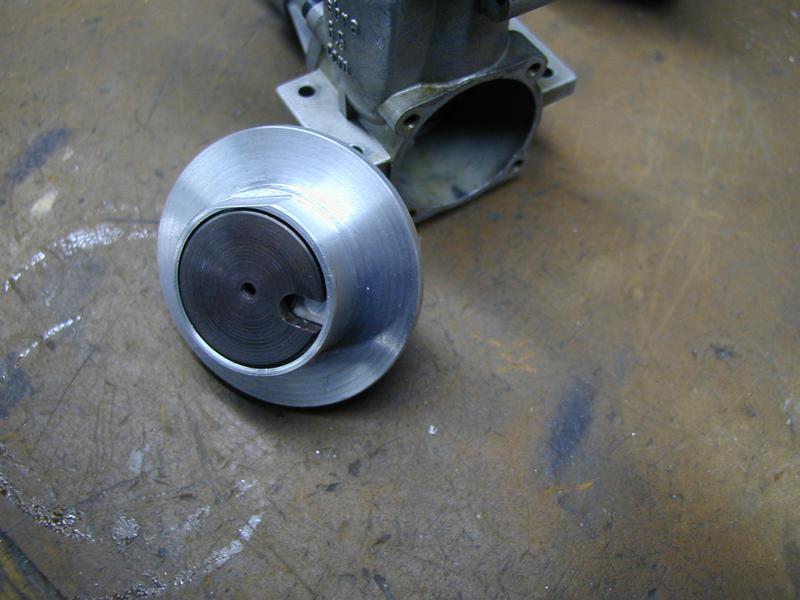
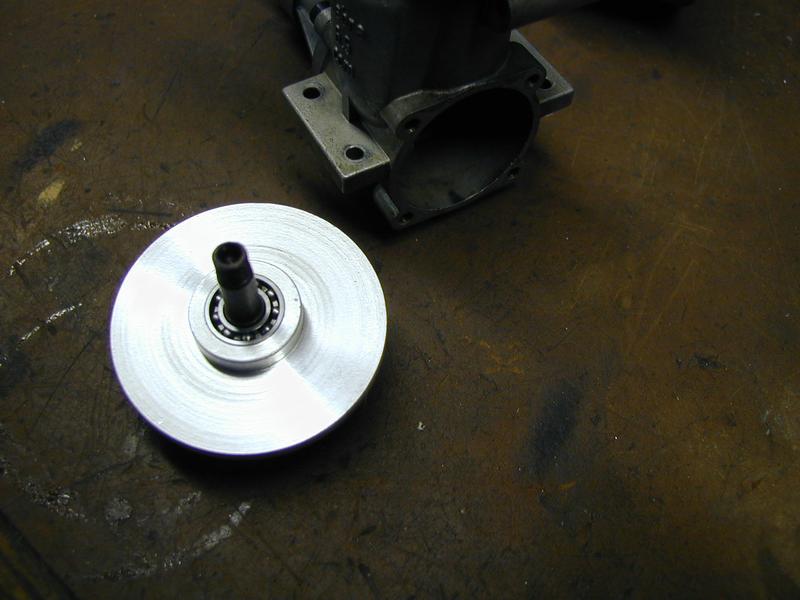
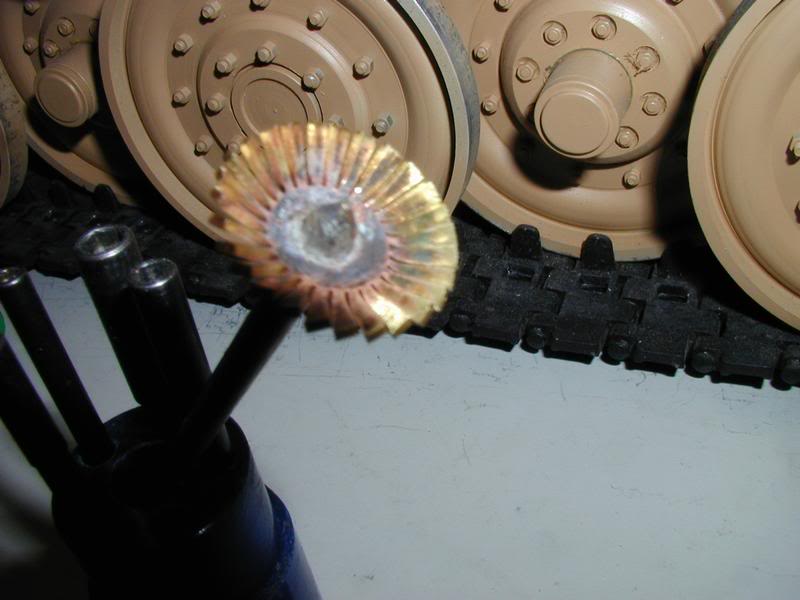
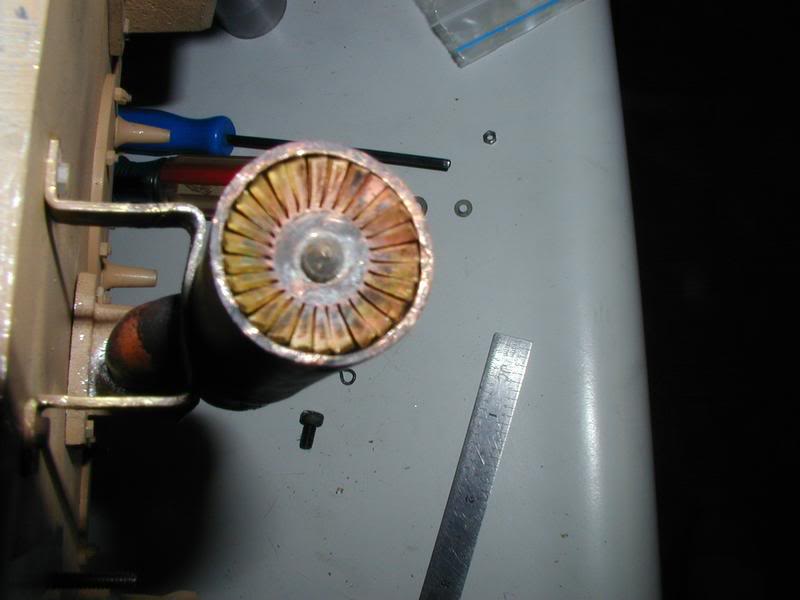
Having completed the rotor and backplate I needed a blower housing so I decided to use as the basis for a pattern a broken original. To this new pattern I added a touch of individualism... I molded two as I need one for my last original Maier engine /gearbox systen.
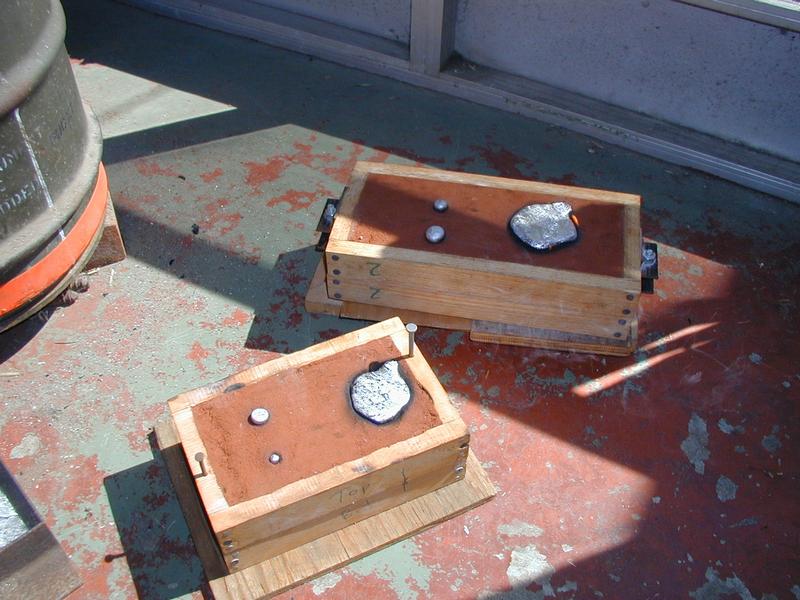
These last two photos show the trial fit of blower housing. I would like to pretty up the casting more; these were really quick and dirty castings and I didn't really prepare the sand much and on top of it all I used a "loose" ram-up in the flasks as I didn't want to break the rather flimsy pattern! You can see the effect of loose or easy ramming on the sides as there was somewhat of a wrinkle formed. I may get to it. :-)
Next up is reworking the Maier gearbox and mounting to a new base plate...I've included a photo to tantalize you! More next time- 06/29/2008
08/20/2008Well here it is what? nearly 2 months later! Sheese time flies. I won't go into details but progress is slow, my hob has been very much the time hawg.
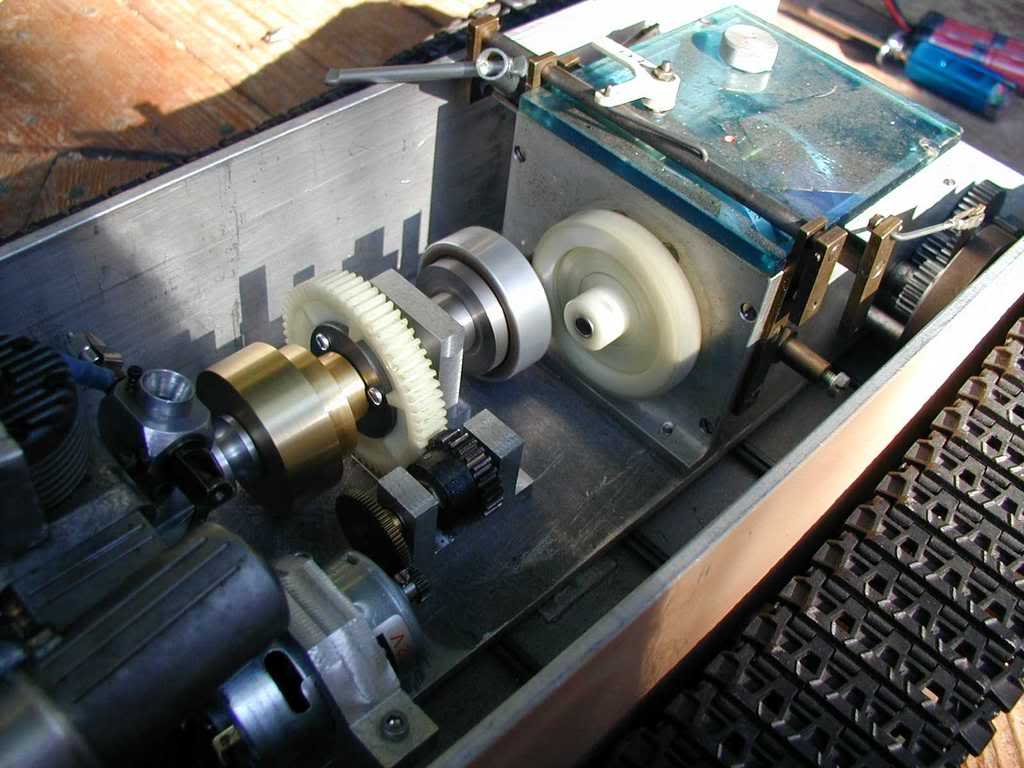
As promised here are more photos I took of the gearbox during the reconfiguring to auit the Panther F chassis and build a self starter.
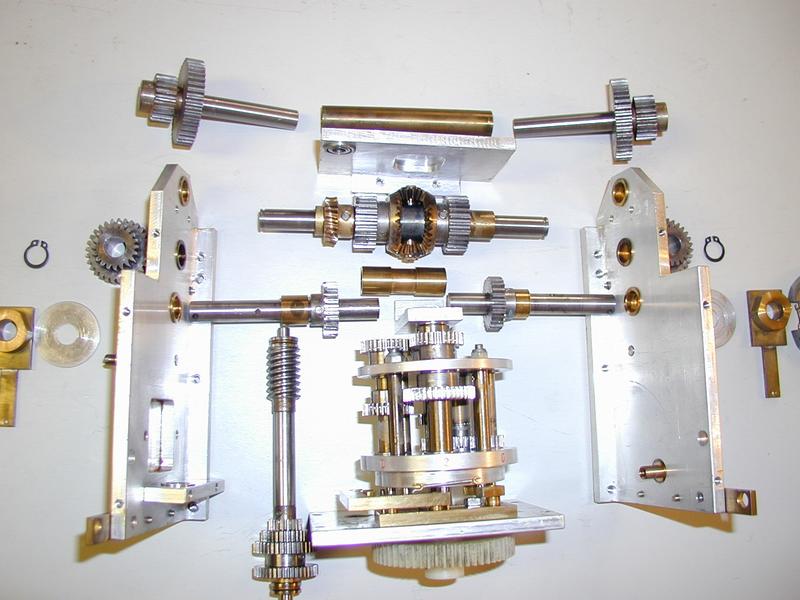
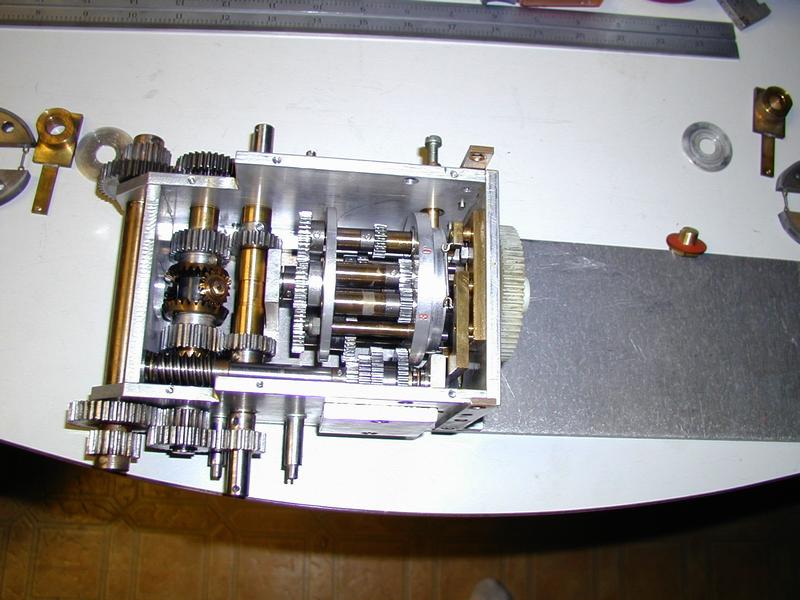
The photo above is the gearbox as completely disassembled as I needed it to be.
This photo is of the main gear carrier
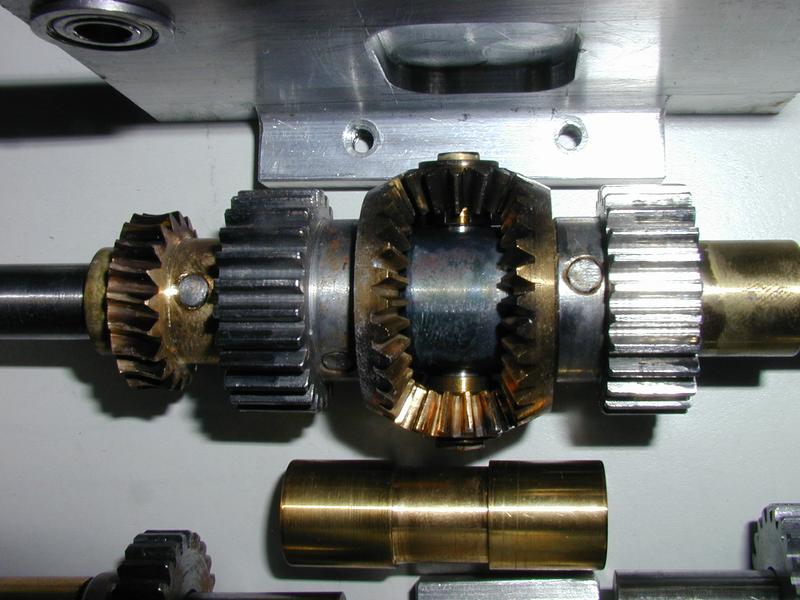
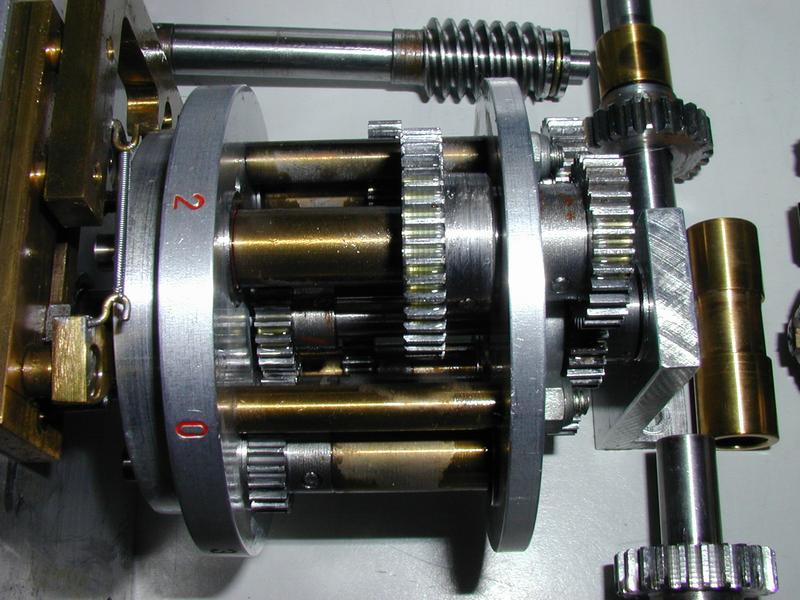
This photo is of the differential, the heart of the gearbox.
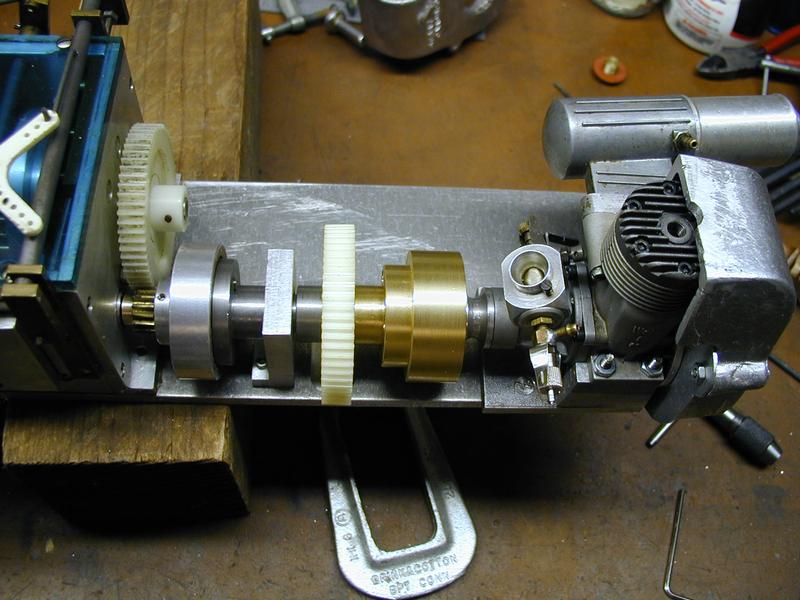
This photo is of the gearbox nearing reassembly, note longer floor plate.
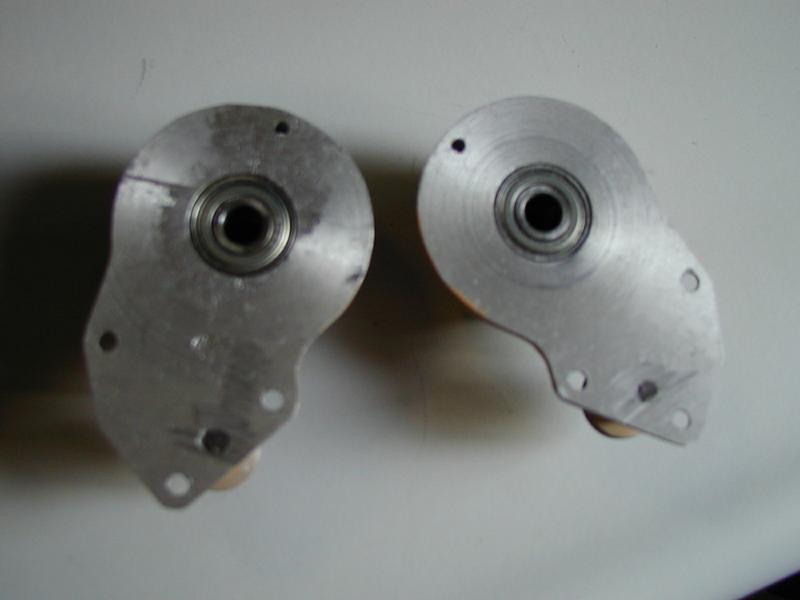
Trial fit into chassis; recall that part of the reason for taking the unit apart was to remove about .01" inch from the width of the gearbox to allow clearance. You can clearly see the large drum brakes for steering.
Fitting new flywheel and drive shaft.
New starter gear with INA 1022 oneway clutch bearing.
Drive shaft support pedestal with bearing.
Fitting clutch( with thrust bearing), clutchplate and bellhousing assembly.
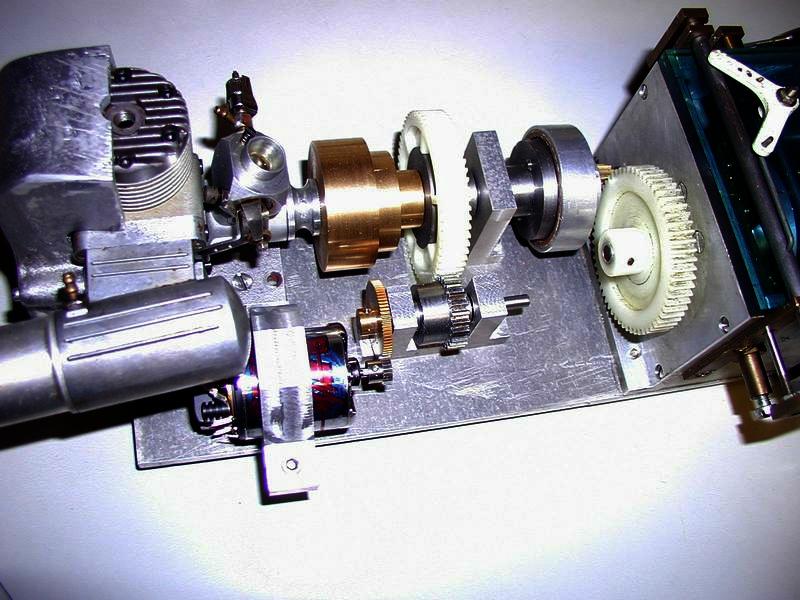
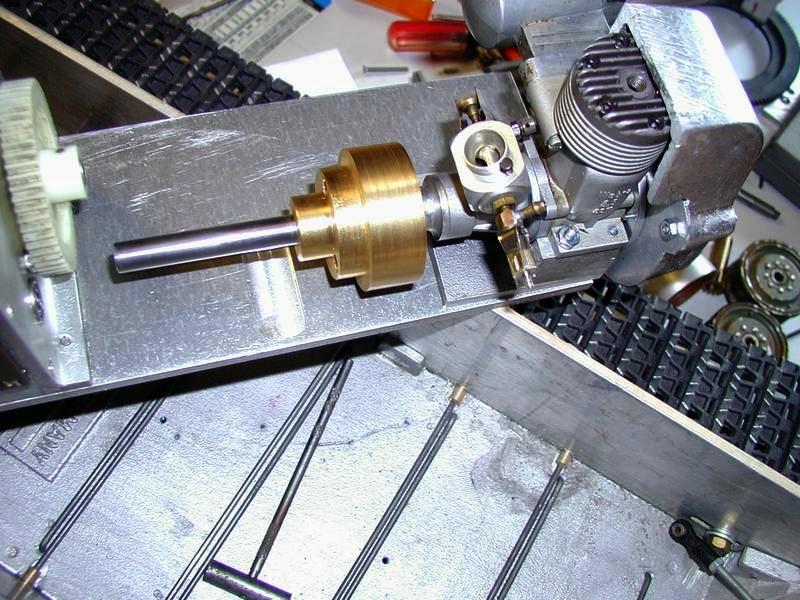
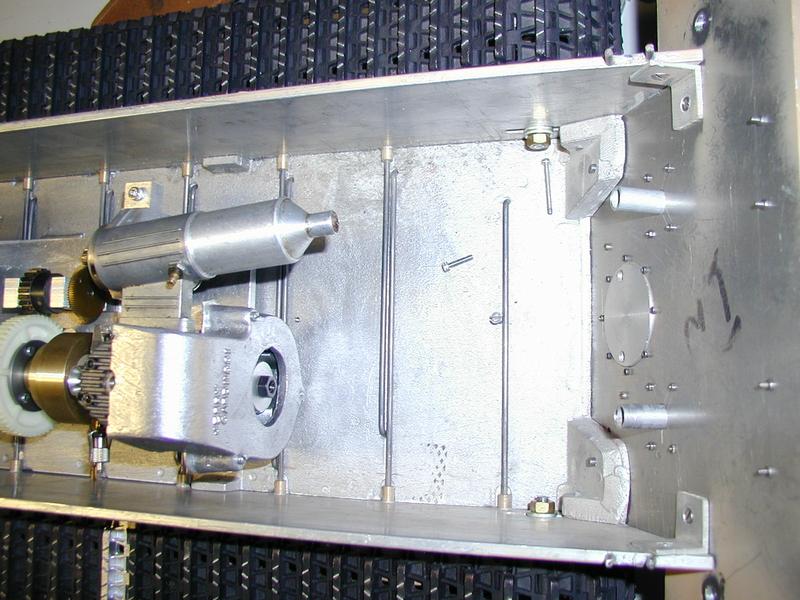
Starter drive and starter motor/motor mount.At this point the engine and support pedestal are completely mounted on the floor plate but the starter drive/motor are just sitting in the approximate positions. Everything still needs pinning and other appropriate forms of attachment to their neighbor components.
By now most of you who have followed my construction articles have come to realize that I follow much the same design with regards to gearbox, engine and starter. I want to say that this is not my own design, it is based on the design that at least so far as I know was original to and sold by Jochen Maier. If anything I will only retain the right to say that I was able to have seen and recognize the comapartive soundness of this design layout early on with respect to others I've seen over the years. So basically I don't have qualms at this point of propagating it into most every model I will do. It is long out of production and Maier's successors don't seem to be interested in revisiting the design even though I wish they would. When I reach the point, and I will, when I complete and build my own gearbox design I will still follow this layout and probably continue to use the Webra 6,6ccm /.40 cid Webra Blackhead RC of which I have many many examples.
Once I had the gearbox/motor/starter assembly essentially complete I turned my attention to the turret drive. The turret drive which I had little interest in rebuiding uses for its bearing mechanism an American lay-susan type ball bearing. Noisy, quite sloppy tolerance are hallmarks of this unit, in all fairness it isn't designed for this application. Nevertheless this bearing should proove sufficient to the task but what needed relocation due to the engine was the turret gear and drive motor. I may show this at a later date.
Next up is reconstruction of the front spocket/drive shafts....when I return!
08/24/2008 My reconstruction was to shorten the length of the drive shaft,remove the inboard bearing block and install a outboad large bearing to supplement the existing bearing in the final drive housing casting.
This photo shows the existing bearing in the casting

This photo shows the new (.625") outer bearing; this will stabilize the driveshaft against flexing under power. It equired rebuilding the output shafts to correspond to the new bearing layout.
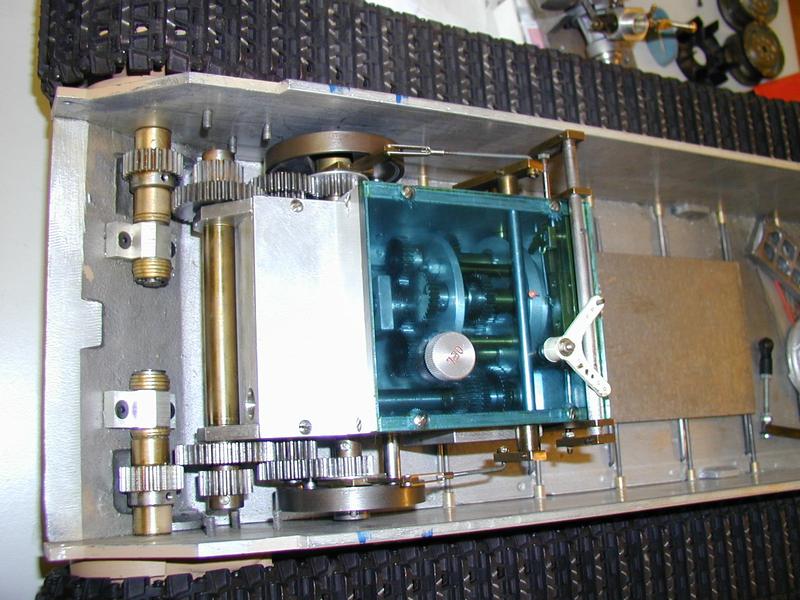
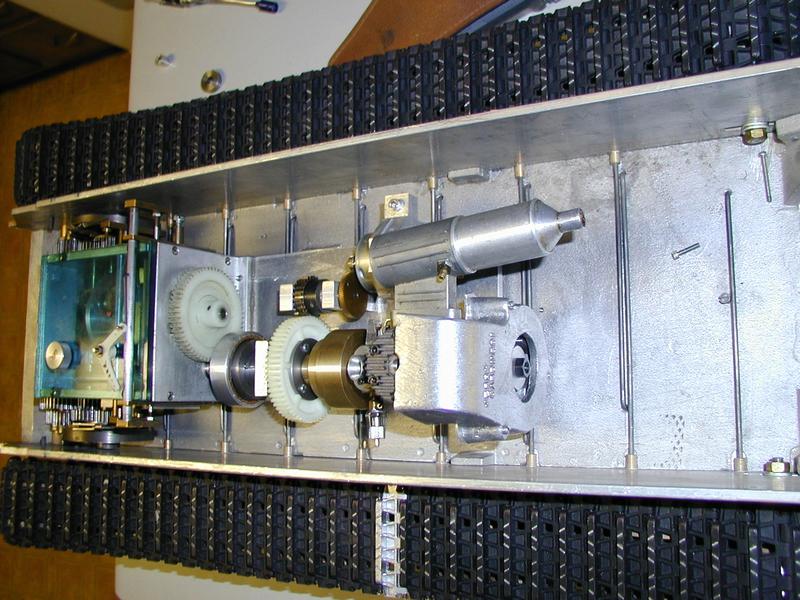
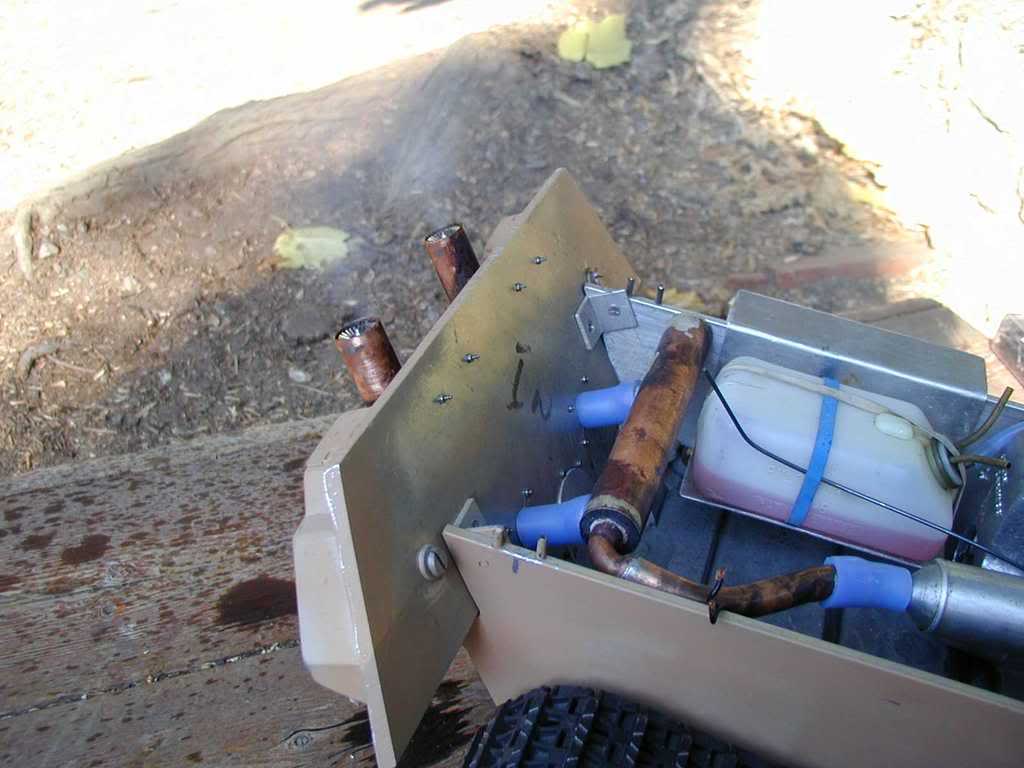
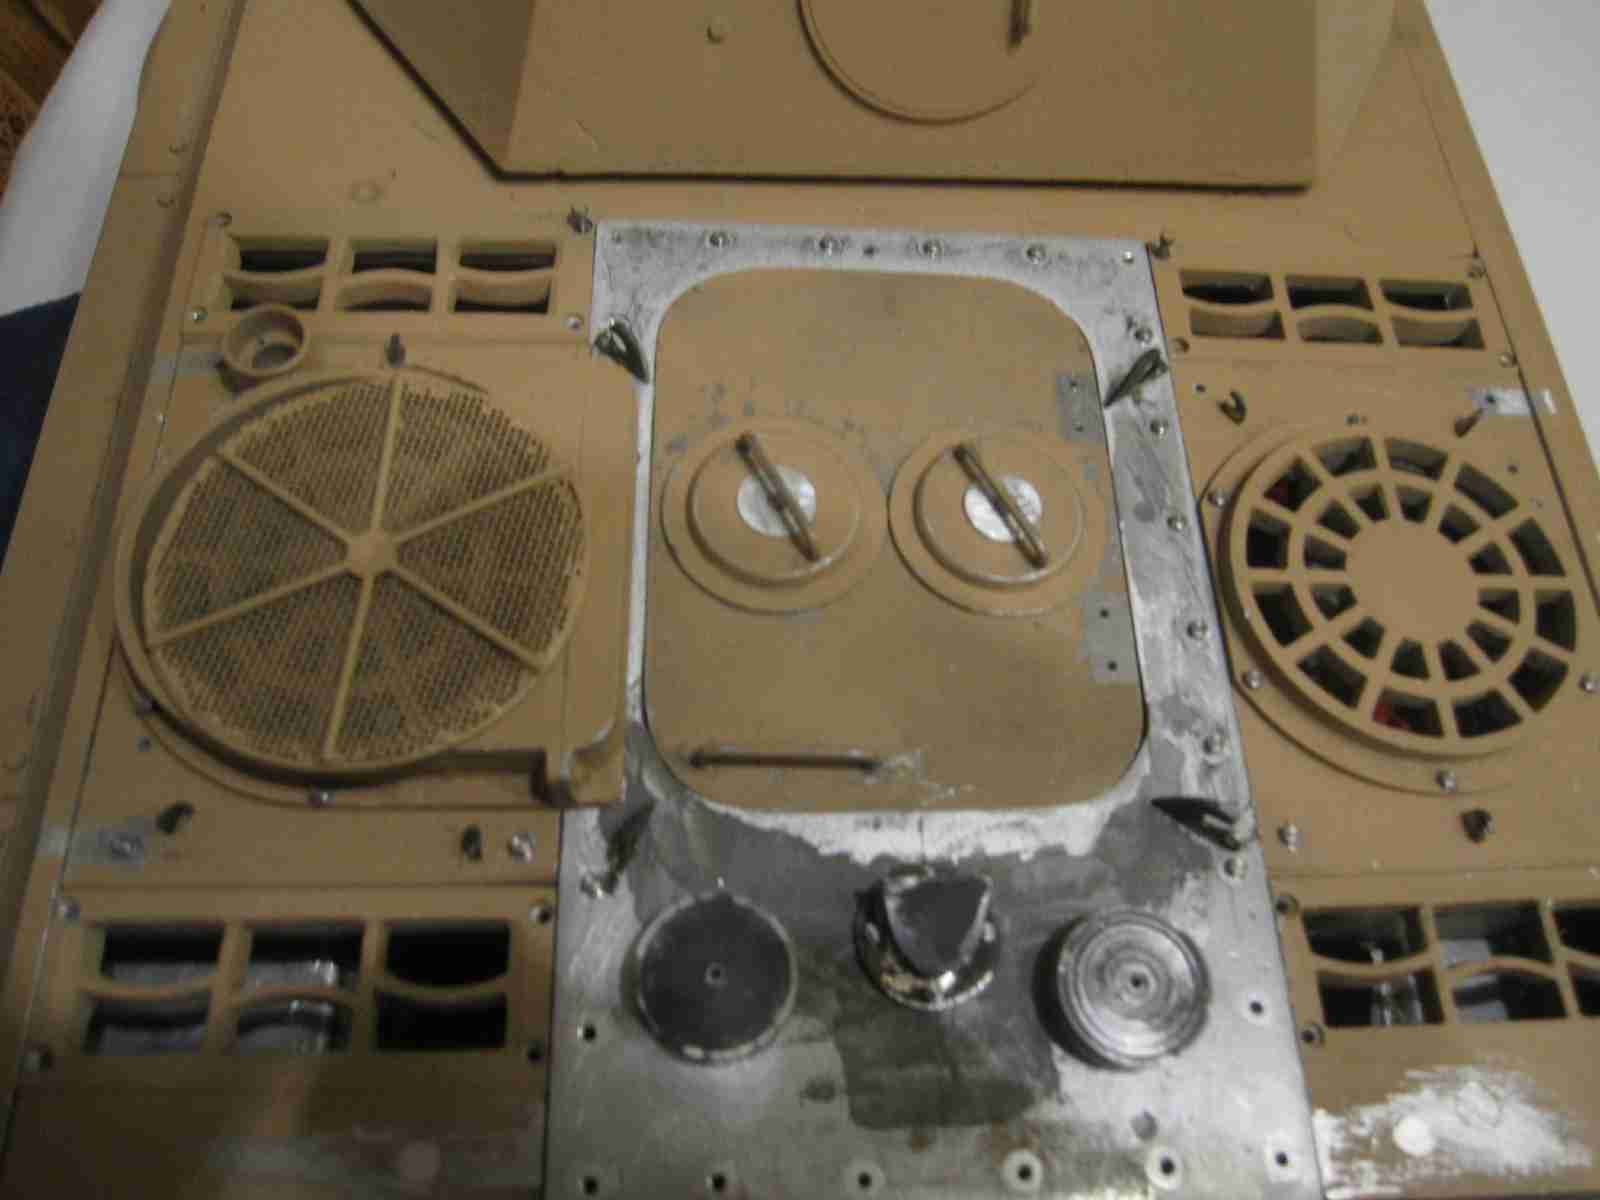
09/14/2008 Progress has been slow, time and other chores have taken their toll. Yesterday with my good friend Steve's help and guidance we spent the day changing the timing belt and water pump on my Miata. Not quite as bad as I might have thought but I'm greatful in only comes around every 60k miles or so. Back to the Panther F. The following photos show the engine/transmission assemby completed and fully mounted in the lower hull. The modifcations to the final drives are complete and I've also finsihed modifications to the rear plate and exhaust system to make it functional. Today ( this afternoon) I hope to build the exhaust manifold.
I will continue a while longer on this model but need to return to the JagdPanther as both this model and that one will be just about equally developed shortly so while I make parts for both the common ones will be easier if I would be able to make two sets at once. Beyond that I will breal in a week so as to better prepare the models I hope to bring with me and run at the BAT battle day at the end of the month.

The beginning of the exhaust system is shown above, I may make a slight extension to the exhaust manifold to ease the job of the silicon tubing between engine and manifold. I will make the flame suppression fan-like inserts for the exhaust stacks. I will probably do a bit with the plumbing and perhaps mount the throttle servo but I need to get to my Battle day models for some prep. Next challenge isn't even one of the models it is what to do about my website's disk space for I'm almost out... Jerry 12/15/2008
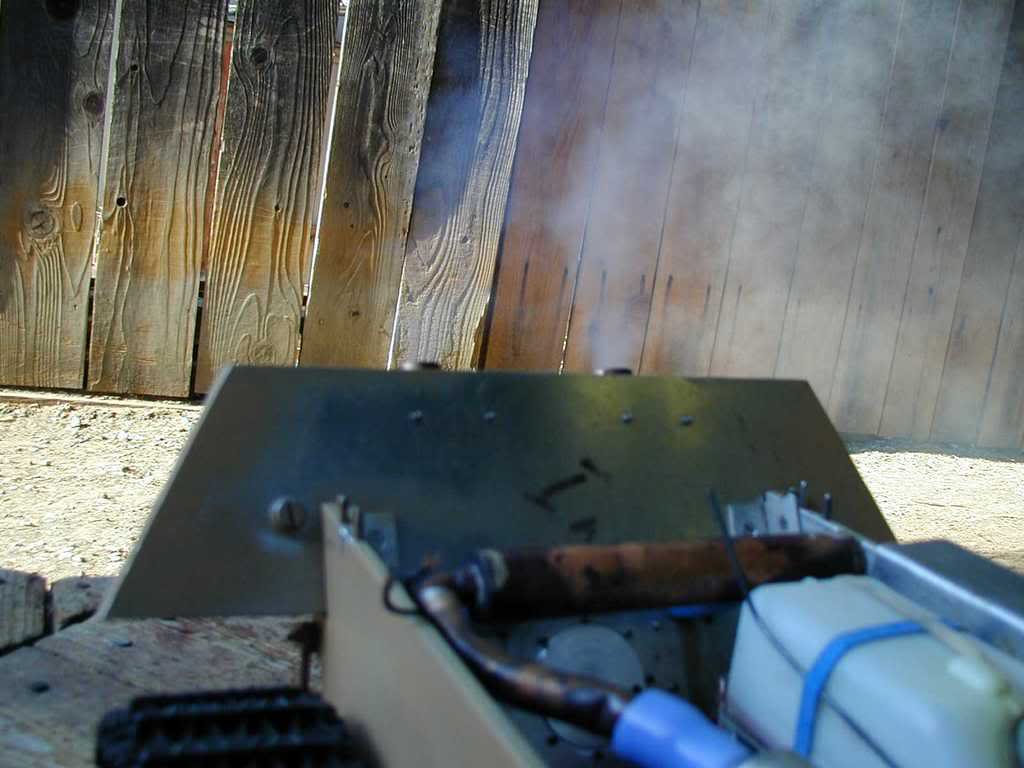
My regular work once again took center stage over the last few weeks, the financial sector's ills demanded more up close and personal time to manage our apps which kept me engaged well into my modeling time. Moving right along I've made the Flammvernichter -like inserts for the exhaust stacks. See photos that follow
My first test
09/29/2008 I just had to test this. There have been two unknowns with this model: 1) this is the first time I've actually modified a standard Webra 6,5 / .40 "Blackhead" into this configuration and I didn't run -test it along the way. 2) this to me was a crucial feature to prove out as this model has this in common with the JagdPanther - the Flammvernichter(sp?) type exhaust stacks. My uncertainty has been how the engine would cotton up to the stationary fan-like vents on the top of te exhaust stacks as they would undoubtedly offer up restriction to the exhaust gas flow. I ran the engine up for about 5-6 minutes burning through about 180cc of fuel at mostly 1/2 throttle. So far so good I didn't detect and overheating nor poor throttle response. I still harbor some uncertainty as to how long they will last, if the pressure from the exhaust stream at high power will bend them or will the exhaust stream prove to be too harsh an environment for these relatively delicate parts to survive in? Time will solve that mystery. Despite the fact that the carburettor settings were just rough it worked quite well! So onward we go...
A test clip is here:
It's high time I return to this and my other projects. I make slow progress in the best of times and these are not. Sadness underscores my efforts these days. I'll leave it at that. I hope to have the presence of mind to do right by these projects.
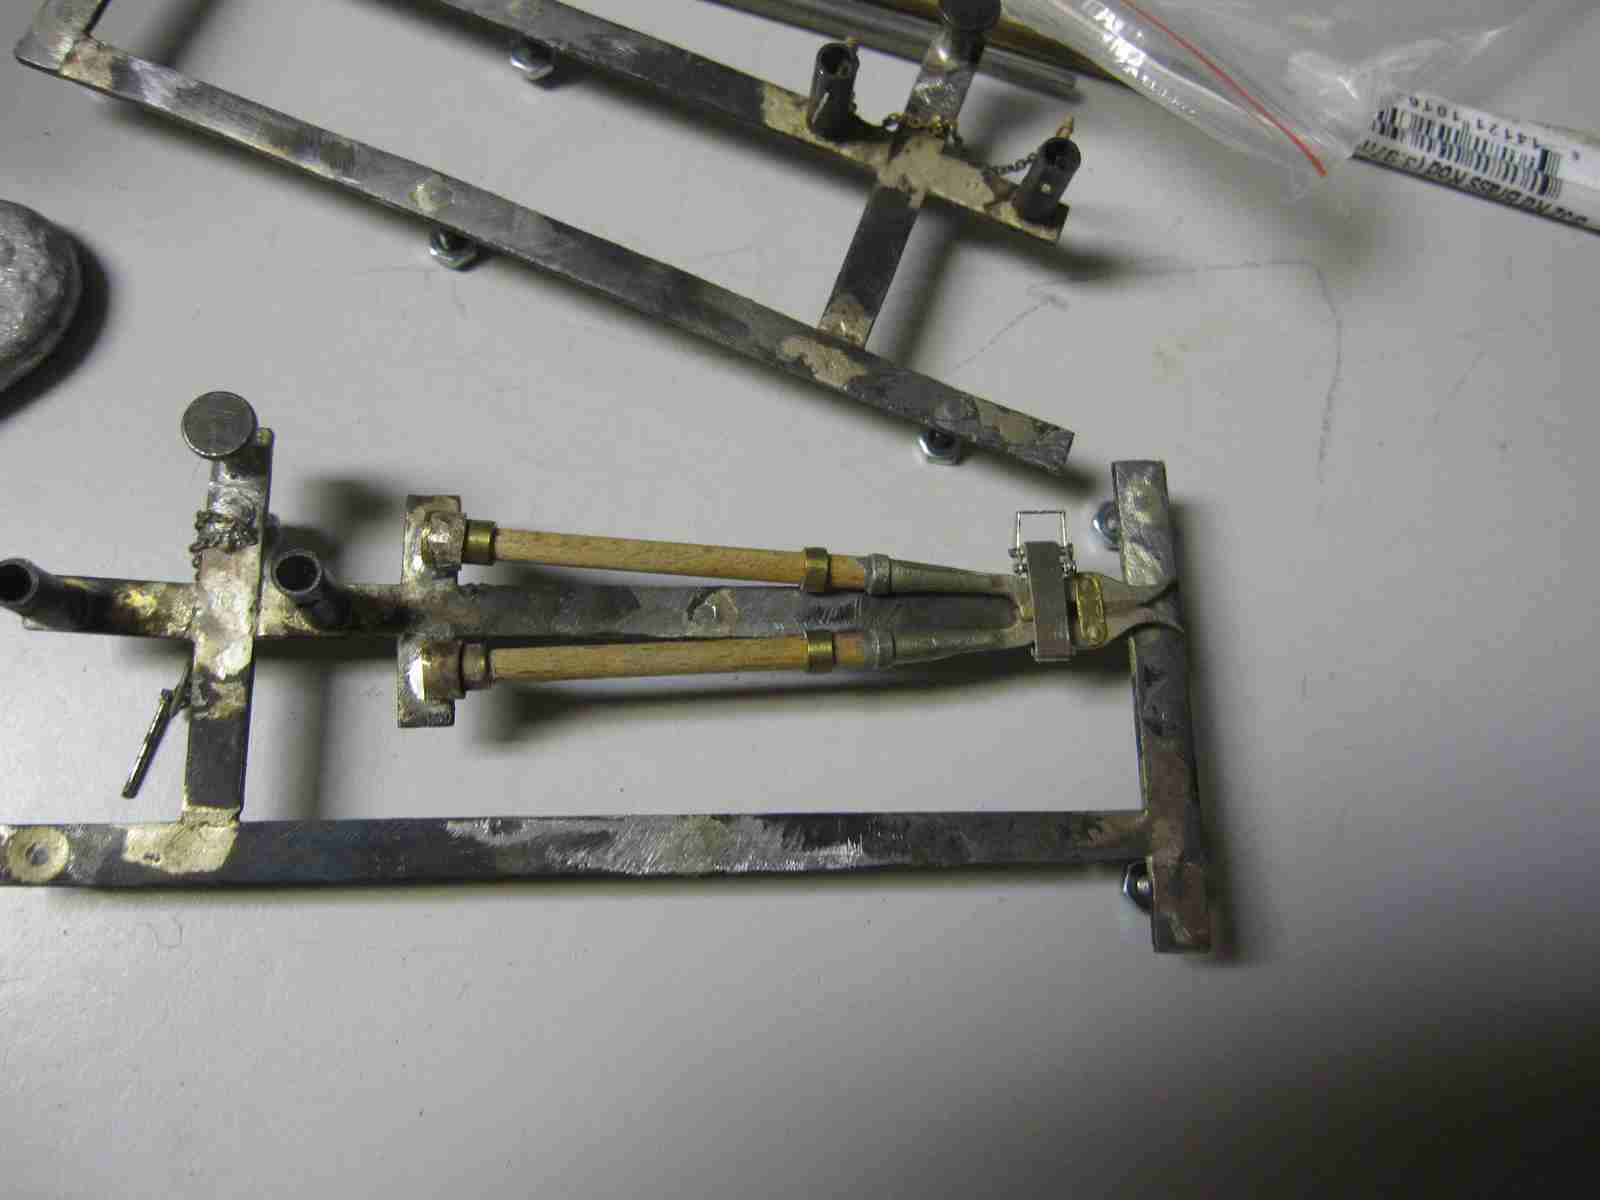
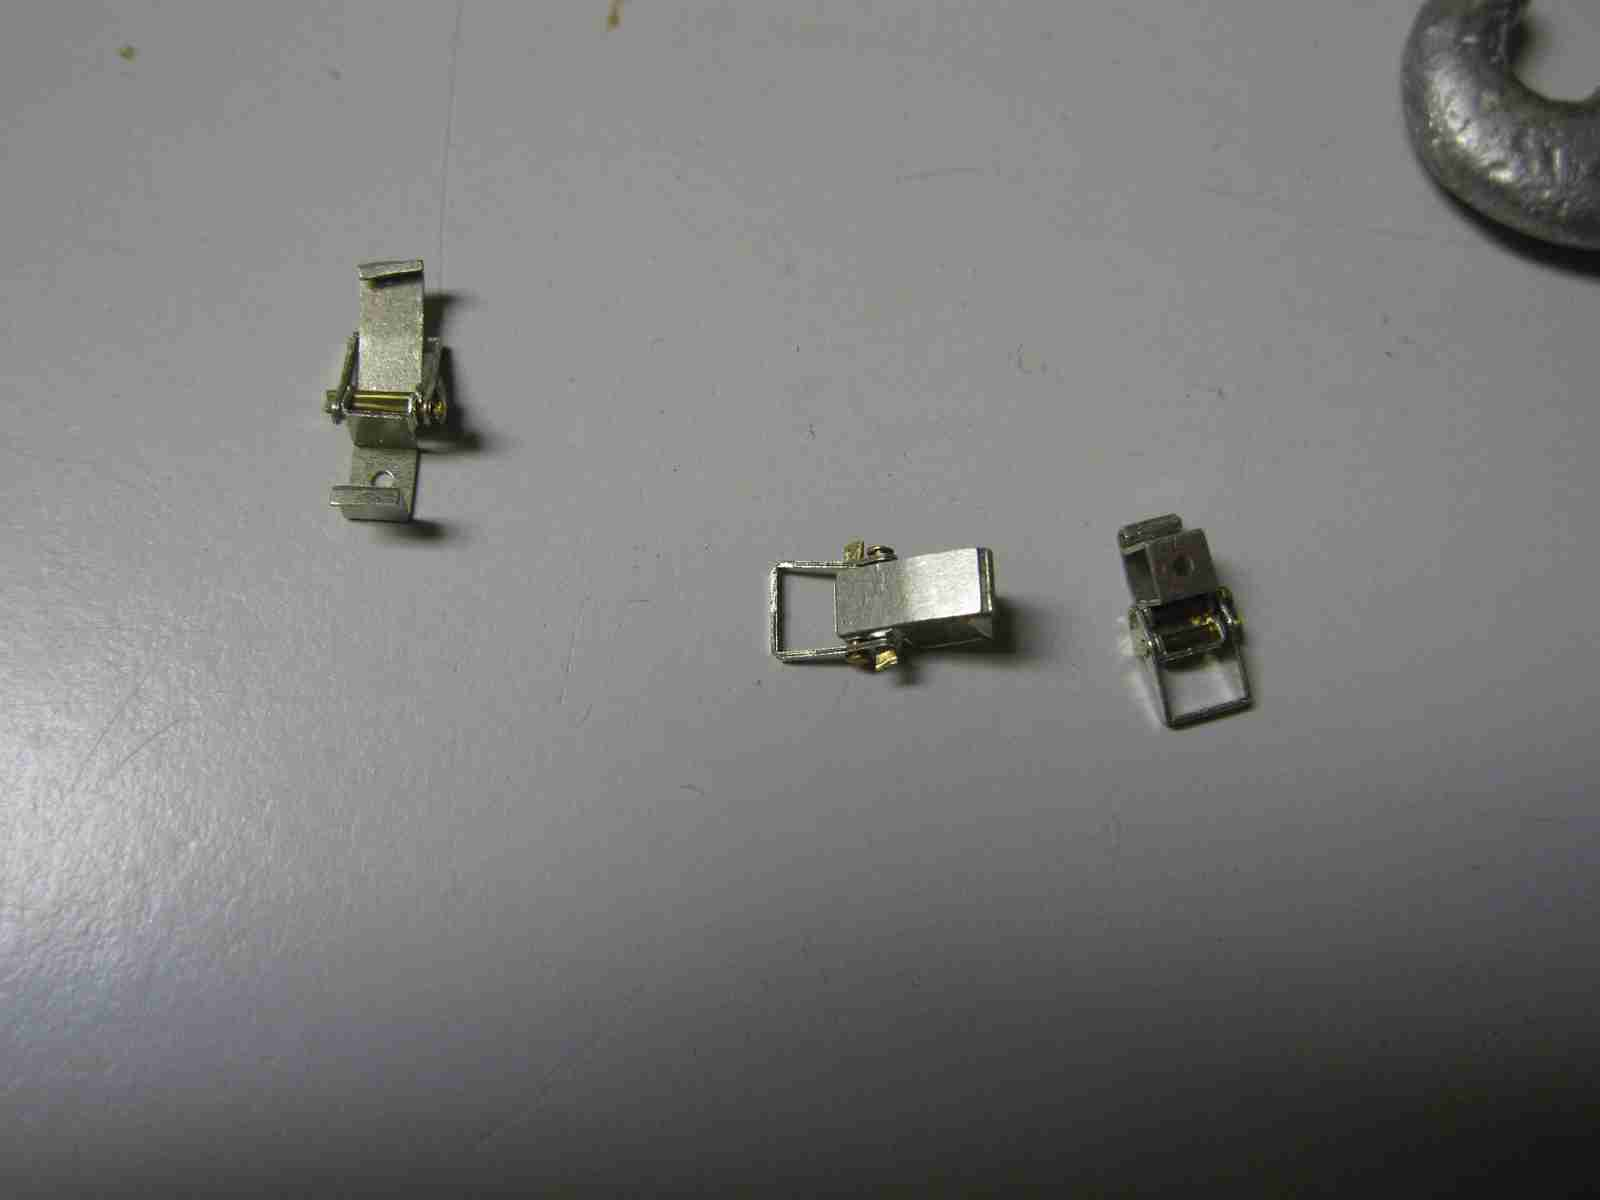
A positive note among the negatives is the recent arrival of long awaited ( > 1 year) arrival of tool clamps.David of Armortek in the UK was the champion agreed to make these for me. See images of these clamps below.
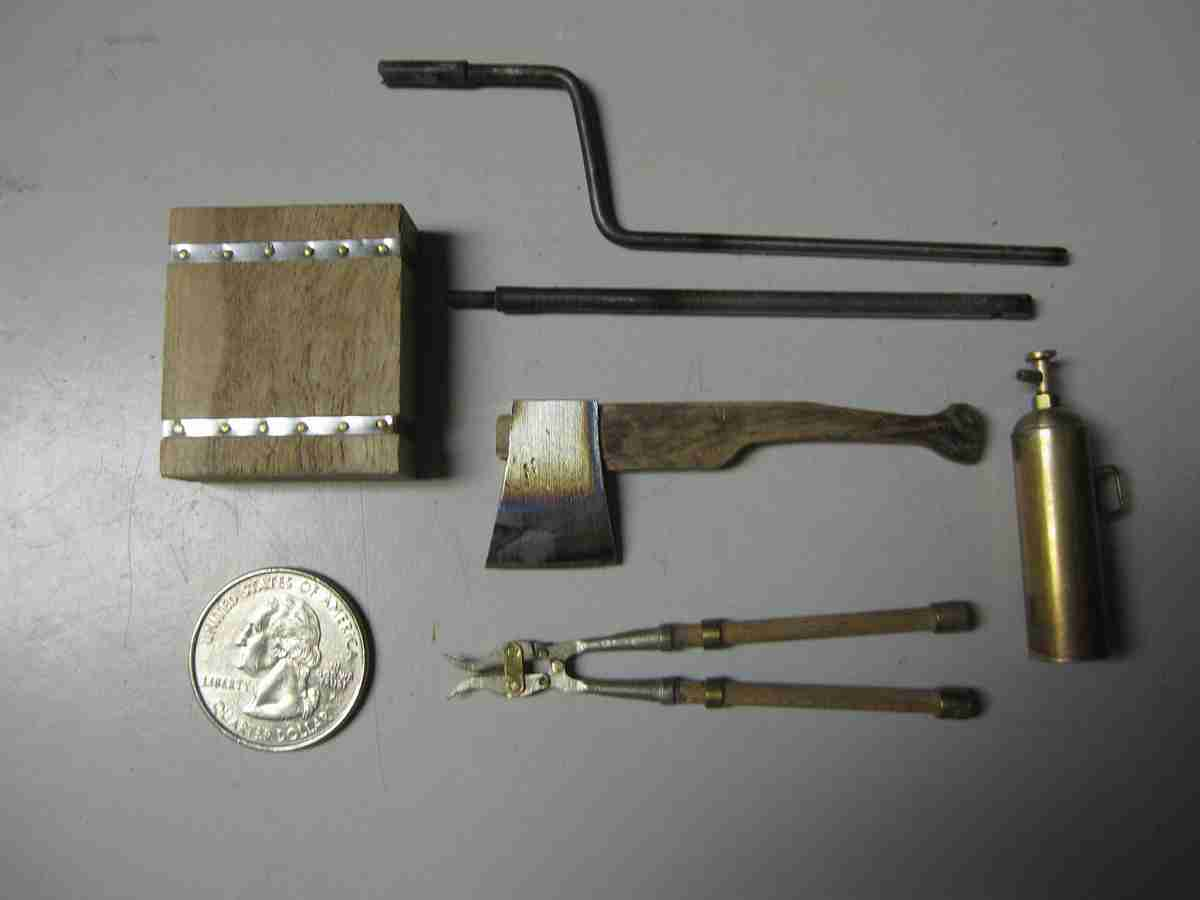
For years I've felt a certain amount of "peer" ( as if I really have any ! Oooo hubris alert!) pressure as it were to do away with the ghastly attempts at lower level detail I've done in the past and do up the tool stowage that most all German vehicles carried on a level more up to current levels. I'll say it straight away that there still is a level beyond which I'm not willing to go. My tacit goal to finish these within my lifetime (!) so that I may get some enjoyment from them remains intact.
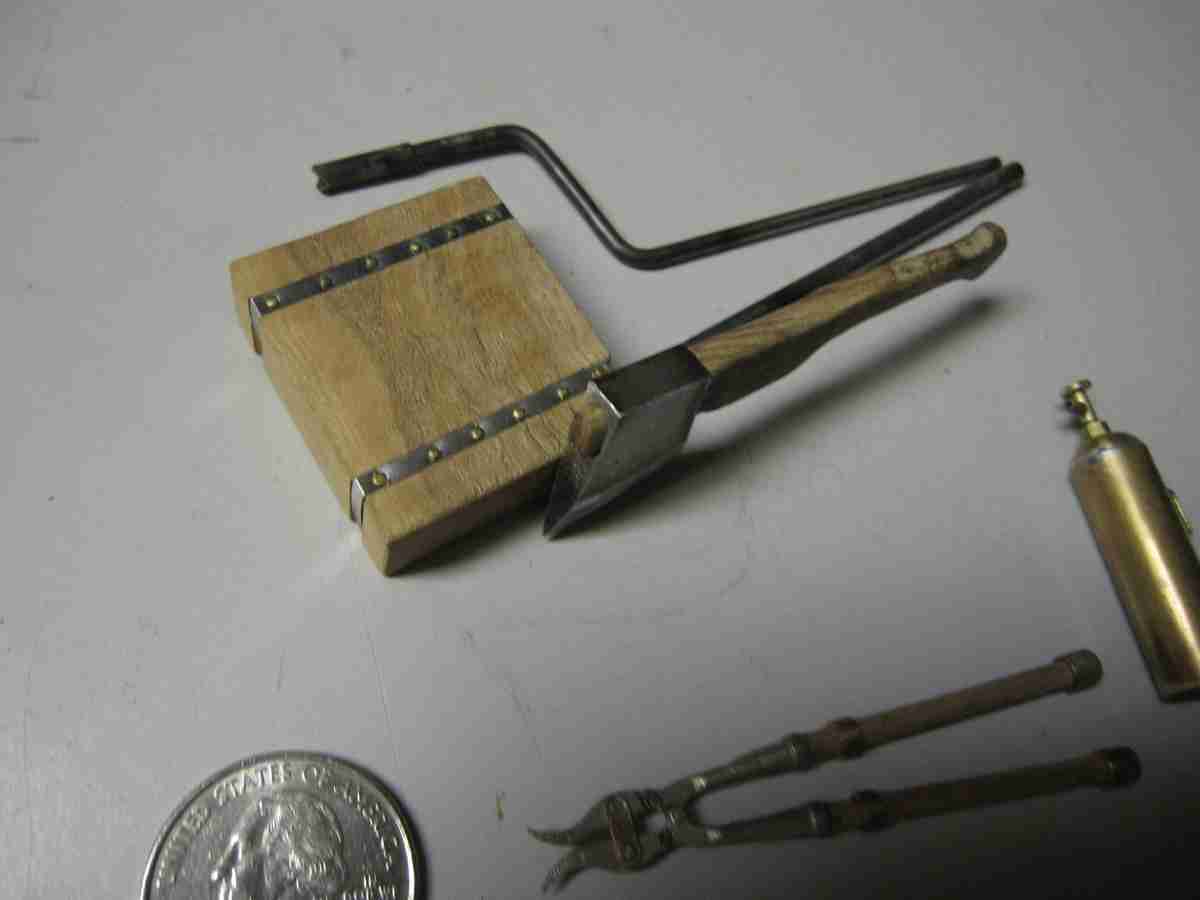
Consequently I can now complete this model and my JagdPanther. As may be seen I've partially stripped the Panther F and it's brother the JagdPanther is just behind. The task is daunting as there are a number of mostly details that I will be improving beside the tool stowage. I am trying fiercely NOT to look at all the work that remains and just get on with it. The tool stowage frames are brazed steel which I had to cut from sheet.Most everything to be attached will be soft soldered so as not to overheat delicate parts. The frames are a bit rough and will be brushed a bit but the painted roughness is in keeping with the overall vehicle. See the wire cutters loosely set with clamp on the frame.in the photo above.
Tools - need to have the right size for the job...
I'm trying to keep the intent of these models claeraly in mind. First and foremost they are supposed to be enjoyable,that enjoyment being derived from both building and operation. All that said I find myself being less and less satisfied with the relatively crude detail of yesterday that was the norm. Many of the Models I have are Maier Panthers or Maier Panther derivatives/ copies. Maier pionneered the model in the mid 1970s, the copies and derivatives came later. Maier I believe based his initial model on the prevailing 1/35 scale models of the day although I never asked him this. Over the years I became aware of where his models departed from true scale. I have no way of knowing if these concessions were made in the interest of strength or they were due to Maier's source material not being accurate. I don't know that he didn't at any time but Maier never mentioned that he ever went to an original full size machine to take measurements and contours. There are some variations in contours that I feel were the direct result of his source which I believe was in part a 1/35 scale Tamiya Pannther A; This is by no means a condemnation or accusation; and as controversial as it may appear it is a technique we all use; I have used 1/35 scale models for checking dimenstions and angles; supplimenting any drawings or photographs that come to hand. The only sadness in this propostion is that the models of the mid 1970s were not as precise as the current offerings. And again please know: this is purly conjecture on my part and is by no means to be taken to represent fact.
Assuming that my hypothesis is in part correct, the level of detail that is available of a 'stock' Maier Panther, and for many copies/derivatives is for lack of a better description crude. It is this crudness that I now find myself at odds with. The lastest thing to raise my ire are the armored periscope covers that you can find all over Panther types. A Maier original is a cast lead affair with a bottom; it rather looks like a letter "D". To correct this I decided to replace them with pressed steel units. What follows is a series of photos documenting this process.
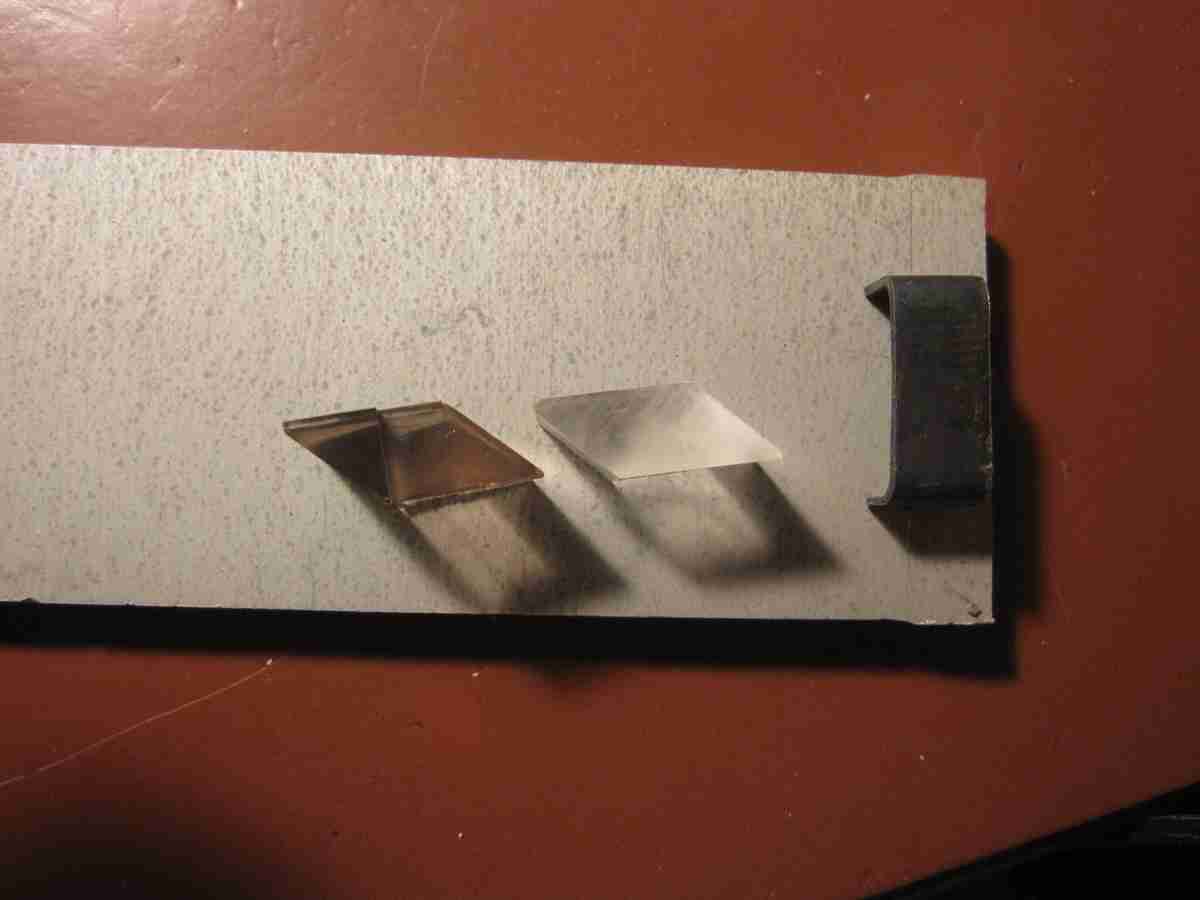
The first photo shows the die I made to press the .042" steel strip into the cover. I later braze 2-56 screws to the center of each 'leg' to secure the cover to the deck plate.

This photo shows a piece I made to test the implementation and serve as a template for making the required mounting holes.
The cover and two periscopes. The darker is one that was sent to me years ago and never used. As it turns out I no longer remember who sent it to me and if any more might be purchased.I decoded to first try to cast these with a slight greenish tint but that proved impractical. The casting resin, unlike others I've use from Tap Plastics was a 1:1 ratio affair which I found more cumbersome to use than others so I decided not to use it. I decided finally to use 3/16 Acrylic sheet, again from Tap. I cut strips, machined the angles at top and bottom then cut them to size.
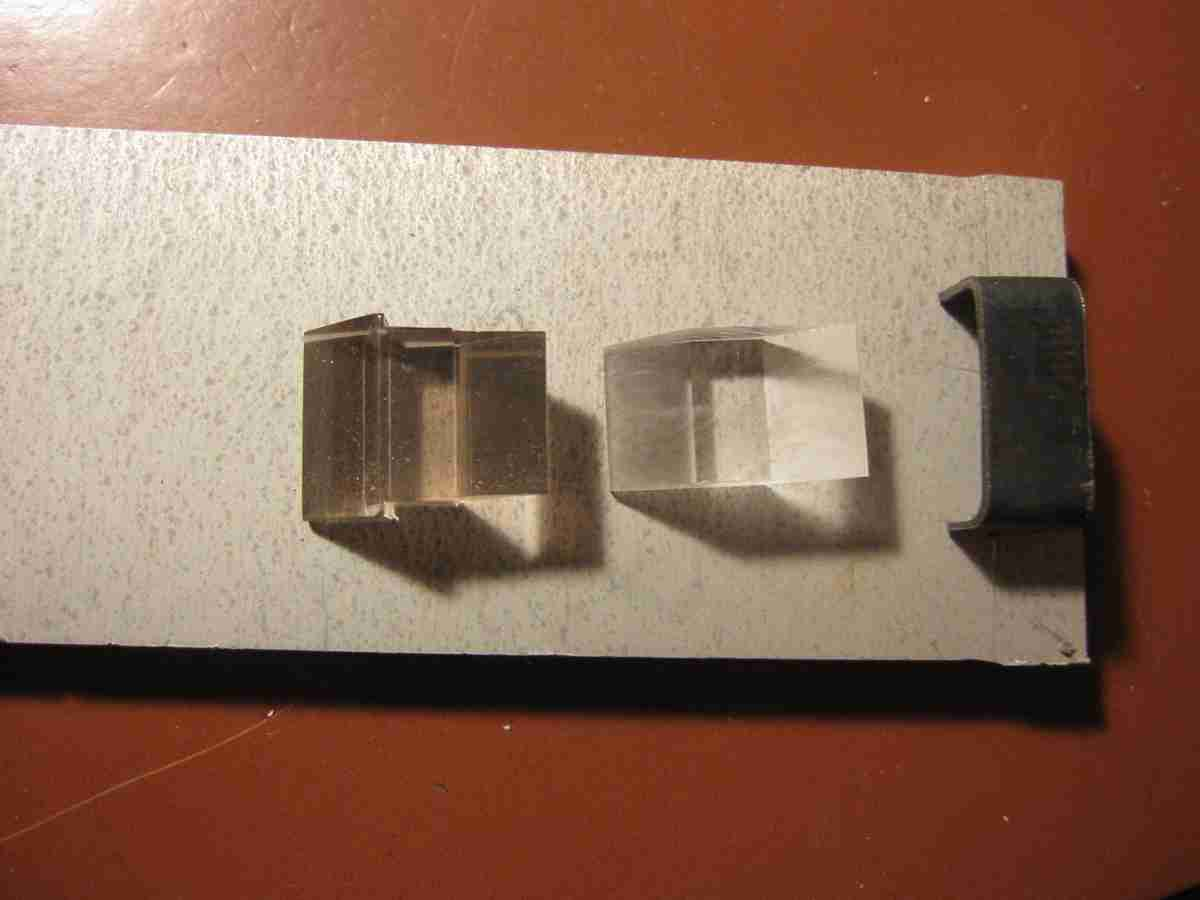
Another view of the periscopes
The test block with Periscope mounted

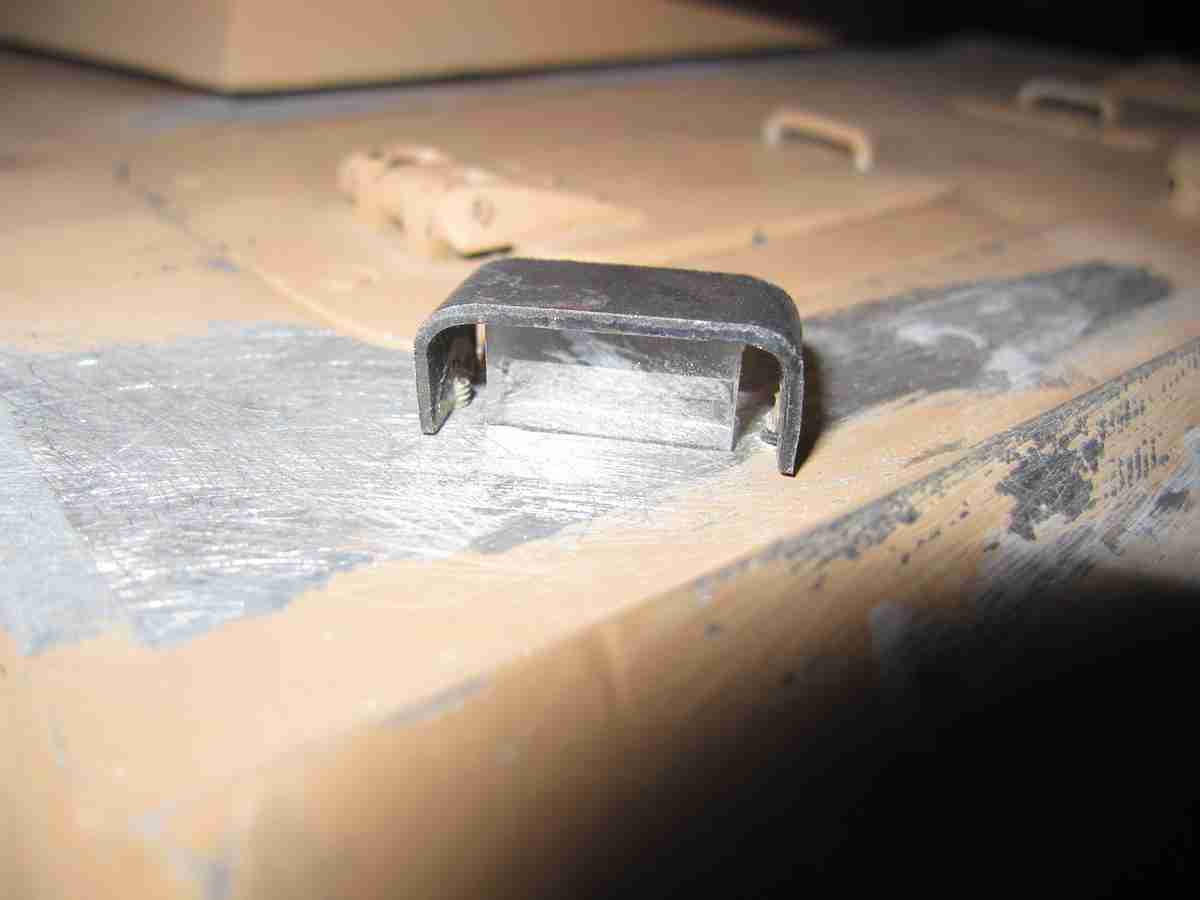
The rotatable drivers scope for the Panther F same as the G version

Top view rotatable drivers scope
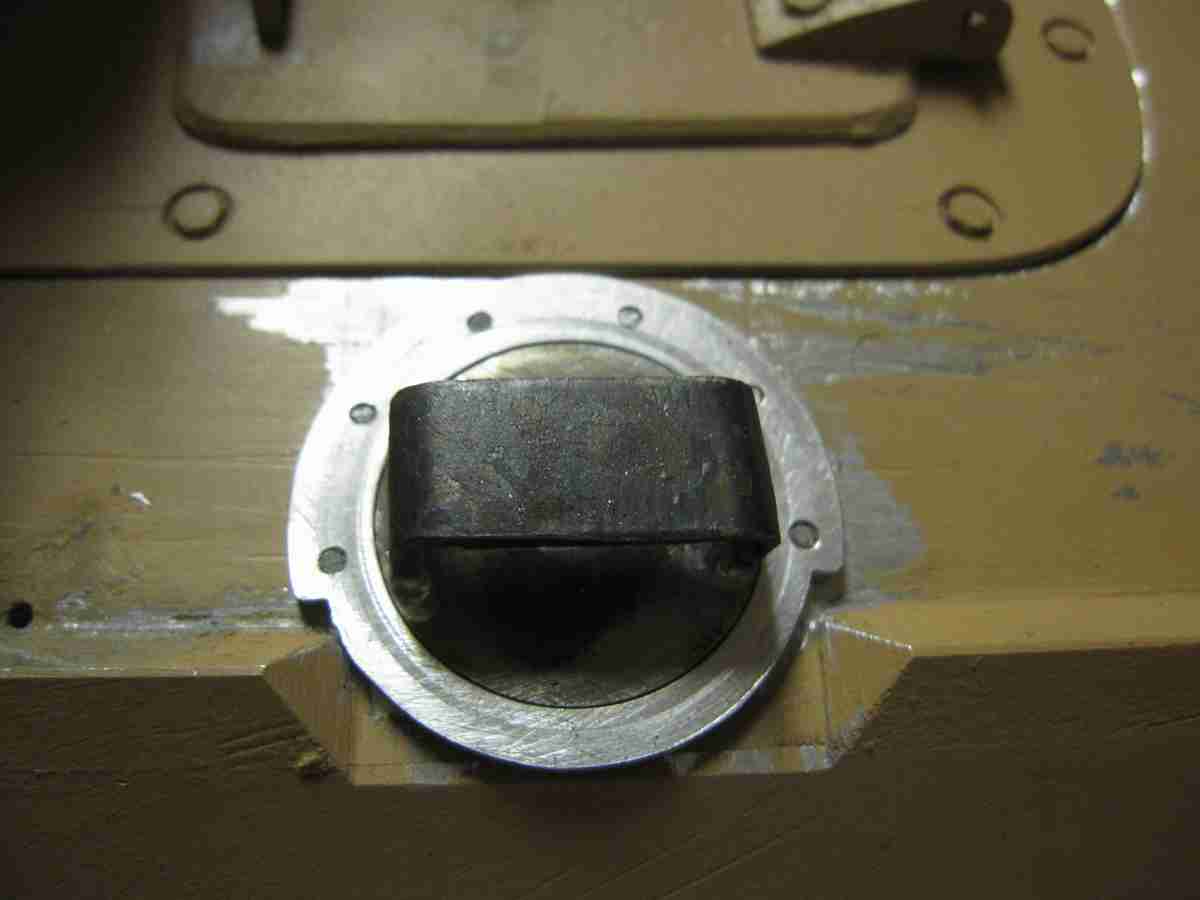
Radio operator's scope. This is just the initial fitting, I will use some material to simulate a weld and conceal the screws brazed to the cover bottom.
The driver's scope from further away
I'm really wanting to make serious inroads to finshing this model and it's stablemate the JagdPanther. They've been here so long!. One of the urges I'm fighting is that which makes me want to retrofit the lower level detail to all my models at once. It sounds foolish but I when I look at a model from years past it's rather sad by comparison. The trick must be to establish a limit certainly but just as with potato chips, soda and ice cream it's easier said than done. I don't need to say that the more detail I drill into the longer it takes which partially explains the realtively long gaps between updates to this website!. Jerry 6/1/2013
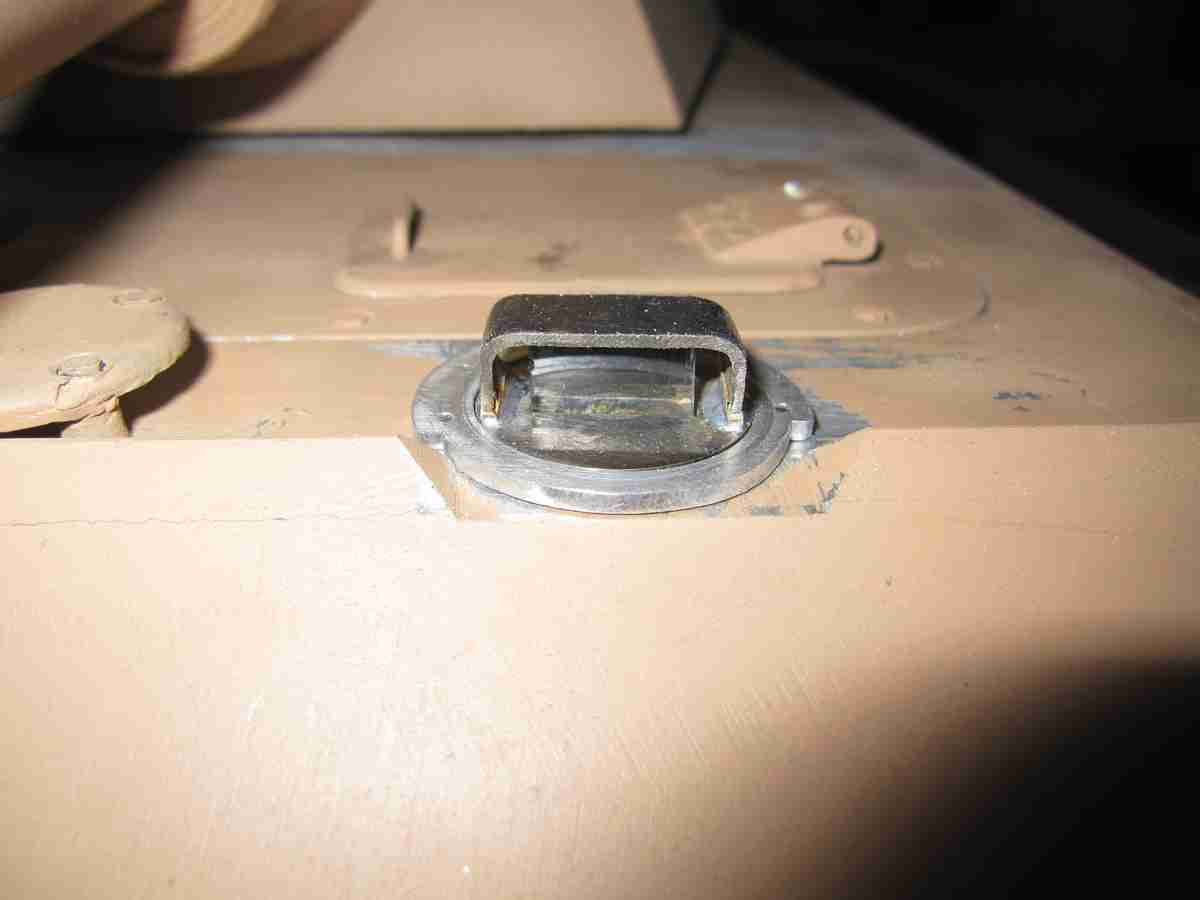
12/08/2013 I'm including a photo of the rear engie deck as I've been spending a lot of time on this. Actually if I were to spend a solid 2 weeks on the model I'd probably be able to finish all that remains to be done; the challenge is getting myself to spend those 2 weeks. I've built and installed oll the engine deck hooks. One thig that can't be seen is under the left ( coolant ) filler cap: I'll be using it as a place to refuel the model. I attached a Du Bro quick connect fuel filler valve under that cap. I plan to run plumbing to it that I can easily connect as I ready the model to run; This will enable me to re-fuel the model without removing the upper hull. I'll take a photo of it for next time. This is pretty much the same things I wrote regarding the Panther F and JgdPanther as I've been working the same components for both of them as pretty much the same time. Additionally I moved the engine bay hatch as I did for the JadPanther about 3/4 of an inch forward. It improves the overall appearance of the model.
I'm probably going to revise the engine bay door; I don't believe the aircleaners were situated side by side in this version of machine.
Slowly going to get back to working on this model after bringing the JagdPanther to near completion a while back. Hopefully even while my shop is cluttered I can sill make decent progress on my projects! I noticed I'd had written a lot about selling Sonoma house here and while it was a very annoying experience it really didn't belong here so I removed it all. Jerry 11/2/2014 -11/22/2018
I'll probably begin work on this project again even though my focus has been on the PZIII project. I must confess I'm a bit hung up on the Pz III idler rollers and need to get back into the way of thinking to make progress. 02/22/2018 - Jerry