The model from 'heck'?
Before I go into the details of this project there a bit of background that needs telling. The basis of the StürmTiger model is a number of parts that wound their way to me some 10 years after they were originally sold. They were in terrible condition. They have needed a lot of cleaning, machine work and modifications just to get them to the state you see below. My plan is to power this model using the very early simple 3 speed gearbox from Maier described elsewhere. I have set this page and the photos firstly to describe the progress of the construction.
The relative height of the swing arms ( not incorrectly so) required the the swing arms be somewhat canted down gradually so the they may be captured by the opposite torsion bar block.

Arrrrgh!
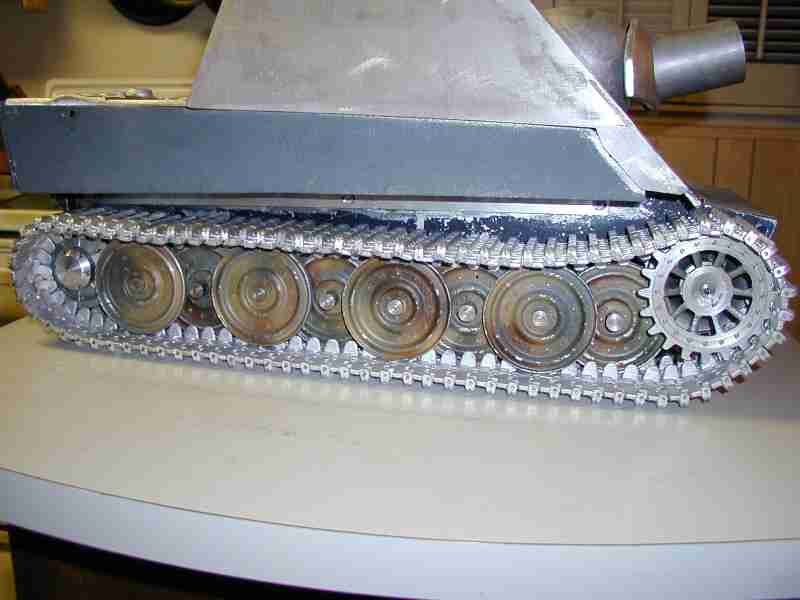
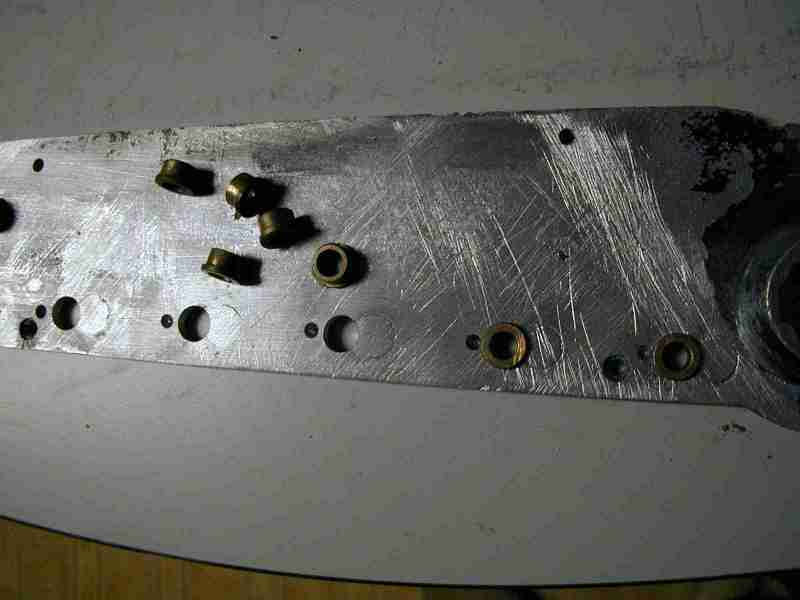
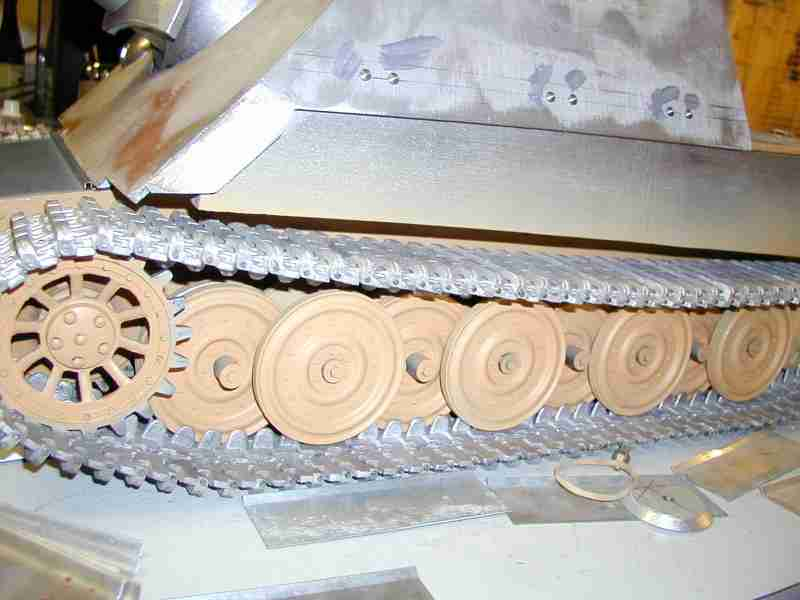
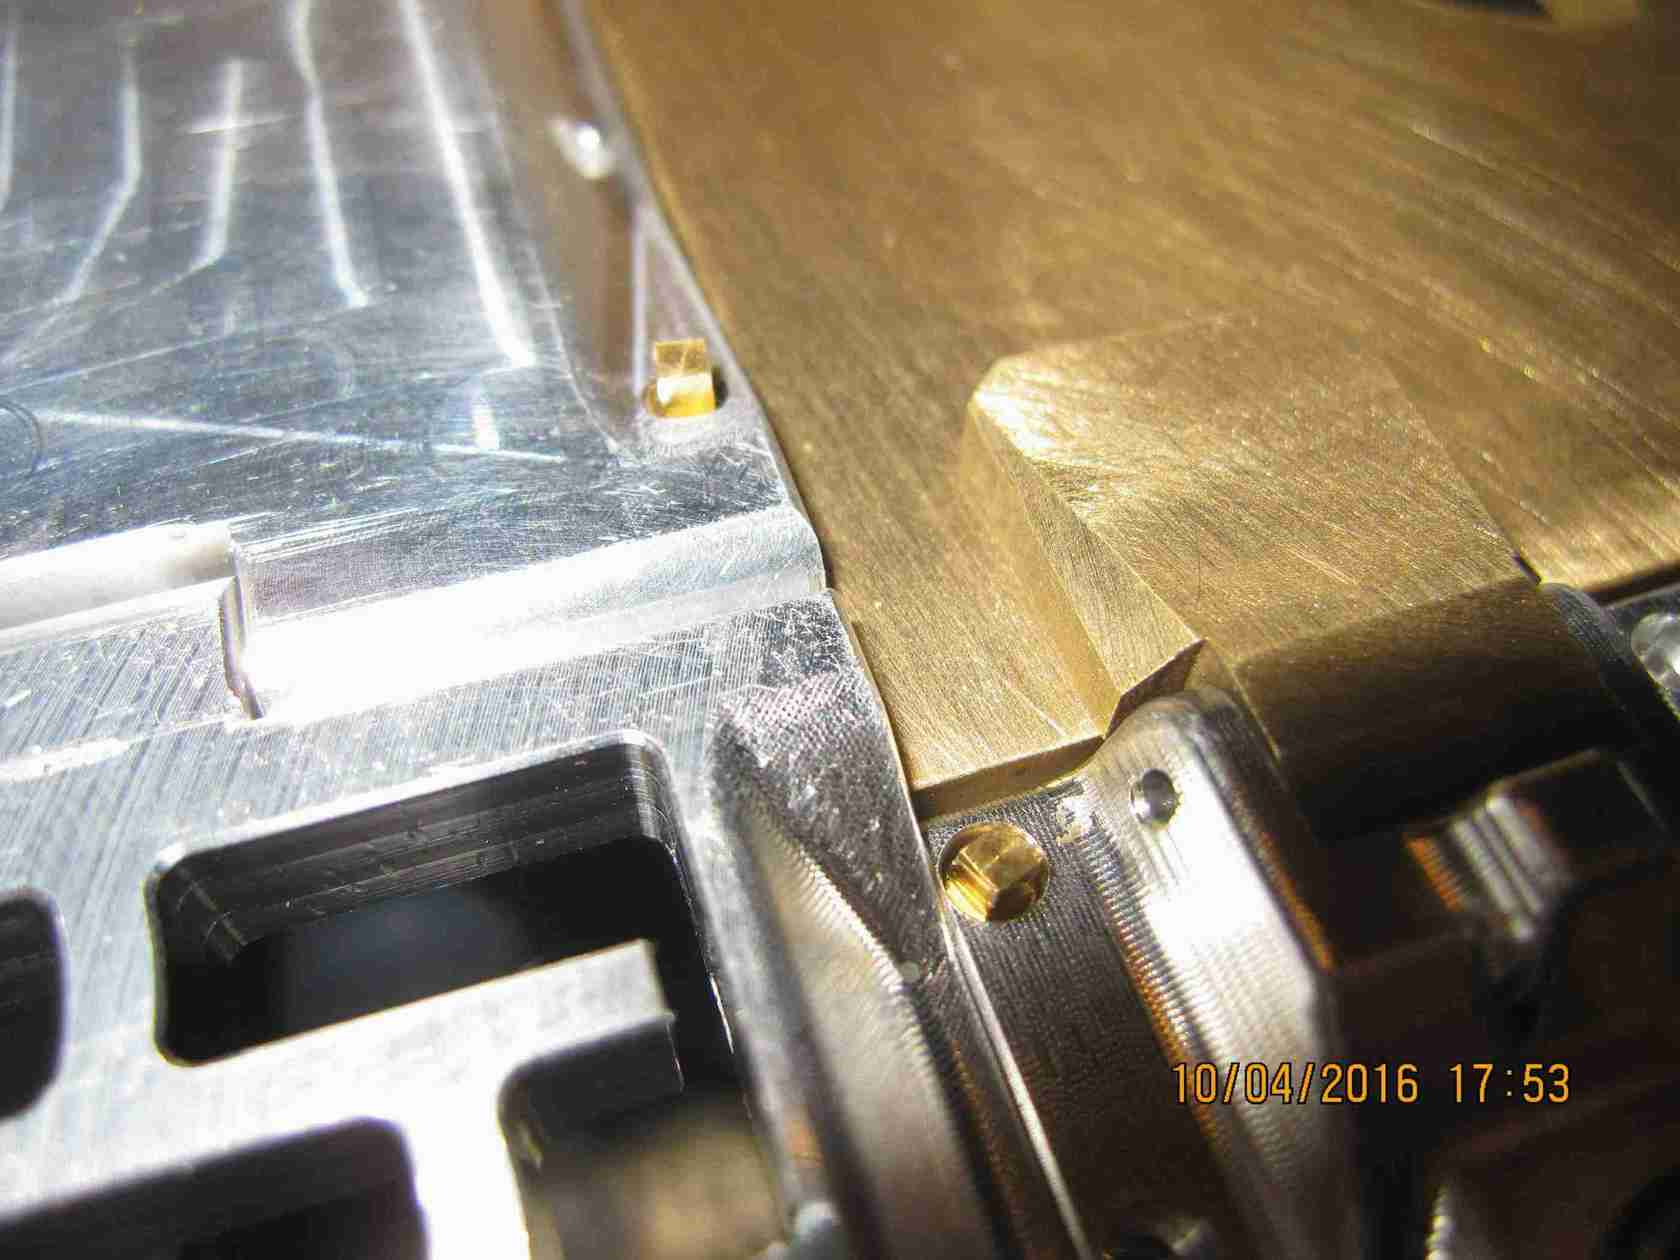
Have you ever really busted your butt working on a project only to find an obvious assumption was wrong? Well here's the example. I ass-umed that the basic layout of these parts was correct. I mean they were originally supplied by on of the 'leading' makers of 1:10 scale model tanks right? Ehhhhhhht! Much to my horror I discovered, while trying to reconcile the length of the right and left tracks and their alignment relative to the drive sprocket and rear idler that one side was offset from the other by more than .375". To understand this look at the swing arms in this photo:
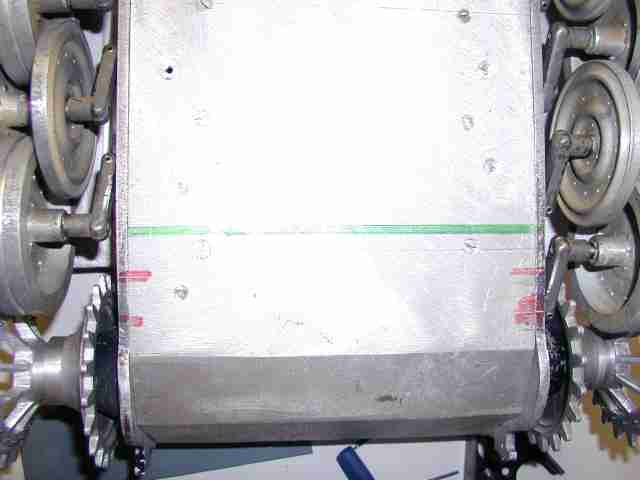
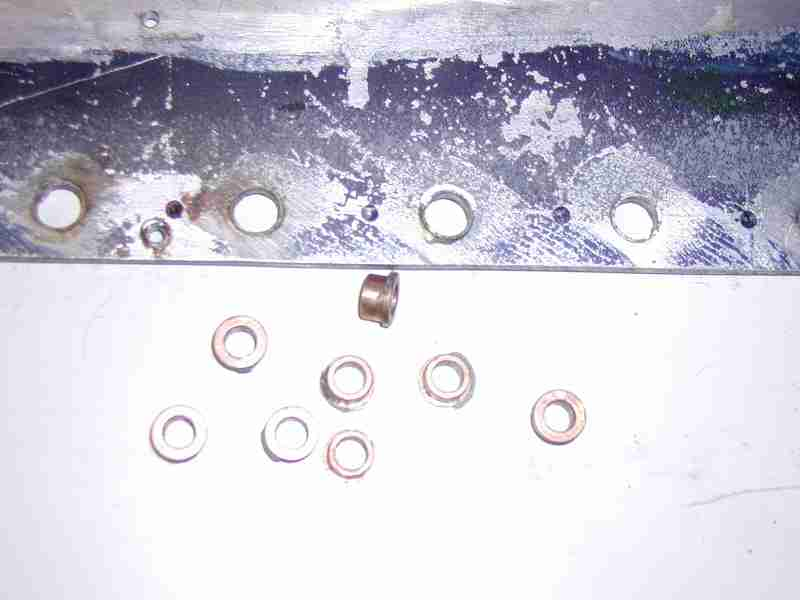
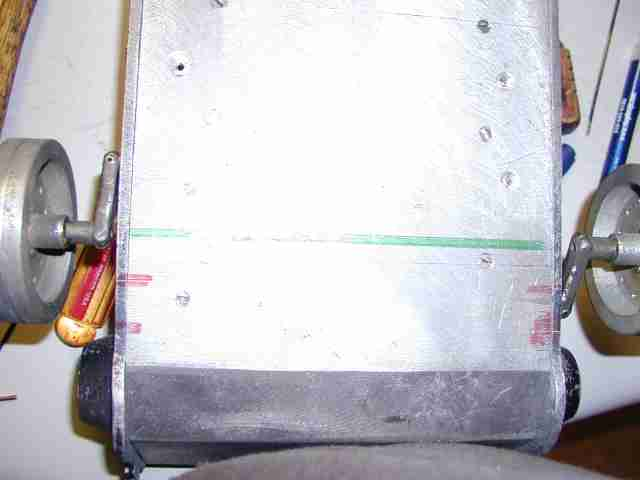
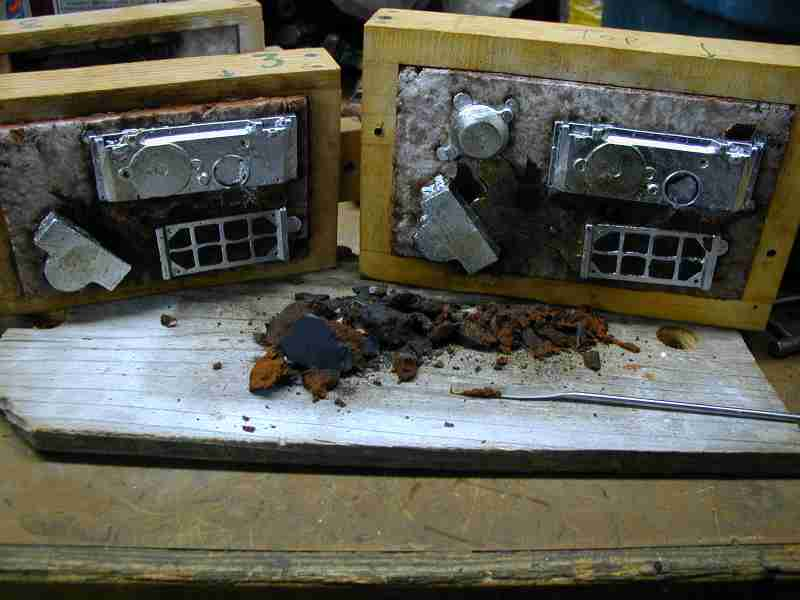
You see, the way the swing arms point in opposite directions left and right(one 'points' rearward the other points forward)? Well when the corresponding arms left to right are set at the same angle their centerlines are supposed to be in line. Well as you may see these did not and by quite a bit. I drew the green line across the hull bottom; and as you may also see somebody else drew the red lines as if they knew the alignment was off. Arrrr! What to do? I had a decision to either make a new plate or fill the wrong holes! I didn't want to make a new plate or at least only consider that as a last resort ( heck I'd paid for these parts ). Now I am not a cast aluminum welder. That left a variation of my rivet-like hole filling solution. I said to myself go for it! What is the worst that could happen... I didn't want to use a hard rolled aluminum alloy so I looked around the shop and found some cast aluminum risers from one of my own casting sessions that seemed close to the size I'd need. These risers are the reult of a pour; they're the air channels that fill up with metal when the mold cavity is full and help prevent certain bad things from happening. Anyway I disassembled the tank, knocked out the bearings for the swingarms. I bored the holes out slightly bigger still and chamfered both sides. I turned the riser to fit the holes, cut small sections to fit then proceeded to fill the errant holes. Here is the progress first pulling th ebearings then filling the holes:
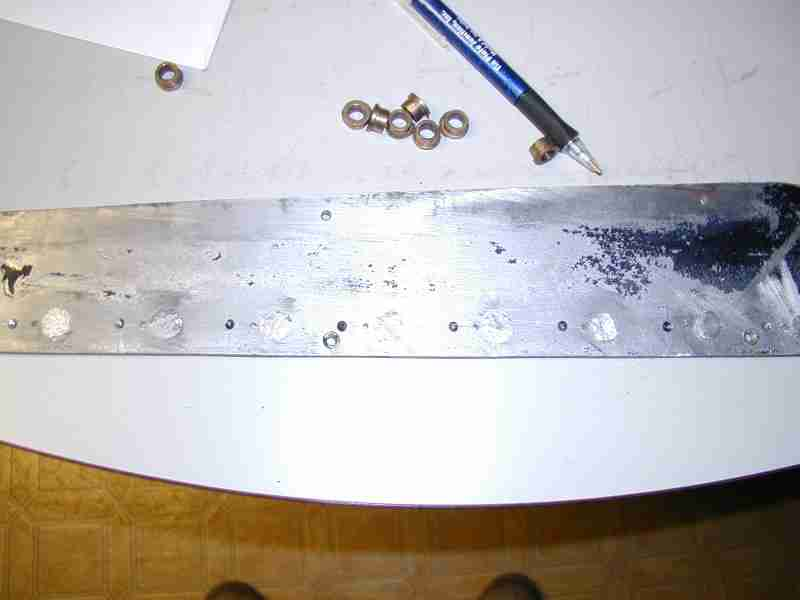
Next is filing the holes flush with the front and back sides:
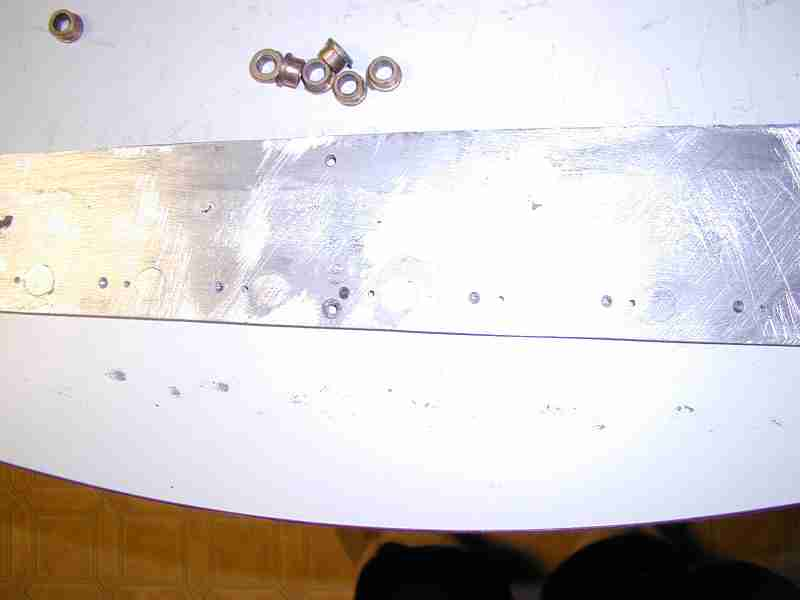
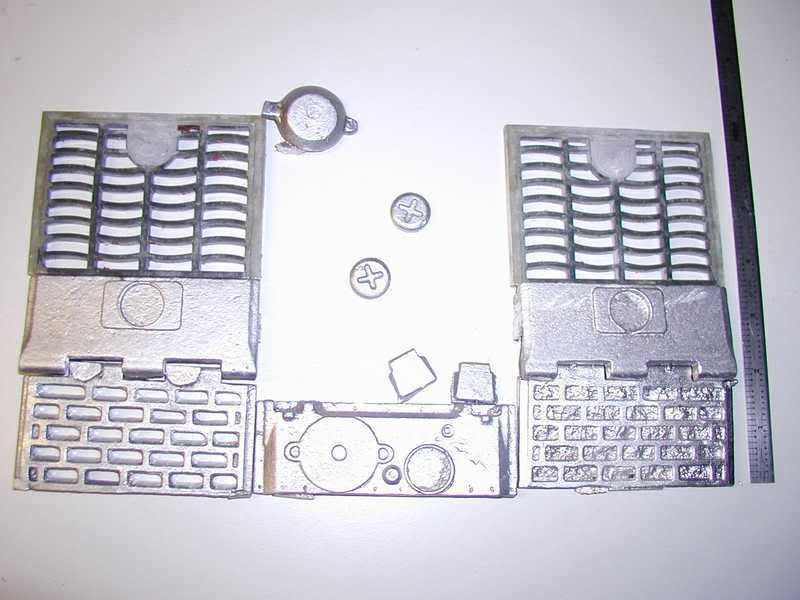
Next is making the new holes offset the appropriate amount!:

Replacing the bearings, you can see the old holes. The plugs are captive fron to back and the new bearing only intrudes partially into the old hole radius so I think it should be ok.:
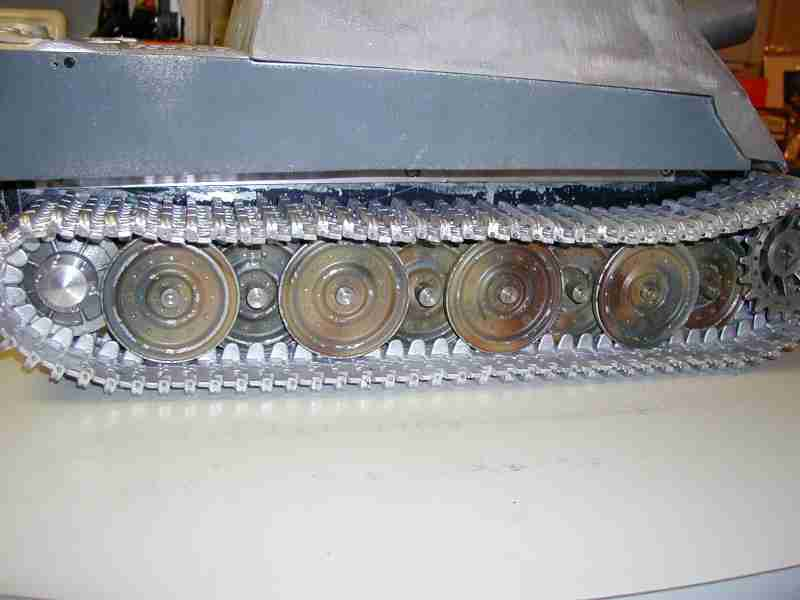
Lastly you may see that th ealignment is now as it should be...:
I learned at least I shouldn't even make basic assumptions when working with an unknown model or model parts. Not only was the alignment problematic from a wheel spacing perspective but the lead wheel intruded far much into the radius of the drive sprocket and looked very bad. I sure could have saved some grief and time. I'll post a photo of where the model is right now. I have to revisit the idler wheel arm I made as I'm not entirely happy with it. However the model will roll on its tracks...Huzzah!
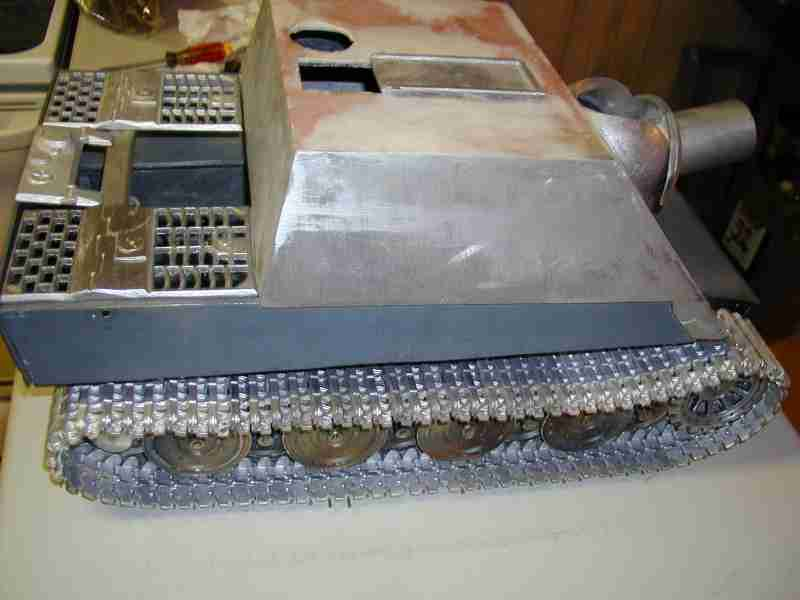
Here it is in July 2006, I've most of the Panther rebuild behind me so I've returned to the Sturm Tiger.
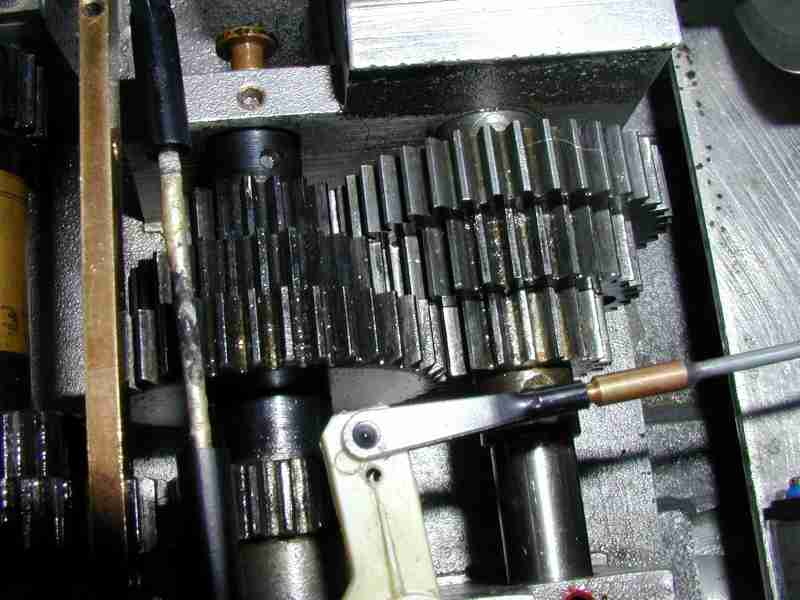
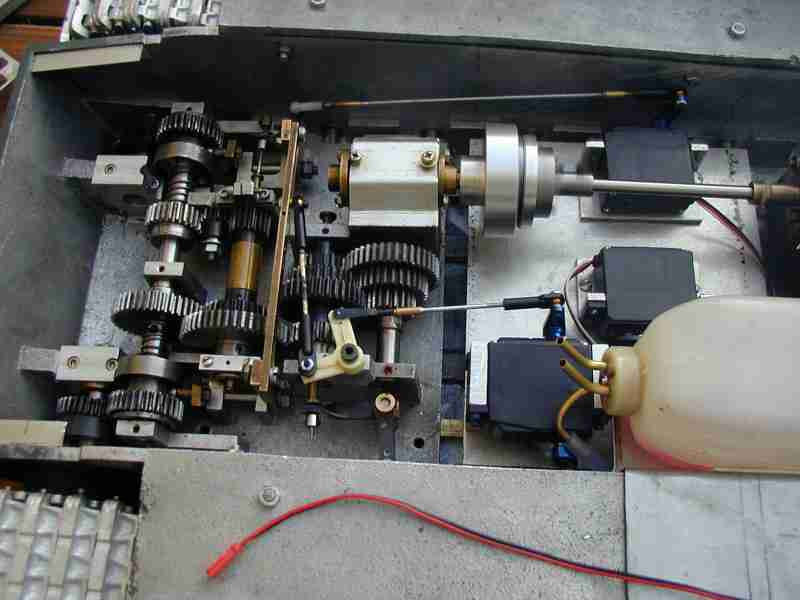
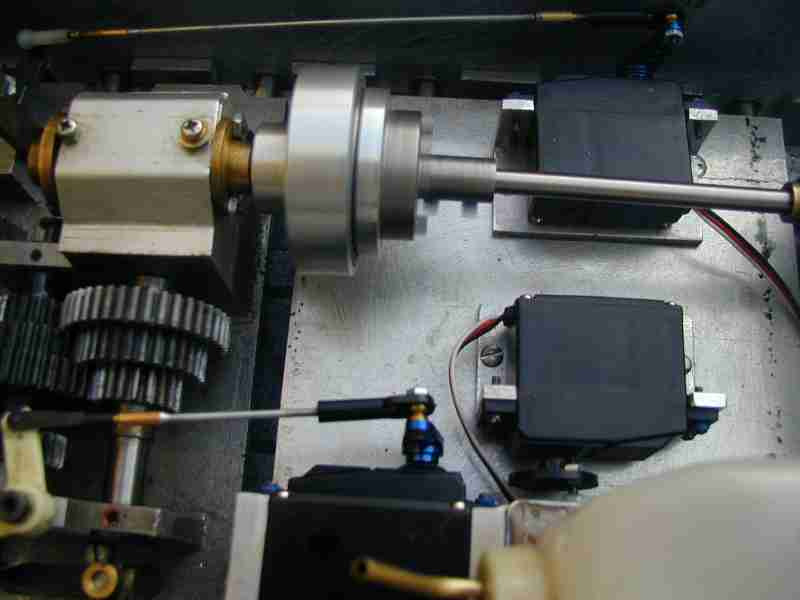
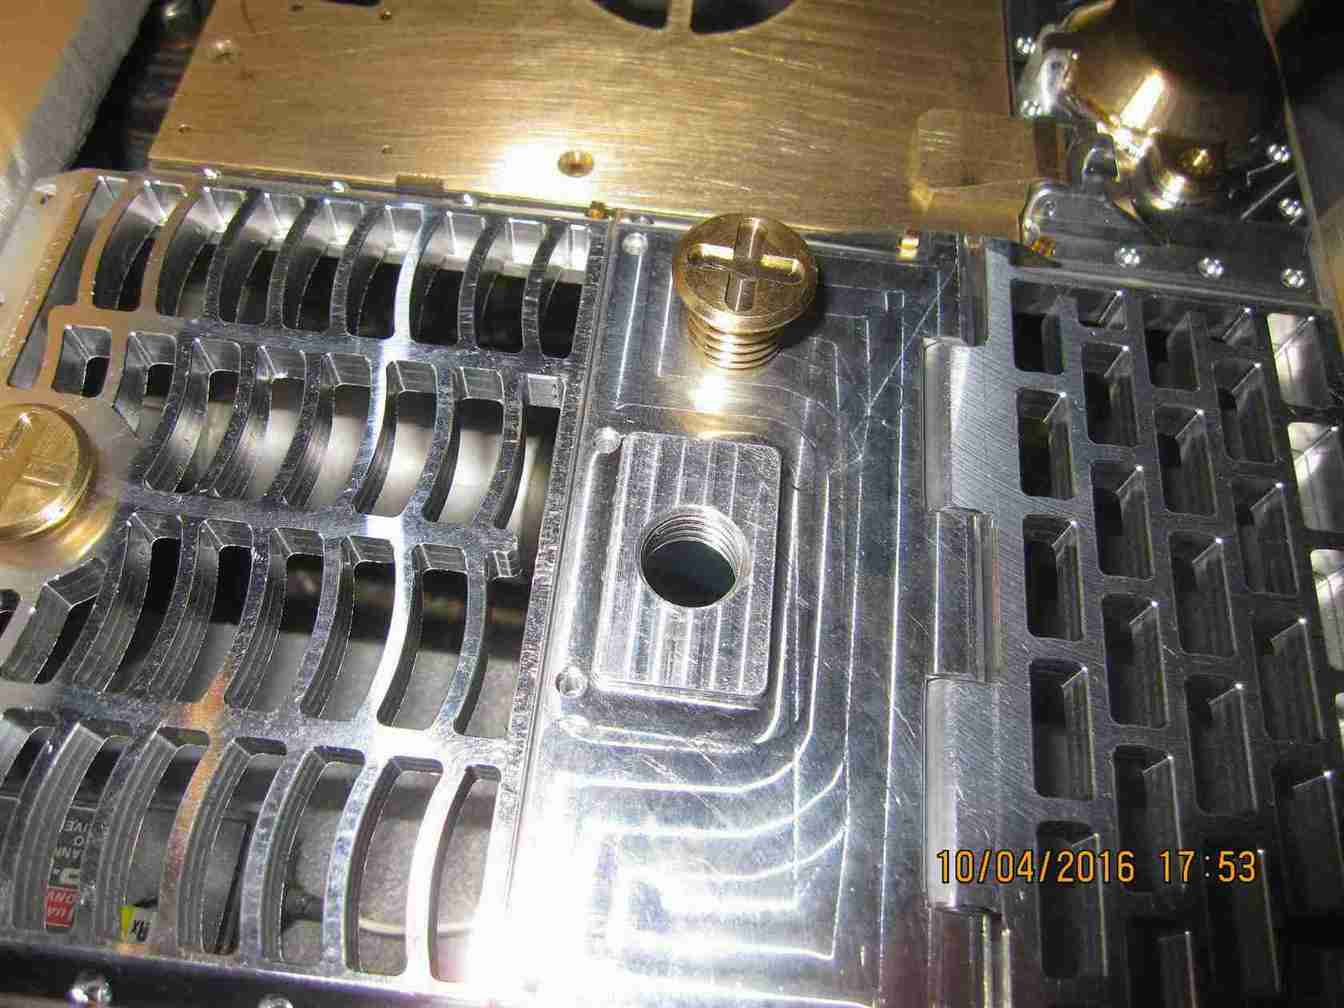
I've spent a lot of time on the rear idlers, remaking the arms and a track tensioning mechanism which is crude but effective. Photos to be posted later. I also spent a lot of time and grief; some choice, unprintable words eminated from my shop in the late hours as I worked on the front end of the model. The Tiger floor pan casting besides being hacked by previous owners ( these parts went through several hands before me and I don't know who did what- I only see the results) is uneven and rough making for a trying job of mounting a output drive with any accuracy. I spent quite a bit of time milling off the areas where the sprocket shafts had once come through the hull sides and had been supported by some sort of pillow block/bearing. I machined all of that away, made new "custom" bearing blocks while attempting to straighten everything out. I had limited success as can be seen; the bearing blocks are dissimilar left to right due to the way the milled floor pan turned out. It was difficult on my small mill to maintain uniformity in the cuts as I had to remove the hull floor from my fixturing and re setit up so I could mill the opposite side. Eventually I arrived at something usable and I proceeded to work on mounting the old Maier open faced 3 speed gearbox. That presented additional challenges based in part on the way I set up the torsion bar mounting and the swing arms. I didn't want to have to mount the gearbox high in the model so I had more machining to do. I milled slots on the edge of the gearbox main plate to allow for the swing arms. Addiionally I made 4 feet, attached to the gearbox bottom with 2 2-56 screws each fastned to the underside of the gearbox. I still will need to make spacers where the screws actually hold down the gearbox or it will warp when tightened.
Below are views of the mounted gearbox

I've corrected the mounting and the gearbox is now firmly attached to the lower hull. I've also mounted the final drive gears to the output shafts and attahed the sprokets themselves to the output shafts. I have to makes the finish pieces for the outboard side of the sprockets, the piece/conoured section through which the armored 'pointy' bolts pass.
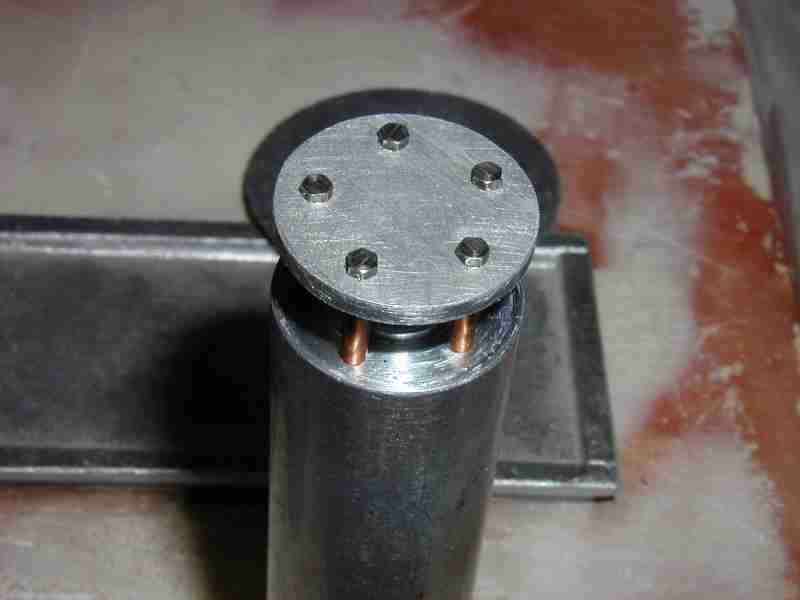
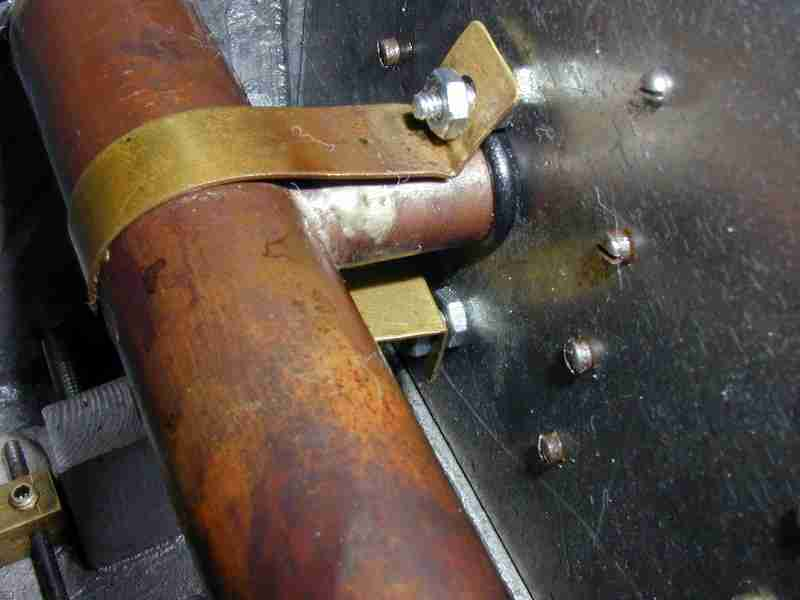
I've decided I'll move right towards making the exhaust system as I want to fire up the engine soon to see if it will all work. I was originally just going to run a rubber hose from the engine exhaust right over the hull back plate but decided a proper exhaust would be better. See a few photos of this progress below:

I saw in a number of my books on the Tiger, in particular the Sturm Tiger that unlike many models which have 6 uprights supporting the shrapnel guard on the exhaust stack( and this might be a variant?? ) the ones in original photos have just 5. That's how I made mine...
Some more progress on the SturmTiger- 08/21/2006
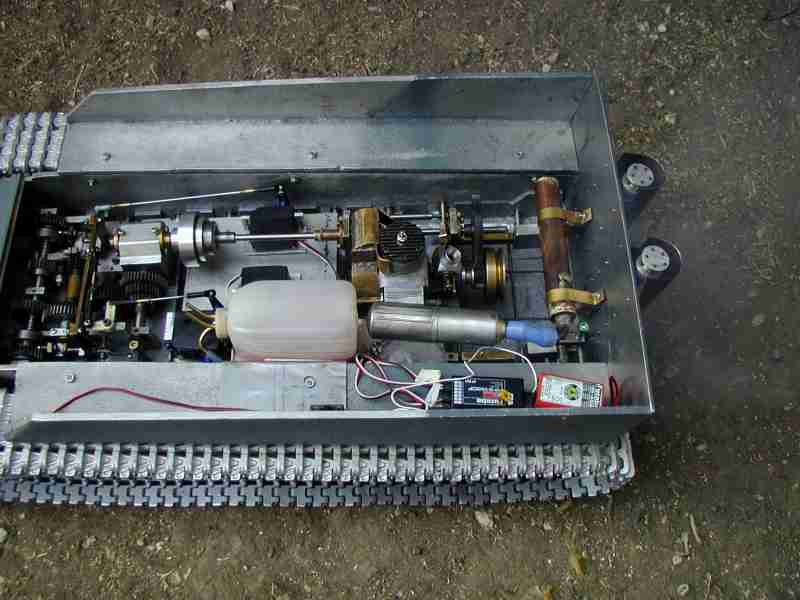
Below is a series of photos taken just after a run test I did today. First is the center section of the model showing th einitial radio installation and fuel tank.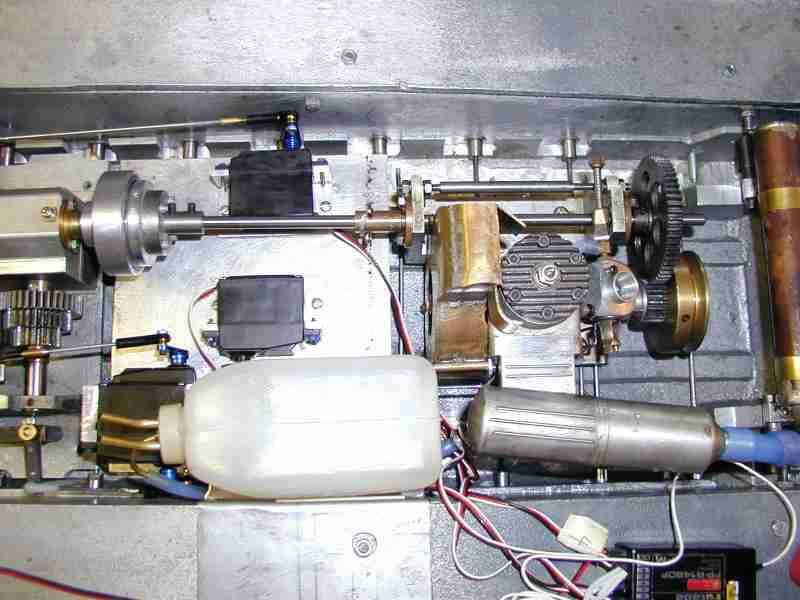
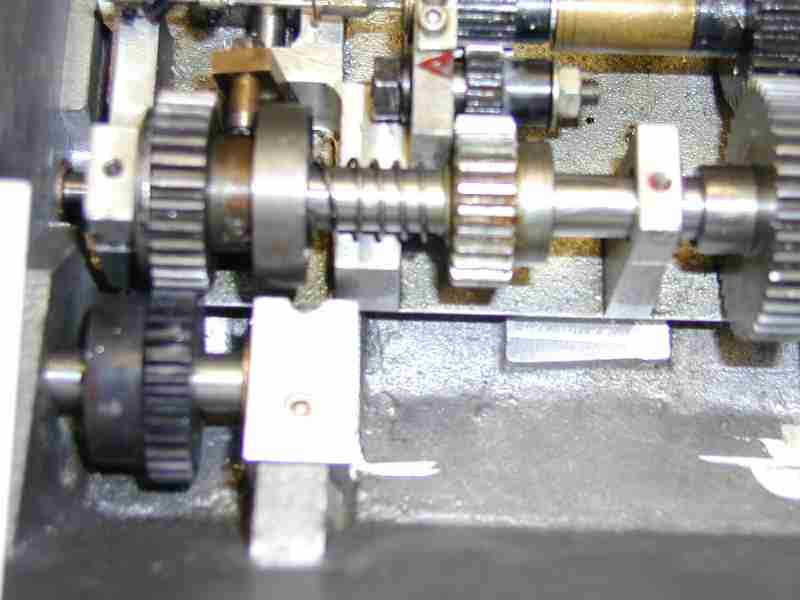
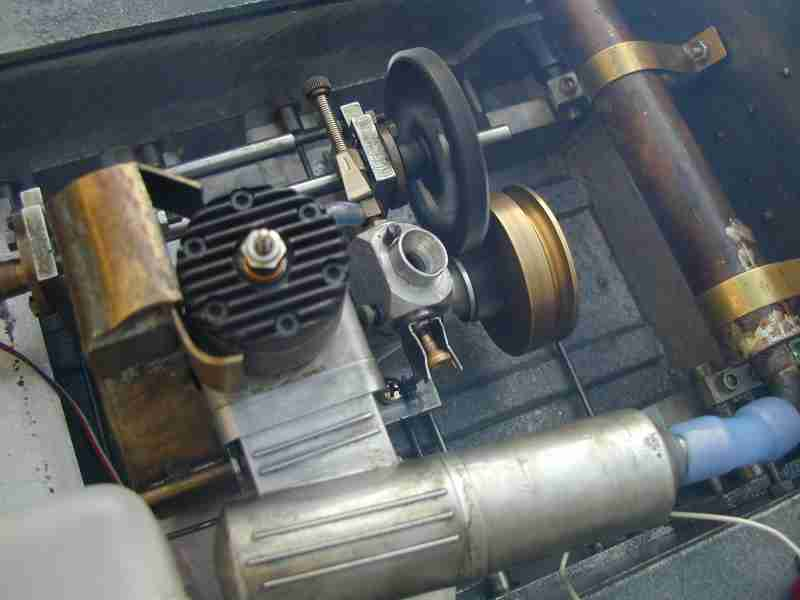
The model ran ok for a first test( after I fished some small plastic pieces from the fuel system that stopped the engine). I question just how well this gearbox will function. It is impossible to switch between gears. I believe the mechanism get jammed; it's difficult to explain. The way the gear selection is made is by moving a rod ( a steel wire actually) with a free turning roller on it from gear position to gear position on the hollow hardened shaft. Each gear has cut in its interior a groove. This groove corresponds to a hole in the shaft. Each each is equipped with a single ball bearing. as the roller/ rod assembly moves from gear to gear the roller if it stays in the right position traps the ball in place 'locking' the gear to the shaft therby engaging that gear ratio. In theory it sounds great. I believe in reality what happens is the roller gets jammed between bearing ball and the opposite side of the hollow channel in the shaft. At this point it is impossible to move the roller. Even when I was turning the assembly by hand this would happen. The only way it seemed to free up was by turning the bell housing in the opposite direction and then the moment at which it truly became operable again is unclear so it was not a highly reproducable process. Certainly under operating conditions it is impossible to apply any counter rotation to the gearbox. So it is my goal now as when I first worked on this gearbox to get it to stay in the 'middle' gear as it should provide a healthy speed range and the ability to change from forward to reverse... and back. I did get one hesitant right turn which wasn't too bad but still managed to run into a tree because I couldn't get reverse to happen.. I need to fix some known issues: turn mechanism range of motion; throttle upper range and the clutch plate which is known to be cracked( it is the clutch plate from my very, very first Panther of 30 years ago. ( it's the same as a Schluter Heliboy so if u have a spare throw it over here so I don't have to make one!). Below are some fotos I took of the model on run up. There is no ( obviously) self starter in this thing but the engine starts very easily. I had started it on my bench and as I am working out wrinkles it died on me. As it turns out my normal starter battery( ex-car) is completely dead ( or the solar driven charger is). So faced with either bringing it back inside to start it I thought what the heck; see if you can start it with a rope! I have a length of that rubber like stuff that goes around screen windows( can't think of the name) which I thought would grip the flywheel better. Sure enough I just looped it around the flywheel's groove gave the right side a sharp tug and it fired right up, with a glow driver attached of course... It runs well, not quite a good low end idle yet nor a proper top end but I need to adjust the throttle servo throw for the latter. One other thing and I've noticed this on my Seiki Tigers as well: with the "sheet metal shrouds" around the exhaust stacks all of the lovely exhaust goo gets sprayed all over the deck, in this case into the interior of the model as well. You can see the light blue cloud in the engine closeup. Yucko. I boought off on the hightened 'signature' of glow engines years ago; that doesn't mean I won't try to lessen the impact of their exhaust! The shrouds are just super at directing all that forward; it is a real good argument to run the engine as lean as possible without damaging it. I may just leave shrouds off.
I really need to lock down things before running again, for example the bolts around the rim of the sprockets come loose, a few track pins that didn't get fixed properly have worked loose; wires are flapping to a degree( sorry pop), and some things just need their permanent mounts and spacers. I've noticed that the left side rear has sunken a bit; I think some of the torsion bars need to be 'revisited'; I'd put brass tubing around the outboard ends so they'd be a better fit in the swing arms but as I feared some of them aren't gripping well. I haven't weighed the model yet but with all the parts including top it is well within 95% of its finished weight; perhaps 60 pounds? On the whole I think I'll be happy with this as long as I don't expect too much from the gearbox. I think forward, reverse and steering will be ok but not much more. I'm going to consider the ability to shift into other gear ranges a occasional luxury.. I'm going to work on the super structure for a bit....jerry 08/23/2006
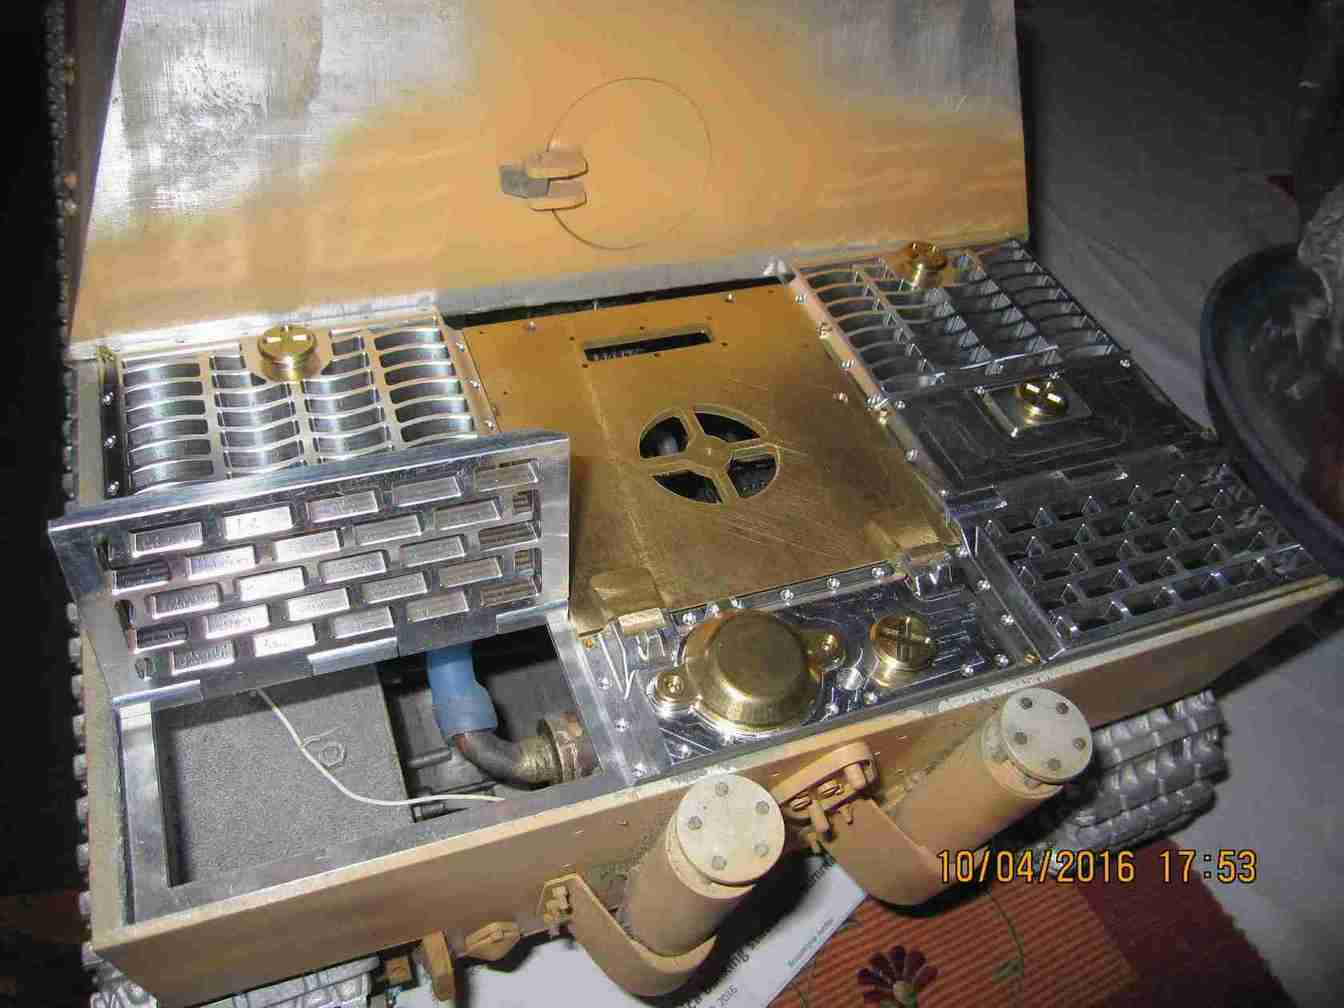
Some progess on the model- Sept 18, 2006; beginning work on superstructure; first primer coat on lower hull. Beginning to look like a decent model. The rear engine deck is just a placeholder. These castings are crappy and mal formed. I'll use these to help cover the deck if I want to run the model however I will resist that urge as it compromises the paint surface with oil and makes subsequent coats difficult.


Making some sand cast parts for the machine. There's the center rear part of the engine deck; I cast two cause they're simpler to cast now after I modified the pattern to have an easier to cast thicker edge. I'll choose the better and throw the other into the parts box. Also you see my Panther G grate; for now every time I make some castings I make these as well as I need 12 of these ( 4 each for my Panther F/II; 4 for my JagdPanther and 4 for my Panther G - which is just a loose collection of parts at this point.) I think I only need cast 3 more. The parts on the lower left of both flasks are rough trunnions for the SturmTiger's mortar. After doing so many machinings( and turnings everywhere ) I wanted to save the majority of the effort by casting them; they'll still need machine work of course just not to be carved out of some bloody great bar of aluminum. I made certain this crucible ( a number 4 I think) was very hot and so I got good coverage in all the parts with no premature chilling anywhere. I also used extra large gates for filling the cavities and multiple risers on most of the parts; especially in the far corners. On the smaller flask the gates were so effective the risers actually chilled about a quarter of an inch above the surface of the sand; they kept a good positive pressure on the mold cavities. Jerry 10/04/2006
Wowzers I can't believe I haven't touched this model in over 2 years already; well not really. I did some work on it into 2007.I finished the rear hatch made a few other parts and lite coat of the prime color. Lately I as my other projects, the King Tiger, Panther F and JagdPanther have been approaching the same point, applying detail parts I decided to get going on this one also.
The main reason I set this model aside was I wanted better rear deck parts than what I had. I approached Jurgen Stehr about buying his but they weren't ready yet and apparently are not yet. Ulirich of Wecohe was to make some but I've not heard of them. So I decided to make my own. I tried twice now to cast the larger grate with no success. These parts are the only major ones I need for this section. These are going to be very difficult parts to cast using my methods! There are so many grate segments that the metals chills long before the mold cavity can be filled. I have an idea for my next attempt and we'll see how that works. Below you can see what parts and the masters for the large grates.
You undoubtedly note that the small grate on the right side is not well formed. Neither was the one on the left. I set the left hand grate in my mill and cleaned out the openings; I plan to do the same for the other. I will then finish them by hand with a small file. These smaller grates actually have the segments at an angle as did the originals. That coupled with the fact that the parts I'm using for patterns aren't actually patterns at all but master parts from someone else's 1/10 project. They're well made certainly but not made to be used as a sand cast pattern. The key point is they cannot be cleanly pulled from the molding sand as they are. This goes x3 for the larger grates, they behave terribly in the sand AND these parts are just a challenge to pour as I mentioned earlier. I elected to NOT make my own pattens for these as I'll probably never make more parts beyond this tank and doing up a pattern for these would be a lot of work. I will try one or two attempts at casting and if I can't get it right I'll make them completely by hand. My goal is to finish all of these this year...03/01/2009
Now here is an update I should have been crowing from the trees in my neighborhood about! One of my far too many projects( I can't help myself!!!) was an Aeromate Tiger I I found on ebay some time back, years now since I'm so far behind on updtaes to this site. I was very impressed with the beautiful nature of the parts for that model as I rebuilt it; the previous owner had been a hack, sorry no better description based on the mischief that had been visited on the model so I had to nearly dissassemble it rebuild it. In the process I marvelled at the detail of the rear engine deck. I thought, "Gee if only my 1/10 scale Tiger family had this detail, quality". A lightbulb turned on, literally, my girlfriend of that time came into the room and turned on the light! Would Aeromate be interested in making their engine deck in 1/10 scale I wondered?? I approached the owners and sure enough they were and ultimately we we worked a deal where I purchased a minimum number of sets. I should be able to adapt these to my entire fleet of Tigers! I'm not going to quibble over early/late variants; These look so good I don't care at this point... Aeromate even included all of the special square head bolts in miniature AND a tool to fasten them for each set...! I wanted to point that out- Aeromate packed each set of part so that I could sell the sets I don't need( if interested contact me. I won't say there won't be some fitting one way or the other but these should be adaptable to any properly dimensioned 1/10 scale Tiger variant. Woo Hoo! Jerry 2/22/2018
Stay tuned for more on this, I plan to return to my Sturmtiger once I get my Pz IIIs on their own wheels and tracks. I decided that getting major parts from any available supplier isn't cheating but rather a tacit acknowledgement of my own limits. I'm ok with limits. We all have them! Woo Hoo! Jerry 2/22/2018
---o0o---