
Well I'm sure by now most of you have realized that I've not moved forward with my plan to make AGW a participatory club. It isn't going to happen until I can settle in one place. Between maintaining homes, job and a all those odds and ends that make up a life I just don't have the time and energy to try to form a club. Given lack of interest locally and certain key persons' emphasis changing away from modeling it isn't practical to consider another club. As always I will welcome like-minded local and distant enthusiasts to join me in an informal association.
In an attempt to reduce the throughput overhead by dragging down photos on the index page I've moved all of the gearbox photos and information to their own page so click the link below to access it. Thanks and enjoy. Jerry.
Gearbox information and photos---Updated!!!
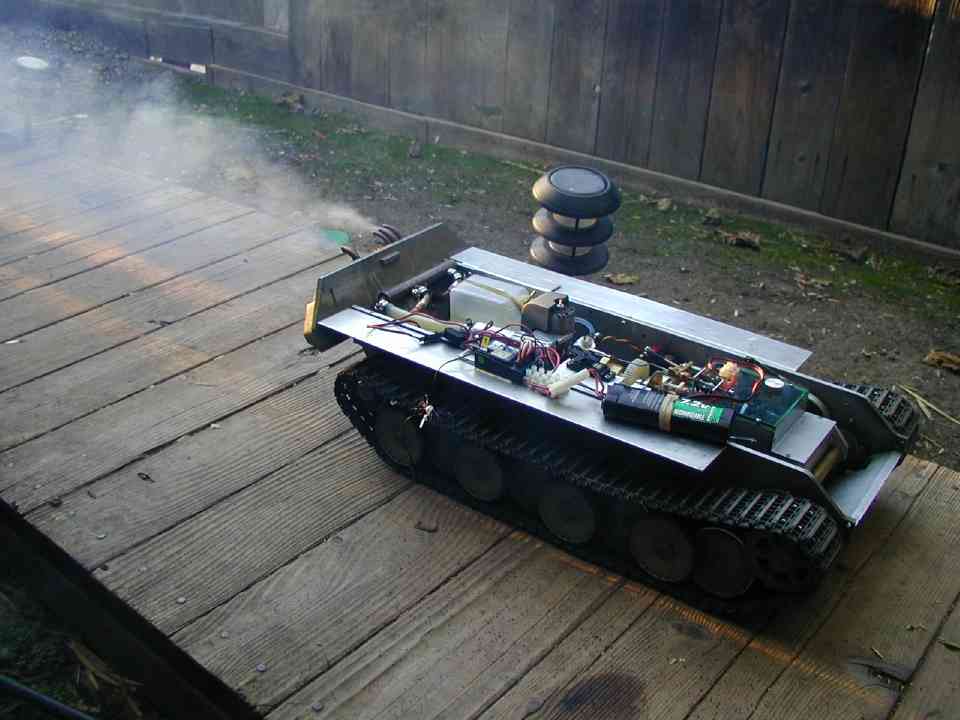
Here's some photos I took today ( 11/25/03) of a Maier Panther I'm rebuilding. First two are of running up the engine; it seems to run lean ( hence not a lot of smoke ) and I popped one of the exhaust pipe rubber couplers making for a minor mess in the back but all in all I'me very pleased; in second photo the model is in 1st gear and is moving off. Last image is of the model as it is sitting on my workbench. I think it is a sort of "transitional selectric" ( my name ) gearbox and a self starter motor I've not seen before in a Maier tank, note the black ( Graupner made) reduction unit integral to the motor which seems to have been OEM equipment on this model. Anyway this was the model's first running trials and it performed very well. Starter is strong, engine ( rebuilt by me) has great compression and starts well as well as the clutch and gearbox worked flawlessly. The shift mechanism seems noiser than my others but seems consistant. I got this one originally to use the lower to power my JagdPanther but now I'm not certain. I had cast a G upper hull which I can fit to this chassis but I'd need to make a new rear plate with the later style exhaust pots...My real desire is to make a G version BergePanther but I'm having second thoughts about this also.... So in the meantime I'm just reworking the innards and I've not touched the outside save to remove broken bits and fill up the annoying holes the previous owner made! Gads I hate to see what some people did to these models. I don't wish to sound snooty but jeeze Louise it would be better to glue something on the model than drill a hole here and there in a unseemly haphazard manner. Don't mind the jumble of wires ( Dad forgive me! ) but it was just a trial and I have not yet determined how I wish to route them all. I really enjoy these models; won't solve world hunger or bring global peace but they make for a great escape......

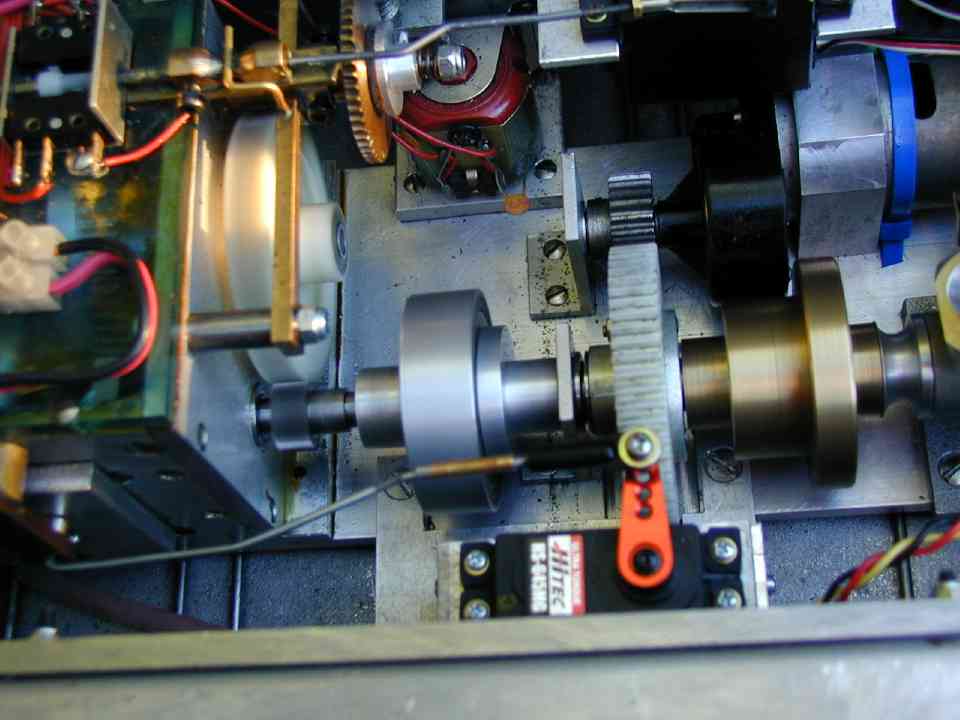
Here's a photo of the input to the transmission and clutch assembly at speed; approximately 4000 rpm; a tad over 1/3 throttle. I try to keep the engines on my 2 stroke powered models running as rich as practical to keep them running cool. Head temps generally run 180 -190 degrees F. 4 strokes run somewhat hotter. Note the starter gear( the large white gear just in front of the flywheel) is completely stationary; this gear runs on an INA 1012 roller clutch bearing. This is a critical component requiring very frequent lubrication. It is my belief that this implememntation stresses this component to it's limit. In fact the three bearings in this area all need close attention....
Meanwhile fast forward many months to Sept 4 2005 !
I hadn't touched this Panther in some while; I just used it in a photo with my new KV-2. Now it has begun to bug me to such a degree that I finally pulled the transmission/engine out. Was 'just' going to clean the inside and try to strip the paint off and nothing more so I could give it a simple repainting. Ha. I now have a pile of parts where the lower half of the tank used to be I found I just couldn't stand it anymore. There are too many things wrong or needing fixing to let it sit there...it all started when I was trying to get the idler wheel off of the right side. The nut was stuck on so hard ( and it's in an impossible to reach state) I couldn't get it out so I took the whole side off which meant pulling off all the wheels AND sprocket /final drive housing which in turn meant knocking out the final drive gear pin. So by the time I was done with that daylight is gone and I figured what the heck I might as well take off the other side also. Perhaps I can put brass or bronze bushings on this on that Maier oddly never did. These bushing are for the torsion bars: the pieces of rod that act like springs for the road wheels... I'd have to show you...but they make the suspension what it is on a Panther. I've never stripped a Maier tank down to the bare bones like this one. Now I also know why I've been avoiding working on this model, it even needs neu tires...Mechanically it was mostly ok, cosmetically it is seriously in need of a makeover....Arrrgh! It will be some while before this thing is back on its feet.... :-(


Some days passed while I fiercely fought with the old paint which resisted bravely, it took the nastiest paint stripper, lacquer thinner and acetone but finally the battle was ( mostly ) won.. Here are the side plates prepared to receive the new brass bushings for the torsion bars

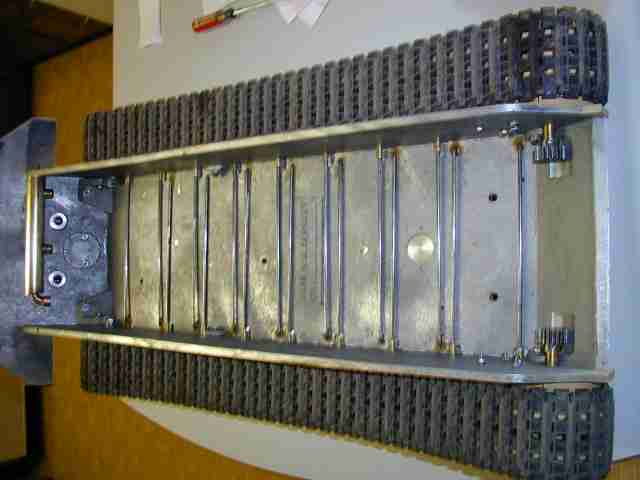
The lower hull reassembled with torsion bars reinstalled and set with Stabalit Express
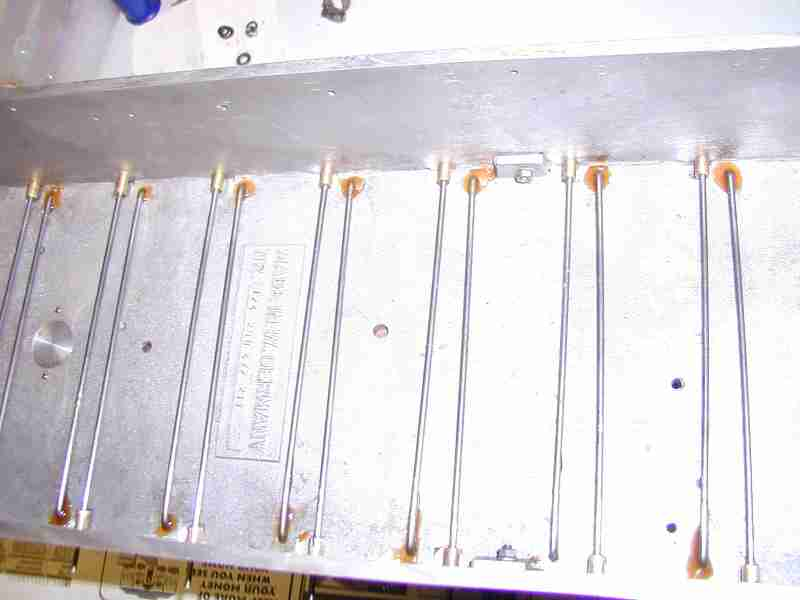
The rear plate mounted and sealed; the side plates rear plates and final drices were sealed with silicon rubber when reassembled
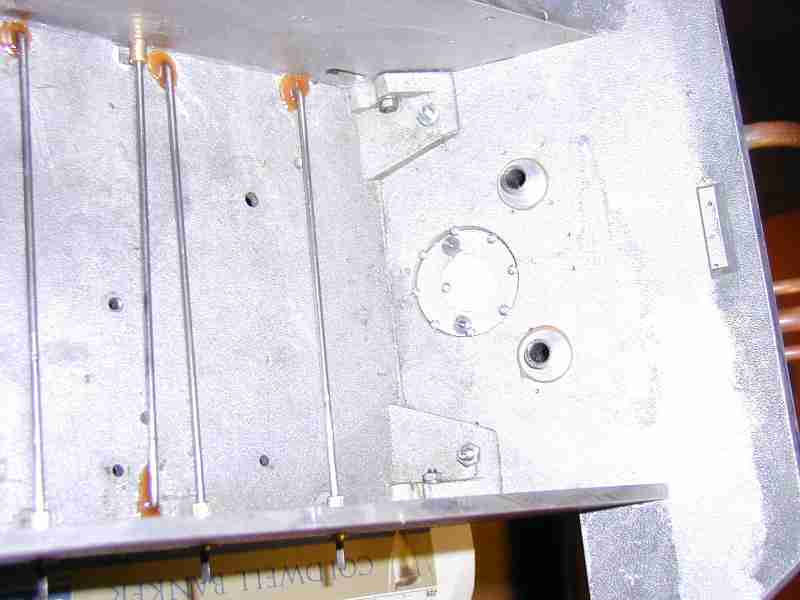
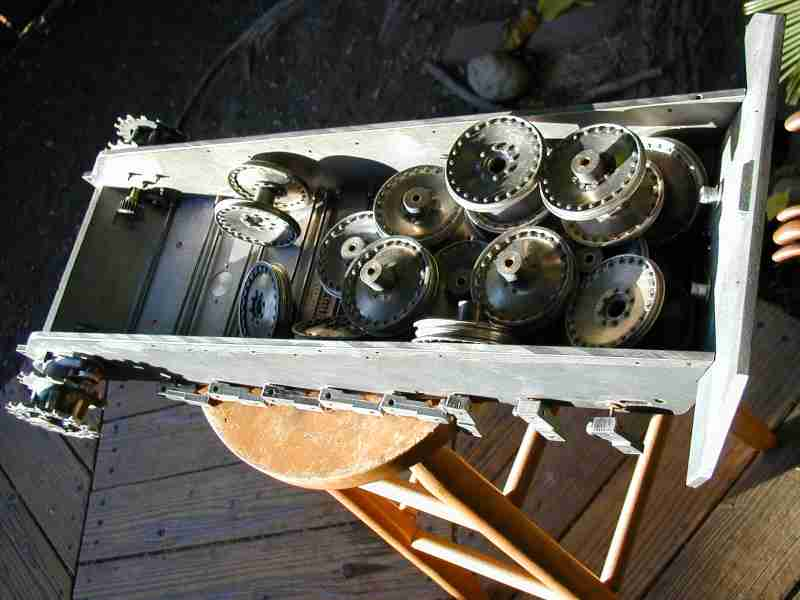
The lower hull with all of the 32 wheels cleaned of the old paint and ready to be repainted prior to mounting new tires.
this last one shows the entire upper hull stripped ( or nearly so) and ready for my favorite mods prior to repainting

01/21/2006- Getting back to the Panther rebuild... or making tires! The tires on this tank were Maier's original thin plastic nasty little rings. most of these were broken and some actually had pieces missing. So I decided to revise my tire mold to make a set of new rubber tiress. All 32 of them (siiiiiigh). I shared this info with several fellow modelers years back and one fine fellow in particular, Rusty Bates, has described it better than I probably could ( see his site's tire page at SHERMAN BUILDERS) but I will describe what I do to make replacement Maier Panther tires anyway.
Making Panther tires
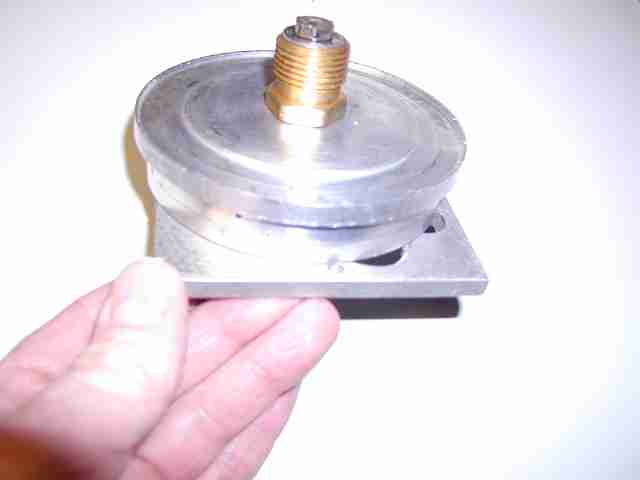
Needing replacement roadwheel tires for a tank one has few choices. You may either try to buy them from the original maker if they are still around or if they aren't you need to make them or sell off the model as it isn't much use without them. You might cast tires out of anything black, resin, poly urethane, whatever. The problem with that is twofold: 1) potential bubbles 2)curing issues unless one is really careful when mixing components. Curing issues may not be a problem for some applications ( because curable materials will generally cure or 'harden' eventually just sitting there but with tires this is serously problematic unless one is aiming for the flat tire look. Expense is also an issue; Devcon products for example, while the cat's meow for making model parts are quite expensive. Perhaps not an issue if you are going to do it once and perfectly the first time. I'm not perfect by a long shot. So after using Devcon once to make a set of Panther tires I decided that that wasn't for me. An aside: because I can hear you ask why do you need that many tires Jerry? I have 4 Maier Panthers, all of them had Maier's hard plastic tires at one time. All needed to be replaced including those on my original Panther I bought in 1976. That is 4 x 32 or 132 tires. I have 3 other Panther family tanks and I developed my own die for making the pressed dish wheels as Maier made. So I needed less expensive tires, just for these. That doesn't even begin to touch on the PzKw III, Hetzer, Sherman and T-34 projects in planning. So tires or more precisely the method to make them more efficiently is a need. I cast about for a better way and through a machining forum some kind soul, who has faded into anonymity over the years suggested " try recap tire rubber ". It is cheap, and heat vulcanizing. So I did and what follows is the process I use. The rubber I buy comes in a licorice- like extruded round form. I vulcanize it in a small oven at a temperature/time rate of from 220 at 6.5 hours to 350 at 30 minutes. I find the best results are at 325 for about 55 minutes. My mold is heavy aluminum, I used to use a two sided version with one side of steel and aluminum but now I just use the aluminum half. I get more consistent results and while slower it just seems to work better. It may seem obvious but I tend to use whatr materials come to hand by way of explaining the early mold. I have one air hole on the circumference on the mold's ring but find allowing the material to bleed inwards towards the center of the mold gives me a perfect tire every time. I don't mold the tires on the wheel for two reasons: I did not want to subject the wheel to any heat as they are thin and didn't want to anneal(soften) the aluminum. Second I wanted to force myself into making a tire that I could use on any Maier or my own roadwheels interchangably. They aren't perfect but they work reasonably well.
Please forgive the photography, I have a devil of a time focusing the camera on the shiny mold parts and the multi dimensional wheels. The results are not so well focused photos which I hope still convey the process. One other thing I did prior to this moding run is I turned a taper on the tire's sidewall the angle of which I got fron the new tires on Jacques Littlefield's Panther A he is restoring. You can't see it in the photos here but the tires have a taper or bevel which taper to a more narrow running surface of the tire from a wider section at the wheel. Now if only I could get a maker's stamp on the sidewall... One of the key aspects of my mold is I compress the raw rubber tightly. The mold works best when there is a slight gap ( ~.030") between the upper plate and the ring when the mold is placed into the oven. The central screw allows me to really subject the raw rubber to a good compressive force which causes the mold to complete close and force the rubber to fill every part of the mold as first it softens then as the vulcanizing process proceeds then forms the end solid yet flexible rubber product. The rubber I use is that employed on large truck retreads so it needs to be tough.
Putting the raw rubber into the mold:


Next steps
I will be preparing the lower hull in the next few days. I have some work to do on the rear plate, some components to remake and then I will paint the assembly in base color and reinstall the roadwheels, tires and hubcaps. Then the engine and transmission will be reinstalled along with the radio system. Then it's to finish the turret and upper hull. The upper hull is awaiting the finish work on the tool brackets, I'd hoped I'd have better luck finding a source of photoetched tool clamps to no avail so I'll just simulate some for now; then the upgraded muzzle brake, funtional escape hatch will complete the rebuild. It should be an attractive model when completed.
One thing leads to another
Never quite being satisfied with the thick resin/plastic stowage box things Maier equipped the original model with I decided to make my own. Additional lesson learned: don't use high temp silver solder to braze thin brass as it warps like crazy due to the temps heat required. In my defense I wanted to use silver solder because it is more forgiving of subsequent work. I only intended to 'tack' the major parts together. I intended to use soft solder the rest and for filling defects. I got carried away and it shows. Ah well they will be better than the plastic lumps. Here's another 'in progress' photo of the stowage bins.
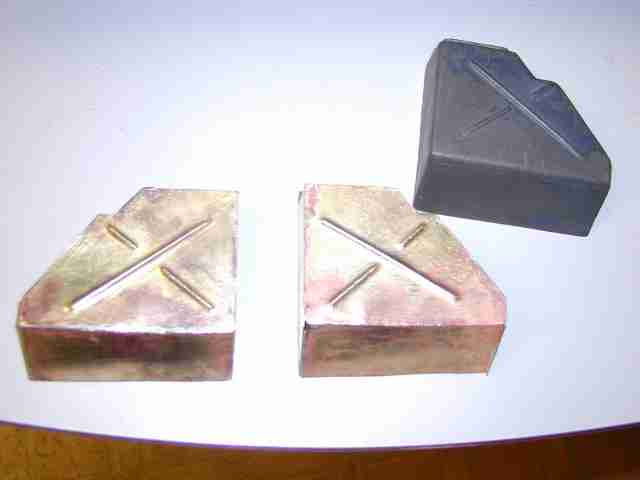
Here are the stowage boxes finshed and mounted. As I mentioned above the thin brass I used was a bear to work with the way I did it. There was a certain amount of deformation I just couldn't get rid of, however in looking at the painted result it rather appears like some minor operational damge that was hastily reshaped so I'm good with it. I'll be making more of these down the road so I'm not certain how I'll do the next ones. They really should be formed in a proper die. I've put a light first coat on the tank's lower hull and I'll begin reassembly of the entire lower hull later this week. Then it is on to the upper hull and turret.

Beginning to mount the wheel assemblies; I use a great lubricant- Lubriplate on the wheel bearings.

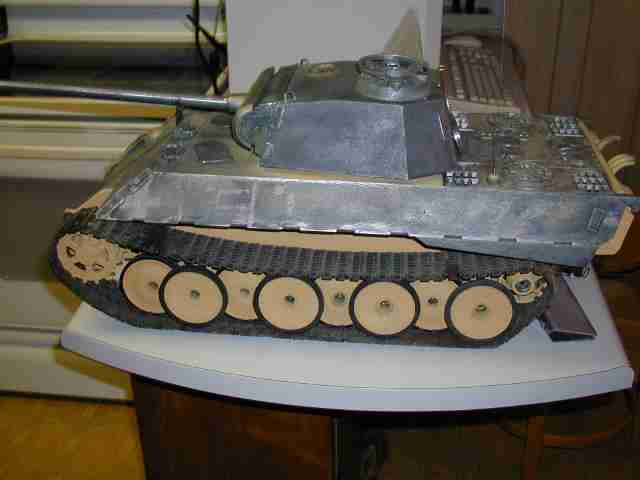
Sitting on its wheels and tracks for the first time in a while

This is as clean inside as it ever will be...
A trial fit of most parts together.. note the turret's escape hatch will have a functional hatch; I gave the hatch opening as well as the hatch a taper like the original...As of this foto the engine/transmission is already reinsatlled however the radio system is not.
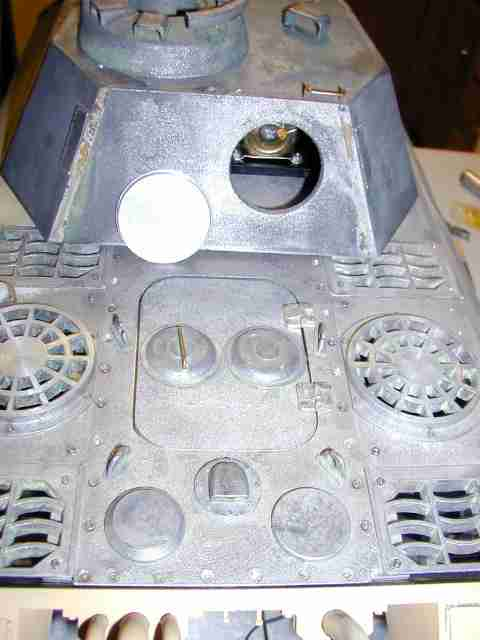
I'm not sure I'll ever make another on of these. I wanted the rear hatch to function. Here's a photo of the thing nearing completion. It's a project within a project. This is an interrim stage of the hatch. I made proper pointy bolts for the upper and lower mount position; the center I'm leaving plain for now as I will eventually make the catch to hold the hatch in one place.
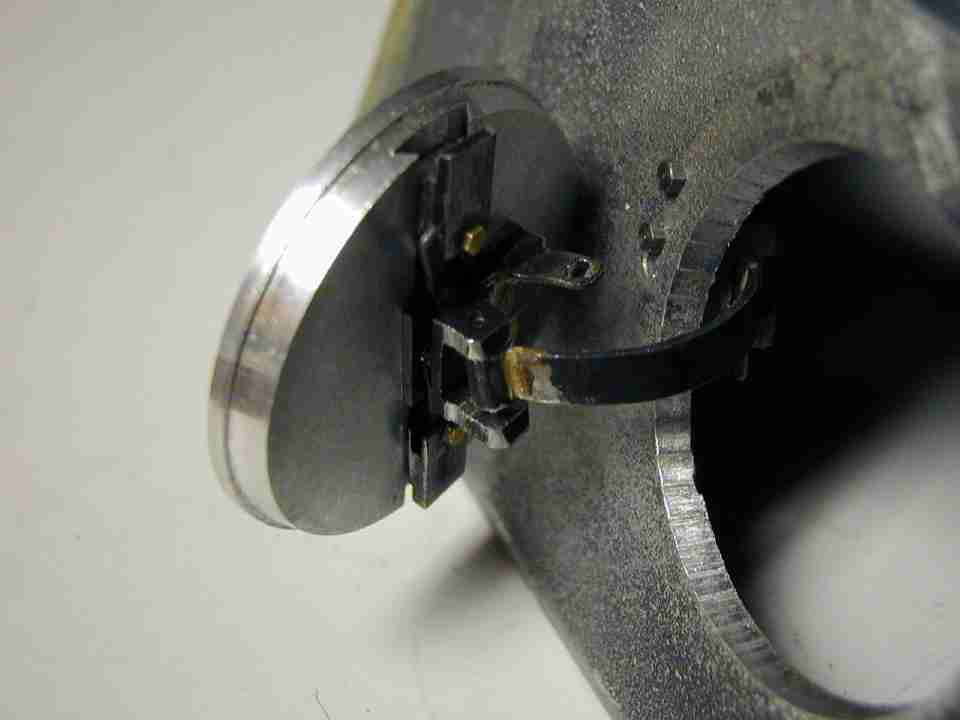
Here's a photo taken just before painting (see below)

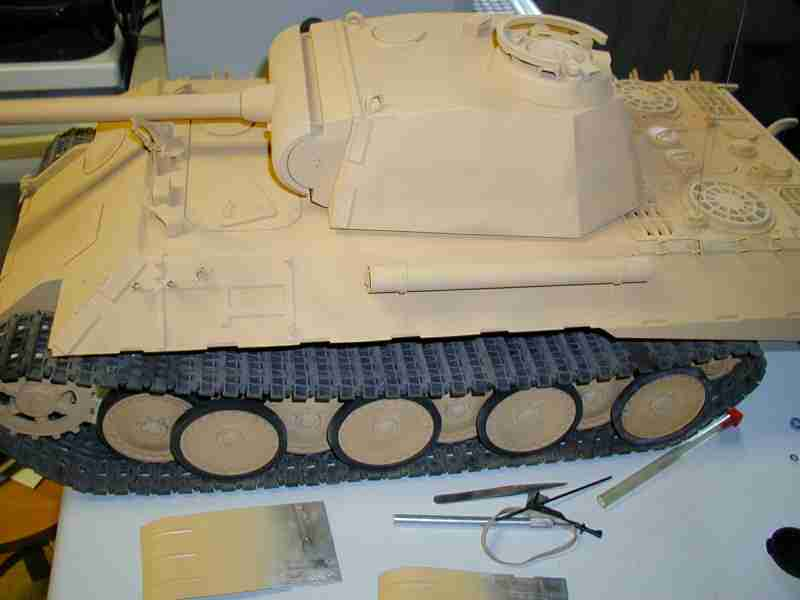
Here's the Panther ready to be painted with a first primer coat. There are still some thins to go over to remove mold marks( notably the original soft cast accessory parts and some other parts to attach, internal panniers, headlight. It is a first coat but even the final primer coat I will let set from some while before I put any camo on. I will remove the outboard stowage should here and on the right side before painting.

After the first primer coat. To let it cure a few days before the next coat... Jerry 05/08/2006
Shelf life of the raw rubber?
I recall someone asking me this once, that is how long does the rubber remain usable? Well I seem to recall hearing or being told 3 to six months however when I got my last lot of rubber I immediately salted it away in my fridge's bottom shelf. I believe I've had it at least 4 years possibly much longer as I don't remember buying any after my dad passed away so more likely 6- 7 years but I could be wrong. To be honest my chemistry or physical understanding of the vulcanization process isn't serving me well: I don't recall if the process is a state or chemical change. I was certain though that the opposite of heating the rubber should slow down any change that would occur if the rubber was left at either room or hot summer temperatures. As with many chemical reactions the hardening of the rubber will occur naturally. I don't know if freezing th erubber will slow this down even further or actually damage the composition of it. The cool temps of the fridge seem more than adequate.
Another tidbit: The long awaited custom aluminum CNC made 3.5 inch sirocco fans ( 6 of them! ) have arrived!! I have a clear shot now at developing my Saito twin engine powered "power-pack" for my long overdue and dormant King Tiger, Panther F and JagdPanther projects. I am targeting my King Tiger project as the first to get my attention. The other projects, once they are sufficiently advanced and this includes the Sturm Tiger, Hetzer among others will be put on hold while I go through the King Tiger and re-aquaint myself with that project which I've not touched in nearly 10 years....
A brief video of a Panther a running I made from the perspective of the commander's cupola using a small self contained wireless camera streaming to my pc with via a video adapter. Spotty and brief but gives you an idea; I'll work on a better version.
It really is a case of not seeing the forest for the trees...
Have you ever worked so long and hard on a project only to lose sight of the 'small things'? Well the more I looked at this Panther the more I realized that the torsion bars are set in such a way as to make the model sit too high! Eeek! Perhaps the model was intended to be electric and carry really heavy batteries and the increased weight was to be compensated by higher initial setting? Who knows. I'll have to fix these either by making new torsion bars or trying to regrind the existing ones. There's a flat ground on these torsion bars that the locking screw of the swing arm engages. I didn't even think to look at this while rebuilding for of my 4 Maier Pamthers this is the only one setup this way by Maier; all the others sit within a .1" of an inch from on another. This one is way higher and looks comical so it needs to be adjusted... later though, but yoou know it bugs now that I realized it! :-(. Jerry 06/23/2008
10/17/2010 - Well as with other revelations of a similar nature, no matter my doing or not, this height nonsense gnawed at me since I realized the problem! This one was especially annoying as the model sits just to my right as I use my pc ( like now). To compound the irritation I had put a fair amount of time with the details on this example in cluding my first fully functional rear hatch. I'm quite proud of that mechanism as it works exactly as the original as it should since I patterened the parts after photos and drawings of the original. Anyway.................I corrected the problem of height. What I did was to meassure the agle of a swingarm at rest ( no load) on one of my other Panthers with was ~30 degrees. I made a gauge and then I simply 'twisted' the swing arms until they were all set to the same 30 degrees at rest. The force required to twist the torsion bars was considerable; much greater than I expected but I actually greatly appreciated that fact. I did remove everything to do this; transmission / engine, tracks and wheels so I could "manhandle" the suspension. After I reassenbled it, it compares very favorably with my other three Panthers at between 2.15 and 2.2" gound clearance. The full size machine had 22" of clearance so I'm spot on. Solved!
======================================================================
Devine Intervention Or....?
A week ago was the BAT battle day for 2005. I'd originally intended to take my trusty old Maier Panther A, veteren of many runs and a stint on Tech TV and my trusty old Seiki Tiger I. Well I didn't take any 1:10 scale with me and it must have been a case of Devine intervention. The day after I decided since I hadn't run my Panther in a long time I'd take it around my yard for a spin. I took it out to the yard, put batteries and fuel in and turned on all the electronics. I choked it and cranked it a bit to prime the engine then reconnected the glow plug. Cranked again and she started right up. As is often the case before they warm up she sputtered and died after 10-15 seconds. I cranked again. "pop, "snap", "whirrr". Aww jeeze, I knew what had happened. starter clutch roller bearing took a hit. Sure enough it was dead. I am so glad it didn't happen at BD as I would surely have been seriously bummed. I took the tank apart, or rather the engine/ transmission. Dismounted the engine and ultimately pulled the starter gear and hub. I said now is the time to try a steel hub to house the INA clutch bearing. I am not 100% convinced it will make a real difference but I made a dimensionally identical ( except for the flange which on mine is or greater diameter ) hub from steel as opposed to the original aluminium version. My theory has been for a while that the aluminum housing doesn't give the support needed under shock loads to prevent the bearing from damage. Probably the forces at work are much greater than they seem and this replacement won't have any positive effect but I had to try it as it has been on my mind every time I look at the thing. After several days of midnight machining I had my part. What follows is the progress of the effort.
First is the view from what acts as the rear of the hub, you can see the thin ball bearing and the roller clutch bearing.

You see the steel part leaning on the gear it is mounted to. Off to the left is an original aluminum part.
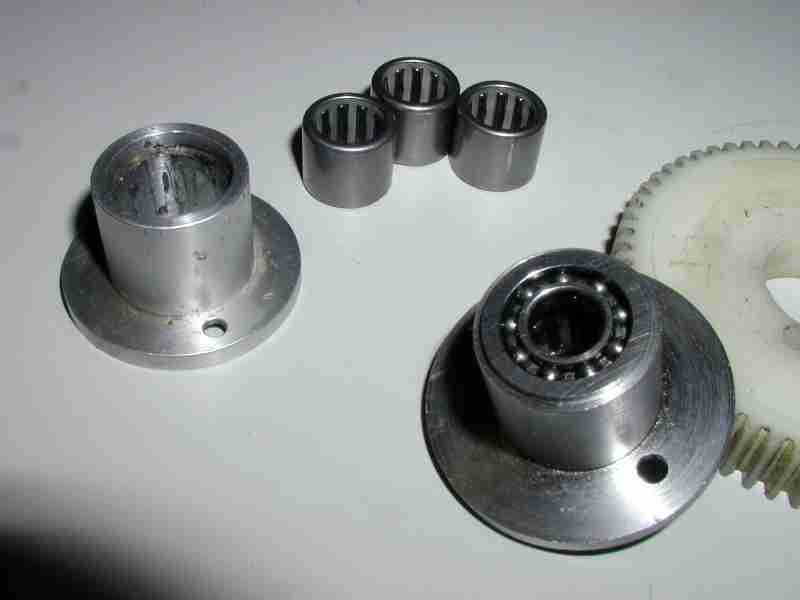
The opposite end of the hub and 8mm ball bearing

The extension shaft that is mounted to the flywheel

The assembled gear/hub mounted

The entire engine/ starter assembly mounted on the tranmission plate. Just about identical to the assembly shown from the rebuild project above.
